Key Terms
o Classical geometric construction
o Compass
o Protractor
o Perpendicular bisector
o Angle bisector
Objectives
o Recognize several simple tools for use in classical construction and understand how they are used
o Understand how some simple geometric constructions can be performed
For many geometry problems, a rough sketch of the situation is sufficient for solving the problem. Nevertheless, even rough drawings or sketches are sufficient in these cases. In other cases, however, we might want to draw a more accurate diagram with angles, for instance, that are correct in measure. To be sure, computers can be a helpful tool in this regard; various software packages make it possible to construct accurate drawings for construction blueprints, for example. We can, however, construct some amazingly accurate drawings of certain figures using techniques of classical geometric construction, which uses simple and readily available tools to draw angles, line segments, and other geometric figures. This article shows you how to perform a few of these constructions.
Simple Geometric Drawing Tools
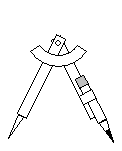
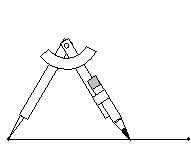
To perform these constructions on paper, you need only three basic tools: a pencil, a straightedge (a ruler is ideal) and a compass. A compass is simply a V-shaped device with a needle on one arm and a pencil on the other. Arms of the V are connected such that the angle can be adjusted. Below is a sketch of a compass.
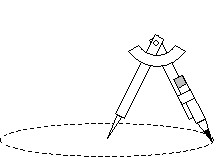
A compass can be used to draw a (nearly) perfect circle. The distance between the needle and the pencil is the radius. The needle is planted in the paper and serves as the pivot point and the center of the circle; simply rotate the compass using the pencil to draw the circle, as shown below.

Some compasses include a rudimentary angle measurement scale near the vertex. A more accurate tool for measuring or constructing angles is a protractor, an example of which is shown below. Protractors show a range of angle measures from 0° to 180°. We will not use protractors much, but it is helpful to be recognize them.
Basic Geometric Constructions
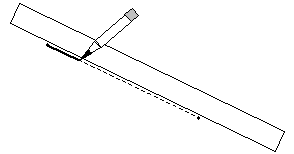
We saw above how to construct a circle of a given radius using a compass (simply use a ruler to appropriately position the arms of the compass at the proper distance). Another simple construction is a line segment joining two points. A straightedge (such as a ruler) is ideal for this simple construction, as shown below. Simply align the two points along the straightedge and draw the connecting line with a pencil or pen.

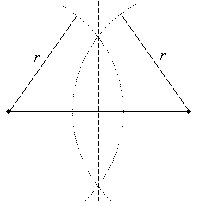
We thus have the ability to draw circles (and arcs) and line segments. Using this knowledge, we can draw other figures. Let's say we have a line segment and we want to divide that line segment in half with a new perpendicular line segment (called a perpendicular bisector). Consider the segment below. Somehow, we want to construct the perpendicular bisector, which is shown as a dashed line.
Note that all points on the dashed line are equidistant from the two endpoints of the solid line segment. Thus, if we draw two circles centered on those endpoints, they should (as long as they are at least as large as half the segment's length) intersect somewhere on the dashed line. The diagram below illustrates this fact.
So, we can find two such points to construct the perpendicular bisector by setting our compass to any setting that is somewhat more than half the length of the segment we are bisecting.
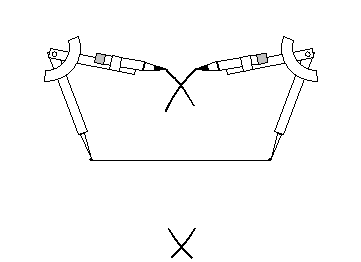
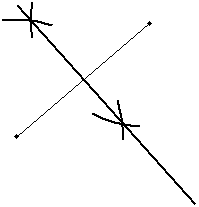
Now, let's draw the required circles. (Actually, we need only draw arcs-the entire circle is not needed.) Make sure that the compass keeps its setting-if the setting changes, it will adversely affect the construction.
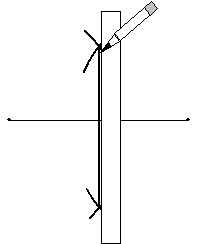
Now, we need only use a straightedge to connect the points formed by the arcs.
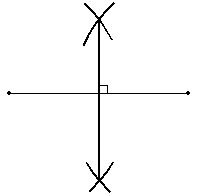
For the purposes of this example, only the segment between the points is drawn. Of course, the segment can be extended indefinitely in either direction-the result is still a perpendicular bisector.
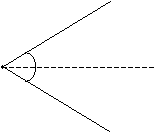
We might also want to bisect an angle by constructing an angle bisector, which is a line segment that divides an angle into two congruent angles. An angle bisector is shown in the diagram below as a dashed line.
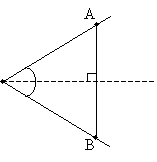
The angle bisector is "halfway" between the two angle segments, and it passes through the vertex of the angle. Thus, we need to find just one point along the angle bisector to allow us to construct the segment. Notice that if we draw a segment perpendicular to the bisector, we have created two congruent triangles (by the ASA condition).

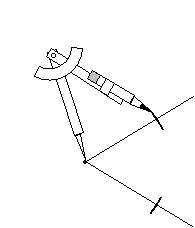
If we simply draw circles of equal radius centered on points A and B, they should intersect somewhere on the perpendicular bisector. Notice first, however, that points A and B are equidistant from the vertex of the angle. First, let's use the compass to determine two such points.
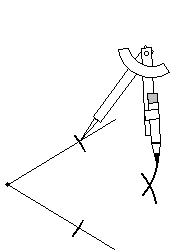
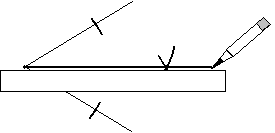
We now have two points equidistant from the vertex. Let's draw arcs around these points to identify a point on the perpendicular bisector.
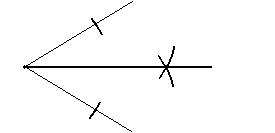
Now, we can use a straightedge to draw the angle bisector.
The result is shown below. Again, this line segment divides the angle into two congruent angles.
On the basis of these (and other) simple constructions, more complicated constructions can be devised. Although modern mathematics and most engineering and scientific fields do not rely on compasses and straightedges to perform geometric constructions, these are illustrative of some of the principles of geometry and how they can be applied using simple tools.
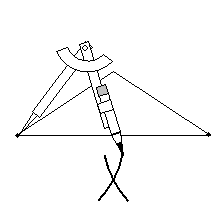
Practice Problem: Use classical construction techniques to divide the isosceles triangle below into two congruent right triangles.
Solution: Let's take a look at what we want to do to divide this triangle.
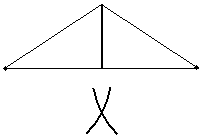
These two new triangles, as mentioned, are congruent (by, for instance, the ASA condition). To divide the triangle in this way, we must either construct a perpendicular bisector of the base of the triangle or an angle bisector of the peak angle. In either case, we need only a single point, since we know that the dashed line passes through the point at the peak of the triangle. In fact, both of these approaches turn out to be similar. Let's use the two points at the base of the triangle (which we know are equidistant from the point at the peak), and let's draw arcs to find an intersection point. Note that this point need not be inside the triangle-a point outside the triangle can be a better choice for the sake of clarity and precision.
Now, use a straightedge to construct the dividing segment. The result is shown below.
Practice Problem: Construct a line segment parallel to that shown below.
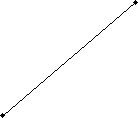

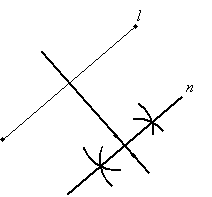
Solution: Recall that when parallel lines are cut by a transversal, corresponding angles are congruent. Let's call the segment shown above l. If we draw a line segment perpendicular to l (let's call it m), then we can draw yet another segment n perpendicular to m such that n and l are parallel, as shown below.
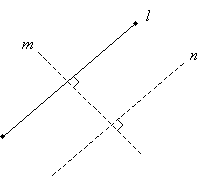

So, let's start by drawing a perpendicular bisector (although it need not necessarily be a bisector) to m.
Now, we can draw another perpendicular bisector, this time for some segment of the new line. (Simply choose two points on the line between which you want to draw the perpendicular segment.)
The new line segment n is parallel to the original line segment l.
