In this section, we're going to start talking about sending emails. This article is going to be very basic, so chances are if you've used another email program before - even if it wasn't Outlook - this section will be very easy for you. That's okay, though.
Creating Email Messages
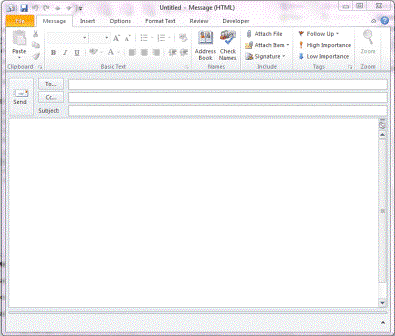
Creating new email messages in Outlook 2010 is easy. All you have to do is start Outlook, then the New Email button in the Ribbon.

A new, blank email will open up.
If you already have Outlook started and are in a different module, then simply click the Mail button in the Navigation Pane, then New Email in the ribbon.
Addressing Messages
Once you have a new email in front of you, it's time to address it to the person or people who you are sending it to. You have a few options to do this:
You can type in email addresses, separating each one with a semi colon (;).
You can click the To button at the top of the email message and find names in your address book. Double click the names of people you want to select to receive the email message, and they'll be added for you.
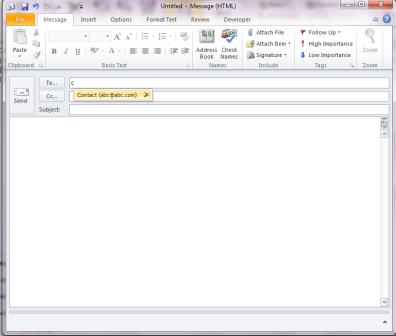
You can also start typing email addresses/names into the To line and Check Names will look up the address for you. Just make sure that it selects the right address. As you can see in the snapshot below, we typed the letter "C" and Outlook gave us the matching names/addresses from our Address Book. We can either click on the name it suggests or keep typing. Outlook 2010 will continue to offer suggestions.
The To Line
The To line appears below. In this line, you can put the email addresses of everyone that you want to send the email to. As we said, you can also click on To so you can add names and addresses.

The CC Line
The CC line appears below the To line. CC stands for Carbon Copy. Let's say you're sending an email to a co-worker about a project the two of you are working on. You might put your co-worker's email address in the To line, since the email is to your co-worker. However, you might want to send other people a copy of the email, such as your boss or other people involved in the project.

That said, the To line is for anyone you are sending the email to. If you want to send copies of the emails to others, use the CC line. Of course, you can put all the names in the To line if you want. That's up to you. But email etiquette in this day in age requires that you use the To and CC lines when sending email to people, and sending "reference" copies to others.
The BCC Line
The BCC line does not appear in a new email message by default. To make it so that it appears, click on To or CC. At the bottom of the window that appears, you'll see BCC. Click on the BCC button or add a name in the BCC line. When you return to your normal email message, it will be there.

BCC stands for Blind Carbon Copy. Any address that you put in this line will not appear on the email when your recipients receive it. This means that you can send an email to your co-worker by putting his/her address in the To line, berating him/her for not doing his work, then BCC your boss. Your co-worker will never know you sent a copy to the boss.
Once you have your email addressed, you can enter a subject for the email in the Subject line.
Composing and Formatting Email Messages
Microsoft Outlook 2010 allows you to type an email message, of course, but it also gives you formatting tools to create a professional email message much the same way as you can create professional documents in MS Word.
To compose an email message, simply click your mouse in the body of the email. A cursor will appear. The body of the email is the large white space below the subject line. When you see the cursor, you can start typing.

As you can see in the box above, we started typing our email message.
Mail Formats
We briefly mentioned the mail formats for your email messages in the last section, but let's discuss them in more detail here.
There are three message formats that you can choose from:
1. HTML
2. Plain Text
3. Rich Text
You can find these formats under the Format Text tab in the ribbon. They are located within the Format group.

1. HTML is a web programming language used to create web pages. You may want to use this if you are adding images to the body of the email or using formatting such as bullet points, bold, italics, etc.
2. Plain Text. Plain text is just as it sounds. Plain text. It doesn't allow for special formatting such as bold, italics, or underline.
3. Rich Text. This supports formatting, including bold, italics, and underline. However, RTF messages are usually converted to HTML when they're sent. Unless requested by the recipient or your employer, you may just want to send HTML.
Spell Check
Spell Check is a feature that is common in the Microsoft Office suite of products. If you've used it before with other programs, then you already know what we're talking about.
Spell Check allows you to check emails for common spelling and grammar mistakes before you send them. You should still read over your emails and check for errors yourself, but Spell Check is an added back up and will catch errors you might miss.
To use Spell Check in Microsoft Outlook 2010:
With your email open, click on the Review tab in the ribbon.
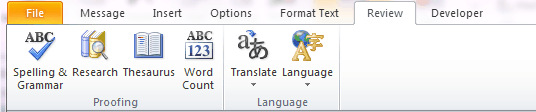
Click on the Spelling and Grammar button in the Proofing group.

As you can see in the picture above, we've made a typing error in our email. When we clicked on Spell Check, the dialogue box appeared. Our typo is in red, letting us know this is not a word in the dictionary. In the Suggestions box, it gives us suggested spellings for this word.
We can either ignore this suggestion just this one time by clicking the Ignore Once button. That will leave our typo as is.
We can ignore all instances where this typo exists by clicking the Ignore All button. Sometimes a word isn't misspelled. It's just not a common word and not listed in Outlook's dictionary. In cases like this, you'd want to Ignore All.
You can also add this word to the dictionary by clicking Add to Dictionary. If this is a word that you commonly used and want to prevent Outlook from marking it as a misspelled word, it's your best bet to add the word to the dictionary. If you click on Add to Dictionary, Outlook will add the word for you. It's that easy!
In addition to all this, you can also click Change to change this one instance of the word, or Change All to change all the instances where you've misspelled it. You can also click Auto Correct. AutoCorrect is turned off by default. The first time you use it, this dialogue box will appear:

If you want it turned on, click Yes.
Now, you have to configure AutoCorrect. We'll show you how to do that, as well as how to turn Spell Check on so your emails are automatically proofed for you. You won't have to click the Spell Check button. That's a real time saver!
Go the File tab and click options on the left. Then click on the Mail category on the left.
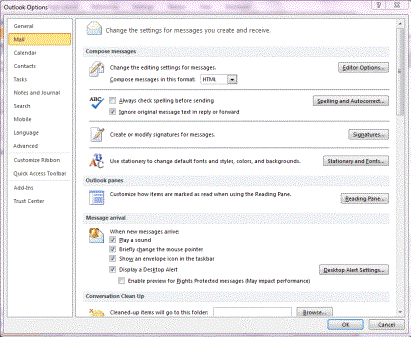
Under Compose Messages, go to the ABC with a checkmark with it. If you want Outlook to automatically check spelling before you send an email, put a check in this box. It is unchecked by default. Now, click on the Spelling and Autocorrect button to set options.
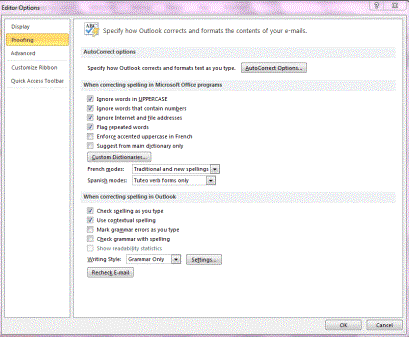
In the window above, specify how you want Outlook to correct your documents. If you want to use AutoCorrect, click the AutoCorrect Options button.
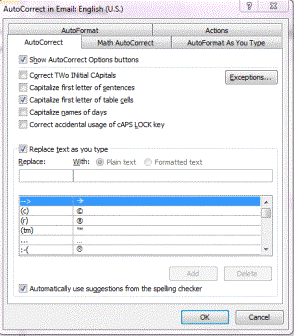
Now, specify what you want Outlook to correct for you as you type. Remember, Auto Correct means Outlook fixes errors as you type. You can also correct math, and format your text as you type by clicking the appropriate tabs.
When you're finished, click OK.
Sending and Receiving Email
Sending and receiving email in Outlook 2010 is as easy as it gets. Let's go back to our email message:

To send this email, simply push Send (to the left of To, CC, etc.) Your email is then sent.
To send and receive emails, go to the Send/Receive tab in the ribbon, as in the snapshot below.

To send and receive all messages, click Send/Receive All Folders. You'll then see a dialogue box that shows the progress.
Select a folder from the Navigation Pane on the left, then right click on the Update Folder button in the ribbon. It will update that folder by sending and receiving all items that are queued or pending. The Send All button will send all unsent messages.
Note: If you only have one email account in Outlook 2010, you just need to click on your Inbox, then Send/Receive All Folders.
Reading Messages
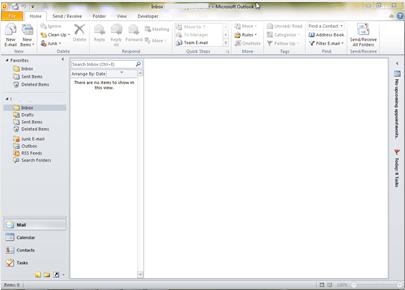
Outlook 2010 gives you two ways to read the emails you receive. The first way is in the Preview Pane, also known as the reading pane. If you click on an email in your inbox, you will be able to view it in the Preview Pane.
The other way to read emails is to open emails from your inbox. Simply double click on any email (in the second column in the picture above), and a new window will open with your email message. To close the email, click the red "X" at the top right hand side of the screen.
Reply, Reply All, and Forward
When you receive an email message, you may want to reply to it or send it to other people.
To reply to a message, you have two ways to do that. You can:
1. Reply
2. Reply All
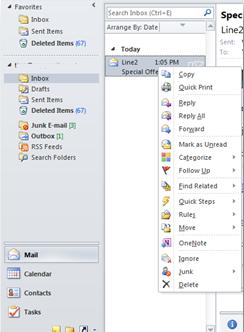
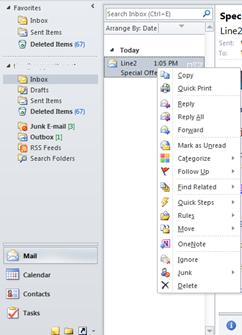
Reply means that you send a reply to the person who sent you the email and only that person. To send a reply, right click on the message and select Reply from the dropdown menu, as shown below.
Or double click to open the email, then click the Reply button in the ribbon. You can then type your reply.

When you select Reply All, you reply to the person that sent the email to you, plus anyone else they sent the email. For example, if Doris sends an email to you, and she CCs ten other people, when you select Reply All to answer that email, you will send a reply to Doris AND those ten other people.
To use reply all, follow the steps for Reply, but select Reply all instead.
When you forward a message, you take a message that someone else sent you, and you send it to other people. It makes sense, doesn't it? You get the message, then send it forward.
To forward a message, you can do one of two things. You can right click on the message (as shown below), then select Forward.
Or you can double click on the message to open it, then select Forward from the ribbon.

Formatting Messages
Applying a Font
You can apply a font to either an entire email or parts of an email. The choice is yours. To apply a font, click on the Format Text tab. You'll see the toolbars, or groups, as pictured below.

The type of font you're currently using will appear. In the picture above, the current type of font is Calibri. You can click on the arrow in that window to display other types of font available to use.
To change the type of font within an email or for the entire email, simply select the text to be formatted, then select your new font. It's really that easy.
Note: You can also do all font formatting by selecting the arrow key beside the word Basic Text at the bottom of the section. By clicking on this arrow, you can also alter character spacing.
Changing Font Size
Next to the type of font under the Message tab is a box that states the size of font currently being used. Using the picture above, the font size is 11. Once again, you can use the down arrow key to either enlarge or reduce the font size. To change the size of the font, simply select the text that you want to change, then select the new font size. You can change an entire email or just a portion. The choice is yours.
You can also use the two uppercase A's beside the font size box to change the size of fonts you're currently using.

Pushing the larger A will increase your font size by one for each time it's clicked. On the other hand, clicking the smaller A will decrease the font size by one for each time it's clicked.
Font Attributes
You may want to select text to either boldface, italicize, or underline a section of text. The boldface command in Outlook 2010 is represented by an uppercase, boldfaced B. Italics are represented by an uppercase, italicized 'I', and underline by an uppercase U with a line under it. These buttons are located directly below the font type window.
To add italics, boldfaced, or underlining to any portion of a text within an email, select the desired text, then click the appropriate button (B for boldfaced, I for italic, or U for underline.)

Next to the commands for boldfaced, italics, and underline, you'll see an 'abc' with a line through it. (ABC) This is for strikethrough. When clicking on this button, it will put a line through any text you have selected.

Next to the strikethrough command, you'll see 'X2'. This simply puts smaller text below the text line of the normal text. This command was used when typing X2 into this section. X2 is just the opposite, putting smaller text above the text line. This makes creating footnotes easier than it had been with previous versions of Word.
The uppercase A and lowercase A that are situated side by side allow you to change the case of selected text. You can change from lowercase to uppercase or vice versa , toggle tHe CaSe, or select other common capitalizations.
Font Color
Changing the font color is as simple as changing the font. Look for the uppercase A with a black bar under it as pictured below.

Select your text, then click on the button to choose the color you want to apply to the selected text.
You can also highlight selected text. To the left of the font color button, you'll see a lowercase 'ab' with a marker near it. It is highlighted in yellow. Simply select the portion of text you want to highlight, click the button, and select the color of highlight that you want to apply.

Clear Formatting
To clear formatting within an email or a specified portion of text, simply select the text, then click on the 'As' with the eraser beside it. It's located to the right of the two uppercase A's that allow you to increase or decrease font size. (See the picture below.) By selecting the text and clicking on this button, it will remove all formatting done to the text and leave you with the default font and font size for the email.

Text Alignment
As with all word processing programs, you can either left, right, center, or justify your text. You can either do one of these things to a portion of text or to the entire email.
This is an example of text that is aligned to the left.
This is text that is aligned to the right.
This text is centered.
The following text, selected from this section, is justified so that it is aligned between the left and right margins, adding space between letters if necessary. It gives the email a clean look.


In the above picture, the left alignment button is highlighted. Beside it is the center, then right, and then justify. To use these, simply select the text you want to align, and click on the appropriate button.
Deleting Text
You can delete text by using the Backspace and Delete keys. But you must remember that Backspace removes characters to the left of the cursor, and Delete removes characters to the right.
To delete blocks of text, select the text to be deleted and press either the Backspace or Delete key.
Moving Text
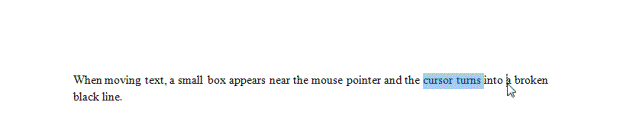
You can move selected text by holding the left mouse button and moving the cursor to the desired location in the email. When moving text, a small box appears near the mouse pointer and the cursor turns into a broken black line. You position the cursor in the place you want the text and release the left mouse button.
Bulleted and Numbered Lists
The types of lists you can create are really simple and easy to remember. Bulleted lists have bullet points, numbered lists have numbers, and outline lists can contain letters and numbers. We're going to learn how to create all three.
1. If you want to create a list with existing text:
2. Select the text you want to make a list.
(Note: Above is an example of a numbered list.)
To create a list, select either the bulleted or numbered list button, whichever you need, as pictured below.
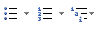
(You'll notice that the first button is for a bulleted list, the second for a numbered, and the third for an outline.)
When creating a new list:
1. Put the cursor in the email where you want to create the list.
2. Click either the bulleted or numbered list button.
3. Start to type.
(Note: Above is an example of a numbered list.)
Creating a Nested List
A nested list is defined as a list with several indentions in the text. Nested lists are often used for outlines and looks like the example below:
1. Creating a list is easy.
1. First you decide what kind of list you want.
1. Bulleted
2. Or Numbered
To create a nested list as the one above, click  to select the type of nested list you want, then use the
  to create an indention by placing the cursor at the beginning of the text to be indented, then clicking the bullet button
  .
.
Format Your List
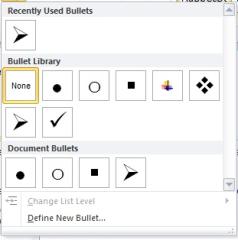
You can change the formatting of the bullets or numbering by using selecting either the arrow beside the bulleted or numbered list button, then making a selection from the drop down box.
Below is a picture of the different formats for bullets that you can choose from:
Sorting Lists
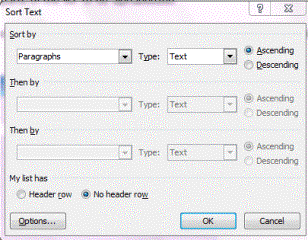
Once you create a list, you can also sort it alphabetically, either ascending or descending. There's no need to worry about putting things it alphabetical order as you type. Outlook 2010 will do it for you.
To do this:
Create your list as outlined in the steps above.
Select the list or parts of the list to be alphabetized
Click  and complete the dialogue box. (Default will sort your list descending.)
It's really that easy, as shown with the example list below.
The original bulleted list looked like this:
2. Mango
3. Orange
4. Apple
5. Fig
6. Grape
7. Apricot
But when you select the text in the list, then click  , the list is alphabetized for you.
Take a look:
8. Apple
9. Apricot
10. Fig
11. Grape
12. Mango
13. Orange
You can sort paragraphs of text or lists using the sort ascending or sort descending button .
Indenting Paragraphs
Indenting paragraphs simply allows you to set different margins for different lines of text.
You have several options for indenting paragraphs:
First line: This controls the left boundary for the first line of the paragraph.
Hanging: Controls the left boundary for every line in the paragraph except the first one.
Left: Controls the left boundary for every line in the paragraph.
Right: Controls the right boundary for every line.
To indent paragraphs, you have two different options:
Option 1: Go to the Format Text tab on the Ribbon. Select the indent buttons in the Paragraph group. They are pictured below.

These allow you to indent left or indent right. The indention increases each time you click on the button.
Option 2: Click the arrow on the Paragraph group tab. Click the Indents and Spacing tab. From this dialogue box, you can set indentions.
Add Borders or Shading to a Paragraph
Just as you can add a border or a color to an entire page, you can also add a border or color to an entire paragraph or a group of paragraphs.
To do this:
Select the Format Text tab on the Ribbon.
Click the Borders button in the Paragraph group. 
A dropdown menu will open and allow you to select what type of border you want.
Apply Paragraph Styles
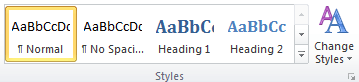
Style refers to the format of your paragraph. Outlook offers several quick styles that you can use. These include headings, no spacing, subtitles, emphasized text, list paragraph, etc. To apply a style, go to the Format Text tab on the Ribbon and go to the 'Styles' group. You'll see some styles in white boxes (as pictured below). You can scroll through these styles to find one you want to use, or you can click the arrow in the 'Styles' tab to select the one you want.
Below are some different styles applied to text.
Subtle reference: The girl ran to the store to get some bread for dinner.
No spacing: The girl ran to the store to get some bread for dinner. (This style leaves out any spaces between lines that may have been inserted in prior paragraphs.)
Paragraph list: The girl ran to the store to get some bread for dinner. (Note the indention in this line that would signify a list.)
Getting to know the different styles and what they do to your text is a matter of using Outlook 2010 frequently.
Note: You can also apply a style to an entire email or individual lines, as well as paragraphs.