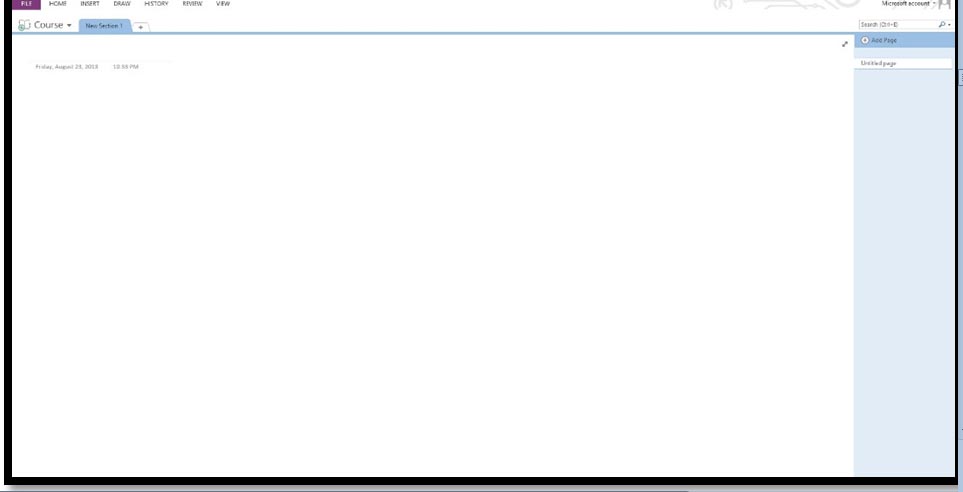
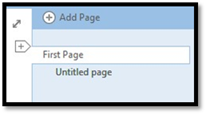
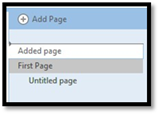
Pages are an element within your notebook. When the new notebook opened, it automatically had one page in it. See the snapshot below.
You can easily add more pages where you can store notes. Pages are like pages in a spiral bound notebook. In this article, we're going to learn more about pages.
Naming a Page
Look at the snapshot above. On the right hand side of the window, you can see that our current page is titled by default "Untitled Page." You are going to want to name each page as a reminder of the content that is on the page.
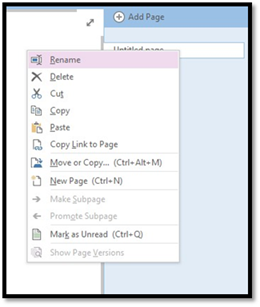
To rename the page, right click on Untitled Page (on the right) and select Rename.
You'll now see that "Untitled Page" is selected on the actual page.
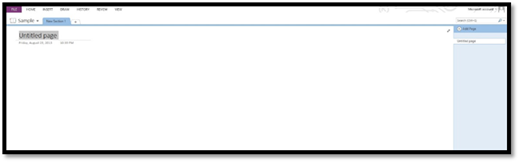
Type in your new page title. You can just start typing. You don't have to "click on" or select anything.
OneNote updates the page with the new page title.

Adding a Page
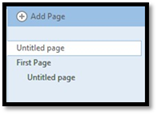
Adding a page to your notebook is just as easy. Look at the snapshot above and see where it says Add Page on the right hand side of the window with the plus sign beside it.
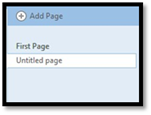
Simply click it and a new page is added. If you look at the next snapshot, you will see the new page was added as "Untitled Page."
This is the easiest way to quickly add new pages. However, as you add more and more pages to your notebook, there may come a time where you want to add a new page in a certain spot in the notebook. For example, you might want to add a new page after the fiftieth page in your notebook. Clicking the Add Page button will add a page AFTER the last page in your notebook.
What if you want the new page to come after the fourth page? Or the twentieth?
Here's how to do it.
Hover your mouse over the page that comes AFTER the page you want to add. You'll see a little plus sign appear to the right of the page name, as shown below.
Click the plus sign, and a new page will be added.
Adding a Subpage
Remember, a subpage is an additional page whose tabs are smaller than primary pages. Adding one is very easy.
Here's an example of how you would use a subpage:
You are taking notes from a meeting that you attended. After the meeting, you use the notes on one of your pages to implement a new policy or strategy. You may use a subpage to jot down notes about the new policy or strategy to present to a boss or co-worker when discussing the meeting or the new directions you're taking as a result of the meeting. If you were using a spiral notebook, a subpage may be a post it note paper clipped to a page.
To add a new subpage, add a new page, then right click on that page, as shown below.
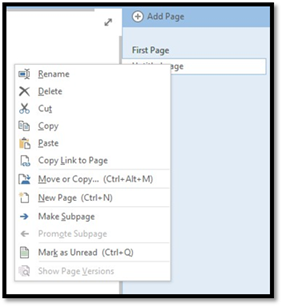
Select Make Subpage from the menu.
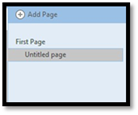
As you can see, a subpage is indented slightly below the page.
Moving Pages
Moving a Page is very easy in OneNote 2013.
Below you see our pages:
Simply drag and drop the page you want to move. For example, if we want to move Page One so it comes after Page Two, simply click on Page One. While holding your left mouse button down, drag it so it is below Page Two.
In the snapshot below, you will see a thick black line. This lets you know where the page that you are dragging will appear. This way, you know exactly where you are placing it.
Let go of the mouse button when you are finished.
The page has now been moved.
You can also right click on a page and select Move or Copy.
Deleting a Page
To delete a page, go to the right hand side of the screen, locate the page you want to delete, and right click on it. Select Delete. The entire page will be deleted.
Using Page Templates
In OneNote 2013, a template is a page that has a pre-existing structure. In other words, it was a layout or structure for the page that was created to use with any page. The framework of the page is already done when you open a template, and all you have to do is add text, pictures, notes, etc. that you want to appear on the page. In other words, a template is simply a ready-made page.
To use a page template, go to the Insert tab. Click the dropdown arrow beside the Page Templates button in the Pages group.

Select Page Templates.
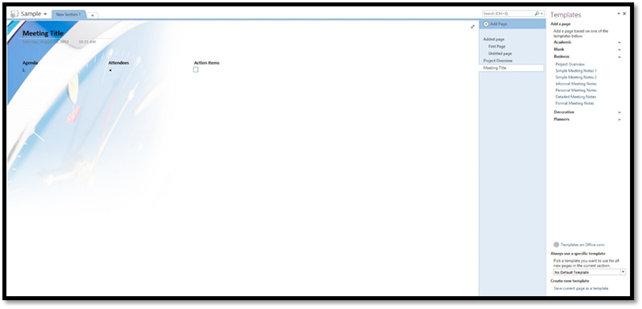
The Template Pane now appears, as shown below.
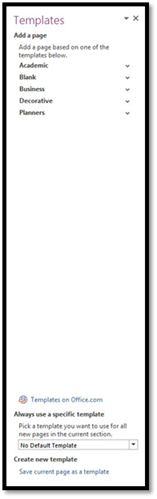
Now, we can add a new page using a template. Templates are grouped by type. You can choose from Academic, Blank, Business, Decorative, and Planners.
Let's click the Business templates.
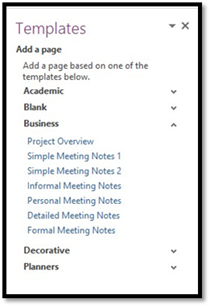
You can decide which template you want to use. The names of the templates are descriptive so you can figure out which template you need.
Click on a template to select it. We're going to choose Project Overview.
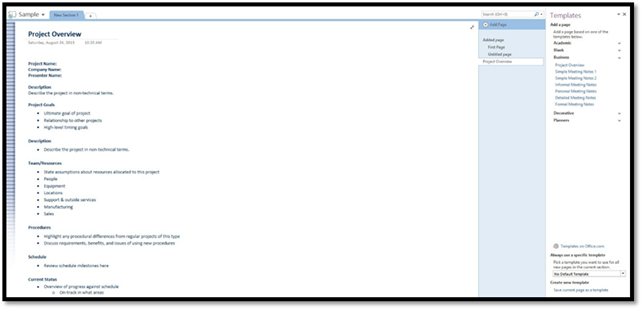
The template appears on the page.
To switch to a different template, just click on a different template name. Below is Simple Meeting Notes 1.
Now, let's go back to our Template pane to see what other things we can do.
Toward the bottom of the Template pane, you'll see Always Use a Specific Template. In this section, you can pick a template that you want to use in all pages within the current section.
You can also create a new template that you can use again in the future by clicking on Save Current Page as a Template.
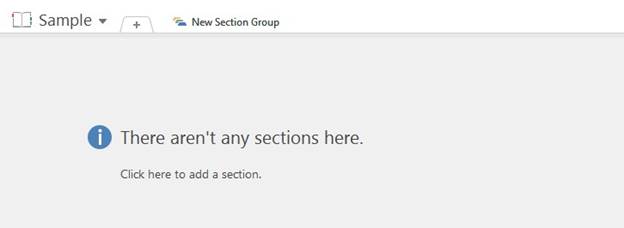
Adding a Section
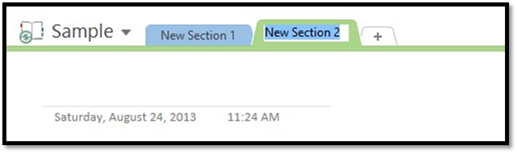
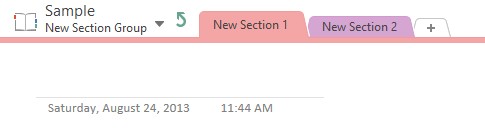
We explained the definition of a section earlier in this article. Now it is time to learn how to add a section. Look at the snapshot below. You can see our notebook title (Sample). You can also see New Section 1 was created for us by default. This is a new section.

To create a new section, simply click the plus sign to the right of New Section 1.
As you can see above, the new section is added. You can now type in the name for the new section.
Now you can add pages to this section by clicking on the section tab (as shown above) to select it, then adding a page using the right hand side of the window as we learned to do earlier in this article.
Adding New Section Groups
If you have a lot of different sections in your notebook, it can get tedious to find exactly what you need. Some sections may be closely related to other sections, but some sections may not be related at all. If you have other users viewing your notebook or you are getting confused about where to find things, you can create something called Section Groups. It is just like the name says � it is simply groups of sections.
Let's say, for example, that your entire notebook deals with natural products, and you have sections related to this with pages in each section. Now, let's say you have users who will just want to view sections on natural skin care products. You can create a Section Group, then put all sections that deal with natural skin care products in that group so they're easier to find. Let's learn how to do that.
The first thing you are going to do is right click on a section.
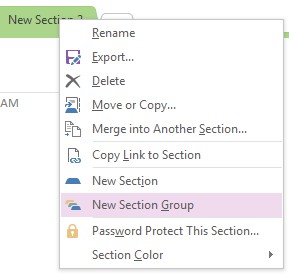
Select New Section Group.
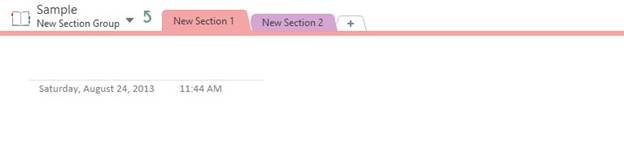
The new section group will appear as it does below.

Now you can name your section group. For now, we're not going to give it a name. You will want to name yours however. We just want you to be clear this is a new section group, which is why we're not changing the name.
Now, click on a section tab (such as New Section 1). Hold the left mouse button down and drag it to the New Section Group to add it to that group.
We've added our two sections to the new section group:
To go back to the main area of your notebook, click the up arrow to the right of your notebook name. The arrow looks like this: 
Your sections are now located in your section group. You can add more sections to your notebook if you want. For now, let's click on New Section group to see that our sections appear there.
Again, click the up arrow to go back.
Working with Sections and Sections Groups
Just as when you were in school and taking notes in class, organization is key in creating useful and helpful notebooks in OneNote. For that reason, we've provide some organizational tips below.
-
Put "like" pages into the same section.
-
Name the pages to represent the content of each page.
-
Name the sections to represent the overall content of the pages. It is like chapters of a book.
- If you have a lot of sections, group your sections into section groups. Give the section group a topic, then place all sections related to that topic in the section group
Inserting Tables and Images
If the only thing you put on your pages was plain text, the pages may look plain and unappealing. For that reason, you can do such things as add lists, tables, and even insert pictures and clippings to dress it up, explain research, or any number of things.
In this article, we're going to learn how to insert tables into your notes, then format them.
Inserting Tables
Before we identify the different parts of a table, let's go ahead and insert one into our notebook. To do this, position the cursor at the point in the notebook where you want to put the table. Don't worry if it's not exactly right--you can always move or manipulate it later.
You'll find tables under the Insert tab in the Tables group. The Tables button looks like this:
Click the Tables button.
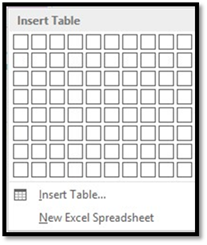
You'll see a bunch of boxes at the top.
The easiest way to insert a table is to drag your mouse over the rows and columns until you have the amount you want.
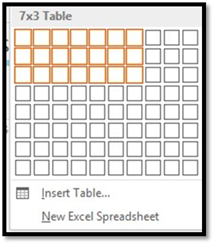
As you can see above, we dragged our mouse to make a table that has seven columns and three rows, or 7x3.
To insert this simple table, click the mouse.
The table appears on our notebook:
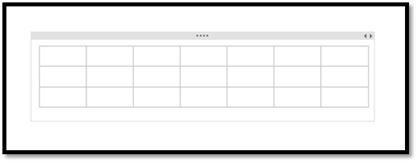
We now have a basic table. So let's identify the parts.
Each box that you see in a table is called a "Cell." There are 21 cells in the table above.
The "Rows" go from top to bottom. There are three rows. Rows go horizontally across the screen.
Columns go from left to right. There are seven columns above. Columns are vertical.
So now that we've identified the parts of a table, let's take a look at the other ways in which we can add them.
Using the Insert Table Dialogue
Once again, we're going to move the cursor to the point in the document where we want the table to appear. Now go back to the Insert tab, click the Table button, and select "Insert Table" instead of dragging your mouse over the boxes (which really represent cells, as we learned a second ago.)
A dialogue launches in the center of your screen. It looks like this.
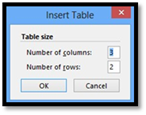
From here you can select the number of rows and columns. In this example, there are going to be 3 columns, and 2 rows.
Click OK.
Adding Text to a Table
Adding text to a table is as easy as clicking into a cell and then typing. You will be able to change any attributes of that text, too, and even apply a Quick Style.
Position Text within a Cell
Once you have your table created, you can start to specify your formatting preferences, including how to position text within a cell. You can choose whether to center text within a cell, or whether to align it right or left, or toward the top or the bottom. Go to the Alignment group under the Table Tools Layout tab. Whenever you select a table, you'll see this new tab appear in the ribbon.
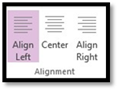
Using the graphics on the left as guides, select how you want text positioned within a cell. You can format the text position for just one cell, multiple cells (by selecting the cells), or the entire table (by selecting the table).
Formatting Tables with the Table Tools
Whenever you create or select a table, the Table Tools Layout tab will appear in the ribbon. It allows you to easily apply table styles, borders, and shading attributes and more. Below is an example of the tools available for tables.

Let's look at the Format group under the Table Tools Layout tab.
As you can see, there are two buttons in this group: Hide Borders and Shading.
If you click the Hide Borders button, the borders of your table will be hidden, as shown in the snapshot below.
If you want to unhide the borders, just click the button again.
The Shading button allows you to add shading (or color) to the cells in your table. You can apply shading to a single cell by clicking the mouse in that cell, then clicking the Shading button. Or you can select multiple cells by clicking in the first cell, then dragging to select the other cells.
The Shading button has a dropdown menu that shows you the various colors of shading that you can apply.
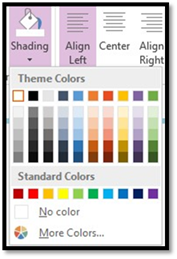
Click More Colors at the bottom of the dropdown menu.
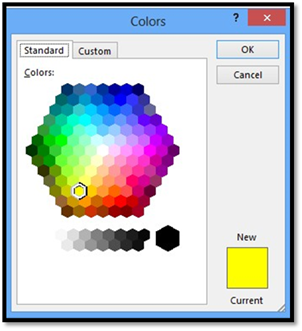
As you can see, there are more standard colors you can choose. However, these colors are all dark. If you want to add text to a table, the colors could make it hard to see text.
Let's fix that.
Click the Custom tab (as in the snapshot above).
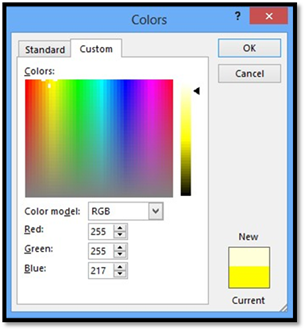
Under the Custom tab, you can create custom colors. To lighten an existing color, use the slider on the right. At the bottom right side of the window, you can see our current color, as well as the new color we created by moving the slider.
In the Borders group, you can use Border Styles add borders to rows and columns to customize the look of your table.
Click OK when you're finished.
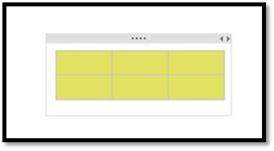
Shading appears in our table below.

Selecting Cells, Rows, and Columns
Selecting cells, rows, and columns in OneNote 2013 is easy.
To select a cell, click within the cell so the mouse cursor is blinking.
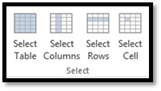
Go to the table Format tab, then the Select group, as pictured below.
Click within the table to make the table active.
If you want to select all the cells in the table, click the Select Table button.
If you want to select a column, click within a cell (so the cursor appears) in the column that you want to select. Click the Select Columns button.
To select a row, click within a cell in the row you want to select. Click the Select Rows button.
To select a cell, click within the cell you want to select, then click the Select Cell button.
Adding Rows and Columns
To add rows or columns to a table, go to the Insert group under the Table Tools Format tab.

To insert a row, first select an existing row in your table.
Next, choose if you want to insert a row above or below the row you've selected.
Click the Insert Above button to insert a row above the selected row.
Click Insert Below to insert a row beneath the selected row.
To insert a column, select a column in your table, then choose if you want to insert a new column to the left or right by clicking on either the Insert Left or Insert Right button.
Deleting Cells, Rows or Columns
To delete a Cell, Row or Column, simply select it, navigate to the Table Tools Layout tab, go to the Delete group, then select if you want to delete cells, rows, or columns, or the entire table from the dropdown menu.
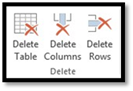
You will then have the option of deleting a cell, a row, a column, or the entire table.