Part of keeping up with your finances using Quicken is entering checks that you write and deposits that you make.
To enter a check or a deposit, the first thing you need to do is select the account that you want to use.
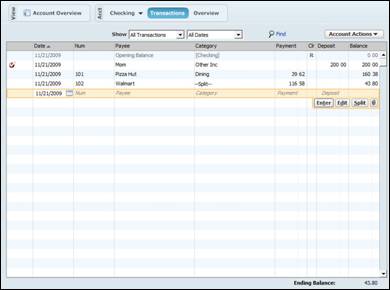
Go to the Account Bar and select the account. In the snapshot that follows, we've selected our checking account.
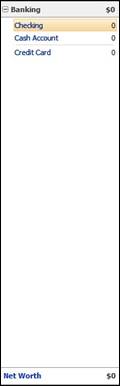
Your account should now be showing in the workspace.
Start a new transaction by clicking on the first line below your existing transactions. This record of transactions is called your account register.

Since our previous balance is zero, we're going to add a deposit first. We'll show you how to enter a check later.
In the Payee field, enter who is giving you this deposit. Let's say that it's a birthday check from Mom. Just click on the Payee field and type her name.
You'll see a Memorized Payee List. This contains anyone you've listed as a payees in Quicken.
Next, enter the deposit amount in the Deposit field. We're going to say that Mom gave us $200.00. She was feeling generous!
When we do this, Quicken is going to ask us if we want to select a category for this transaction. Yes, we do, so click Yes. (We should have clicked in the Category field, but we wanted to show you that Quicken will prompt you for a category.)
When we click Yes, a drop down box will appear that allows us to choose a category.
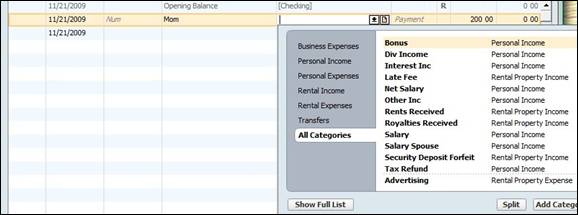
We're going to choose Other Inc. Just so you know, Inc. is Quicken's abbreviation for Income. It doesn't mean incorporated.
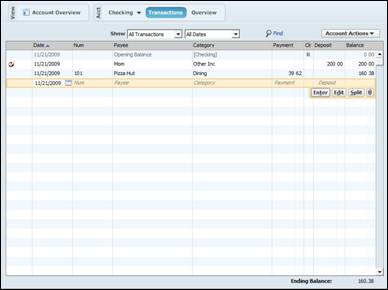
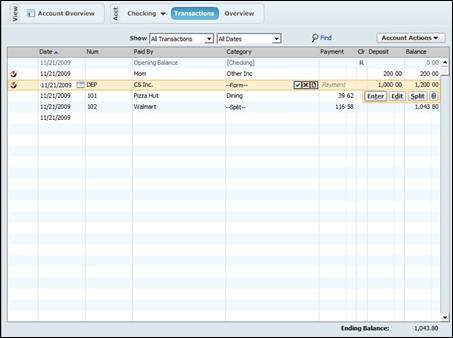
If you look at the following snapshot, you can see that our deposit has been added, and our new balance is $200.00
Now that we have some money to play with, let's enter a check.
Click on a new transaction line in the account register.
The first field we're going to fill in is the Num or number field. When you click on this field, as we've done in the following snapshot, a drop down menu will appear. At this point, you'll have to choose if you want Quicken to automatically fill in the next check number or if you want to enter an ATM, deposit into checking, print check, a transfer, or an EFT (electronic funds transfer).
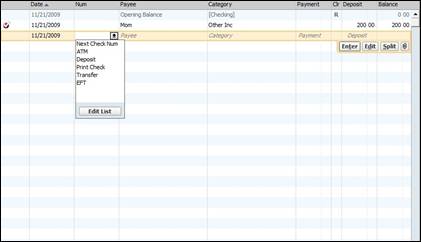
We're going to let Quicken automatically assign the check number. Since we are just starting Quicken, it put the default number of 101. Of course, you can add an actual check number.
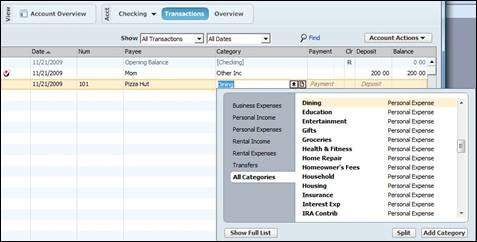
Next, we're going to select the Payee. Let's say we wrote check 101 out to Pizza Hut.
When we click in the Payee field, Mom's name will come up as a Memorized Payee. This is handy if you give/receive money from Mom frequently. But this time, we want to type in the name Pizza Hut.
Quicken recognizes certain payees. Pizza Hut is one of those, so it automatically filled in Dining as a category. However, the category box still appears (as shown in the next snapshot) in case we want to change it.
Now, you'll add in the payment amount in the Payment field. This is not a deposit; it's a debit. That said, we want to make sure we put the dollar amount in the Payment field.
In our example, we're going to say we spent $39.62 on pizza. Mom came for dinner, and she was hungry.
Quicken updates our balance for us once we push enter.
Splitting Transactions
A split transaction is simply a transaction that encompasses two more categories. For example, if you shop at Wal-Mart, you might spend some of your money on household items and some of it on groceries. Since you're using Quicken to track your money as much as manage it, you'll want to split transactions like these.
To do this, go ahead and enter your transaction information such as check number (if it's out of your checking) and Payee information.
When you get to the Category field, click the Split button.
You'll see the box pictured below. We've already entered a split amount in two different categories. You must enter amounts that equal the total of the transaction if you want to keep your account register accurate.
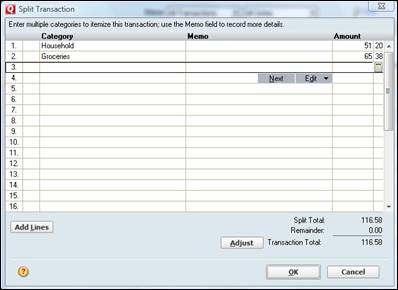
You can add as many categories as you want. Use the memo field to write notes to yourself.
When you're finished, click OK.
Since we hadn't yet added if this was a payment or transaction, this dialogue box appeared:
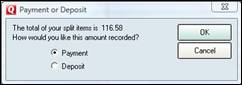
This is a payment, so we've selected it. Now, click OK.
Our account register now looks like the snapshot below.
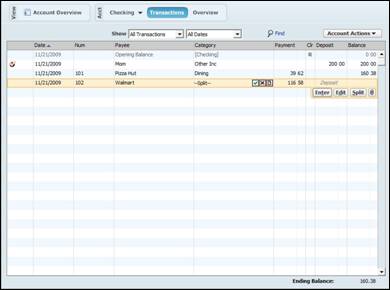
Click the Enter button to add the transaction.
Entering Credit Card Transactions
To add a credit card transaction, select the appropriate credit card account from the Account Bar.
You'll then see the account register for that credit card in the workspace.
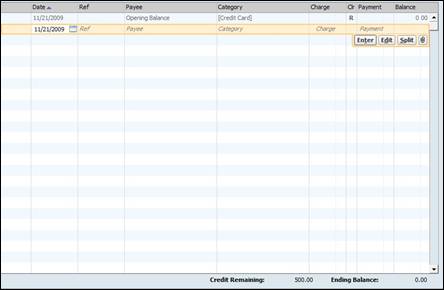
You'll enter credit card transactions the same way that you entered payments and deposits for checks. The only difference will be that you will now enter charges and payments.
In the Ref field, enter a reference number for the transaction if you have one.
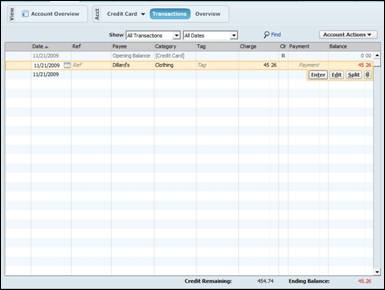
Next, enter the payee's name in the Payee field. For this example, we went shopping at Dillard's.
Dillard's is another name that Quicken recognizes. It automatically suggests the clothing category. Of course, the box also appears if you want to change it. We don't.
NOTE: You can also split transactions with credit cards using the same steps you took with checks.
Now, fill in the charge amount. We filled in $45.26.
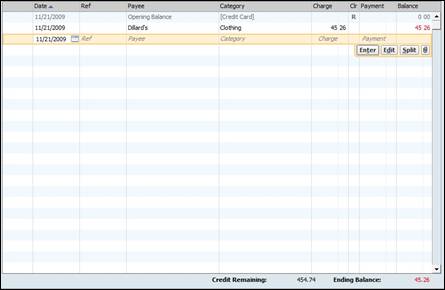
Please notice that charges appear in red as does your ending balance. This is because credit cards are viewed as a liability, not as asset. Credit card balances will also decrease your net worth in the Account Bar.
NOTE:We entered our credit card limit in the Setup tab. We did this by clicking the Edit button beside our credit card account.
To enter your paychecks, first you have to set them up in Quicken.
To set up a paycheck, click the Setup tab and go to the Income and Transfer Reminders section shown below.
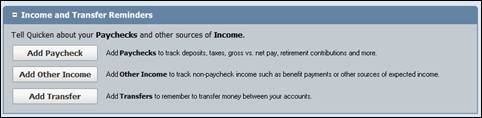
Click Add Paycheck. You'll see the following window appear.
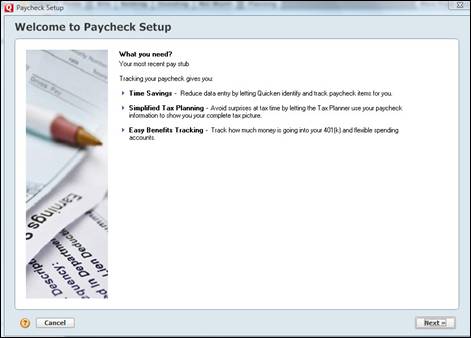
Click Next.
In the next window (pictured in the following snapshot), you'll specify whether this is your or your spouse's paycheck. Then you'll enter your (or your spouse's) employer.
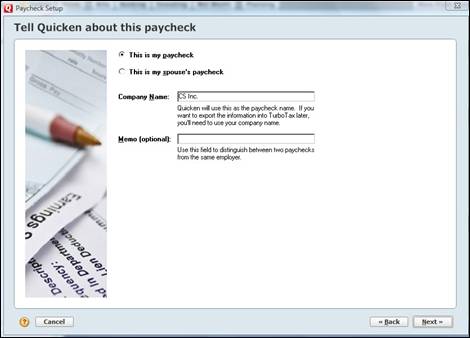
Click Next.
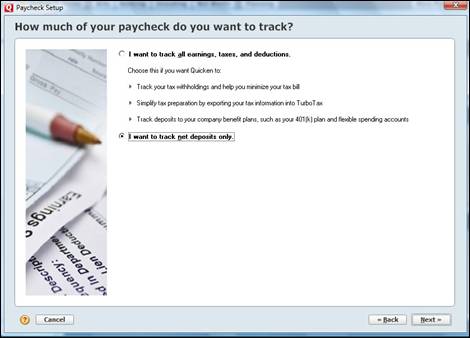
In the above window, you'll choose if you want to track all earnings, taxes, and deductions � or if you want to track net deposits only.
If you choose to track all earnings, this box will appear:
NOTE: We've chosen to track all earnings for this example because it is the most complicated step. If you choose only to enter your net salary, you will only be required to enter the dollar amount that you take home each week.
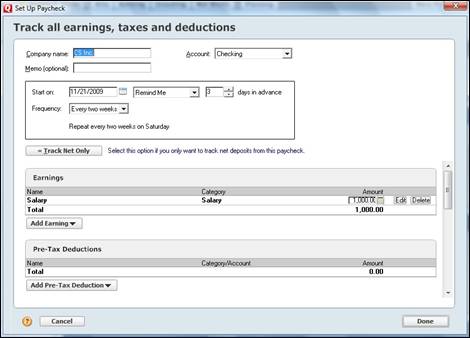
Fill in how often you are paid, your salary, as well as any pre tax deductions.
Scroll down and fill in all tax information and after-tax deductions.
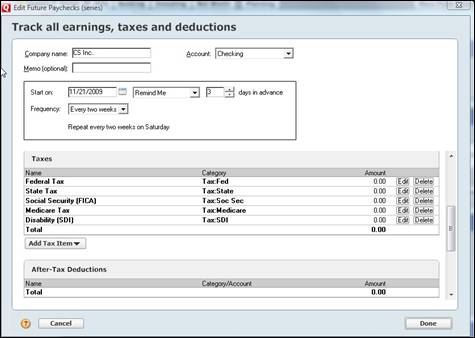
You'll also be asked to specify which account your paycheck will be deposited into, as well as your net income.
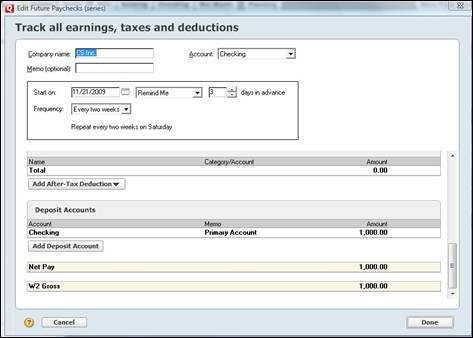
Since we're just using an example, we're not going to fill in the tax fields. We would need your paycheck to do that!
Click Done.
Quicken will then ask you if you want to enter year-to-date amounts. This is a good idea to make tax season even easier.
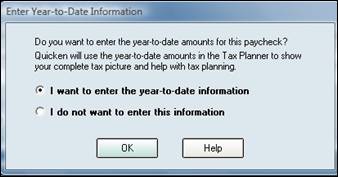
Click OK. If you've selected "I do not want to enter this information," then your paycheck will be entered into Quicken.
To enter your paycheck into an account, click the To Do button at the bottom of the account register where you deposit your check.

This will pull up your reminders.
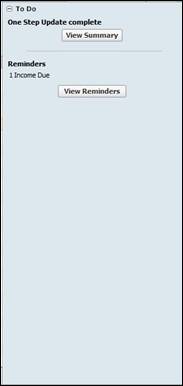
Click on View Reminders.
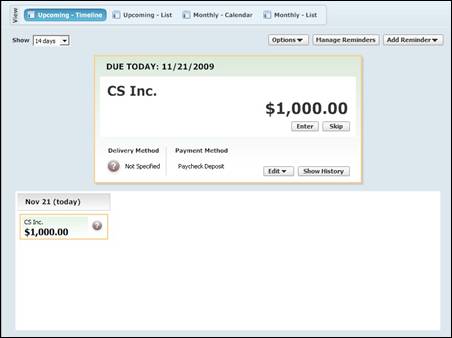
To enter the paycheck into your account register, click Enter.
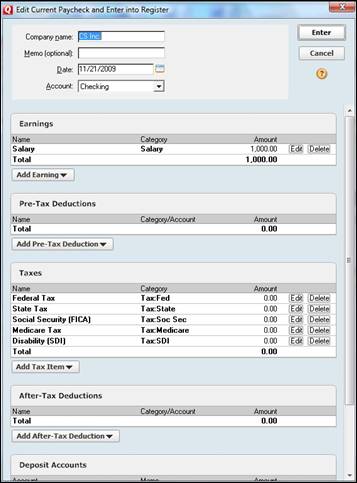
Unless you're on salary, each check may be different. You might have to go through and change information you need to change.
Click Enter, and you'll see the following box.
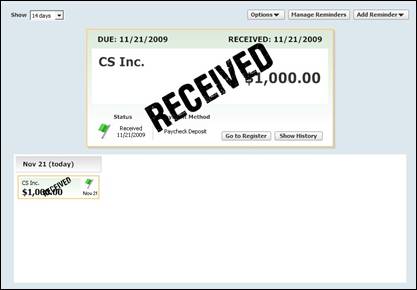
Click Go to Register.
Your paycheck has now been added to your register.
Click on the Enter button if everything is correct.
Using tags gives you another way to group or classify transactions in Quicken. A good example of using tags is tagging all transactions that occurred while you were visiting your in-law's three states away. This gives you a means to track how much you spent and how you spent it.
Let's learn how to tag transactions.
First, open the account that you want to use. We're going to use our credit card account for this example.
Look at your account register.
The tag field is to the right of the category field in your account register. However, yours may be hidden. To show the tag field, go to Edit>Preferences>Quicken Preferences. Click on Registers on the left.
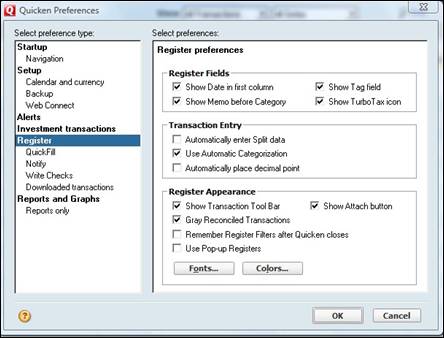
Make sure the Show Tag Field box is checked in the Register Fields category.
When the tag field is checked, your account register will look like the snapshot below. You can clearly see the Tags field.
Now, we can enter a tag. Since we spent the money at Dillard's on a visit to our in-laws, we're going to tag it as such.
We typed in "In Laws" for our tag, then pressed Enter.
This box appears:

We can now add a description if we want. We can also add a copy now. However, you only need to add copy numbers if you are tracking rental properties so that you can track them separately for your Schedule E form at tax time.
You can also assign multiple tags to one transaction.
To do this, click on the downward arrow beside the current tag and click Multiple Tags.

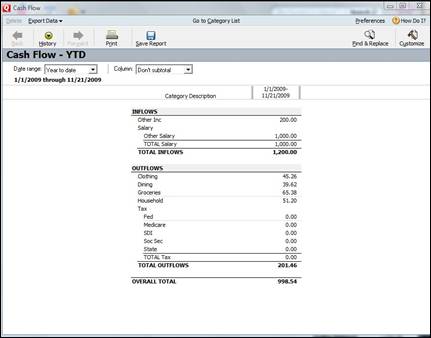
To view your cash flow, go to Banking>Banking Reports>Cash Flow.
This will prompt a window to appear that will show you your cash flow.
If you connected your accounts to your financial institution, you can also view your cash flow this way and also update all transactions.
Click the Download Transactions tab, then click Update Transactions.
You may have to enter a password.
In the dialogue box, select the Download Latest Cleared Transactions and Balances check box.
Click Update Now.
Once Quicken updates, review your updates and accept them into your register.
There are a number of reports that you can create from the register of any banking account. A standard report shows all the transactions that have the same payee or category.
To create a register report:
Open the account register that you want to use.
Next, determine what you want to report on. If it's a payee, select the payee in a transaction. The same holds true if want to report on a certain category, etc.
To select all transactions, select a blank transaction.
Now, go to the tool bar and click Report  .
.
You'll now see the following dialogue box.
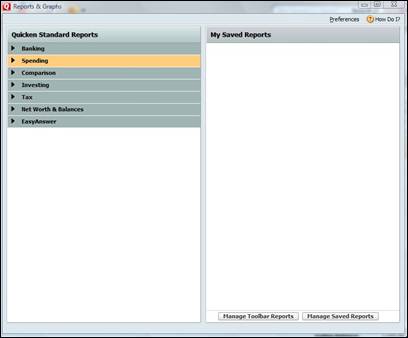
If you want to run a report on your spending, click the Spending group on the right.
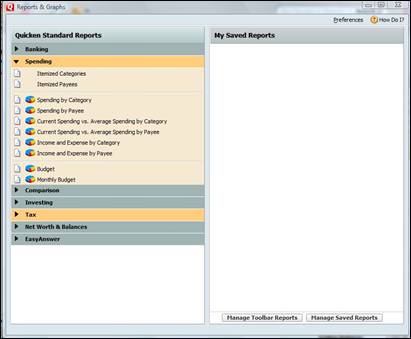
Select if you want to itemize categories or payees, then select how you want to report on spending. You can choose spending by category, payee, or even compare your current spending to your average spending.
We are going to do Spending by Category for this report.
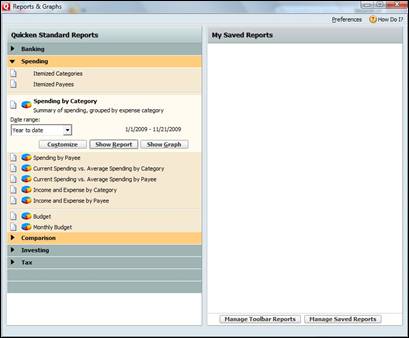
We want the year-to-date, so we'll leave that alone.
Next, we'll customize our report by clicking the Customize button.
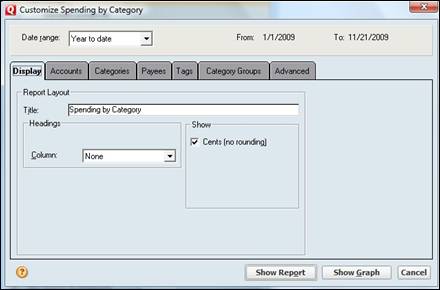
Using this dialogue box, we can customize the information we'll receive.
When you're finished, click Show Report.