Understanding Color
There are two color models in Elements that allow you to set color for your images. The first model is based on the way that the human eye sees color. Using this model, you can adjust the colors for hue, saturation, and brightness or HSB.
The other model that Elements gives you to adjust color is based on the way computer monitors display color: in red, green, and blue or RGB.
Elements also gives you four image modes to allow you to determine the number of colors used in an image. These are grayscale, indexed color, RGB, and bitmap.
We'll learn more about these modes and models throughout this article.
Image Modes
As we just discussed, an image mode allows you to determine the number of colors used in an image as well as the file size.
Elements has four image modes. Let's discuss each one of them and what they mean.
Bitmap mode means all pixels in the image or displayed in black and white. These images or 1-bit images because they have a bit depth of 1. To convert an image to bitmap, go to Image>Mode>Bitmap. If your image is currently in RGB mode, Elements will first convert it to Grayscale to remove hue and saturation from the pixels, and then to bitmap.
RGB to Bitmap
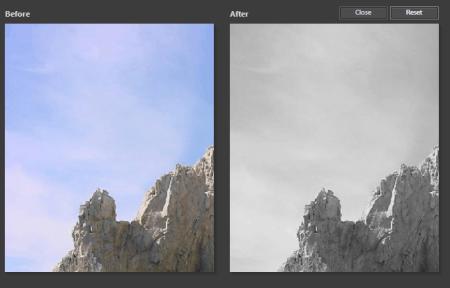
Grayscale mode uses up to 256 shades of gray in the image. This is an 8-bit image. Each pixel has a brightness value that ranges from 0 (black) to 255(white). To convert to grayscale, go to Image>Mode>Grayscale.
RGB to Grayscale
Indexed Color mode uses up to 256 colors. When converting to the indexed color mode, Elements makes a list of all the colors used in the image. If a listed color is not one of the 256 colors that the indexed color mode offers, Elements then converts that color to its closest match. The match will be one of the 256 colors. This helps to reduce file size. However, editing features are limited in indexed color mode. It's recommended that you temporarily convert to RGB to make any changes. To convert into indexed color mode, go to Image>Mode>Indexed Color.
Indexed Color
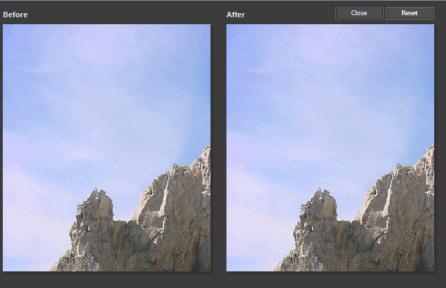
RGB mode. In RGB mode, the red, green, and blue components in your image are assigned an intensity number that ranges from 0 to 255. Zero is black, and 255 is white. This allows for a wide range of colors and results in a larger file size. However, it also provides crisp, colorful images. To convert to RGB mode, go to Image>Mode>RGB.
Color Management
Each device that you use for an image will have a different range of colors, called a gamut. Your digital camera, scanner, monitor, and printer will have a slightly different gamut. When you move images from one device to the other, the colors shift and are reproduced slightly differently.
Color management translates the colors in your digital camera and other devices so that the colors you see on your monitor before you print are the colors you see after you print the image. The colors may not match exactly because your printer may not have the same range of colors as your monitor, but color management means they will be as close as possible.
In order for color management to work, you must profile all your devices or use the ICC profile given by the device manufacturer. Embedding profiles with your images makes the colors portable so other devices and Elements can read and translate the color.
To set color management in Elements:
- Go to Edit>Color Settings. Select a color management option, then click OK.
- When you save a file, select ICC profile in the Save As dialogue box.
Foreground and Background Colors
The blue square in the image below is the foreground color. The white image is the background color. You can change either of these colors using the Eyedropper, Color Swatches Palette, or the Color Picker. We'll learn how to do this later in this article. For now, it's important that you learn how the foreground and background colors are used.

These squares - or the foreground and background colors - are located toward the bottom left side of your Elements window in the toolbar, as shown below.

Whenever you use the Brush, Paint, or Bucket tools, you use the foreground color. When you use the Eraser tool, you use the background color.
The foreground and background colors are used together in the Gradient tool.
Using the Color Picker
You can use the Color Picker to change the foreground or background color. To access the Color Picker, simply click on either the Foreground or Background color.
We've clicked on the foreground color, or the top color.
You can select your color by using the Color Spectrum.
You can also select colors using the HSB or RGB models, or assign a hexadecimal color.
You can also check the box at the bottom left of the Color Picker to assign only web-safe colors.
The Color Swatches Palette
The Color Swatches palette makes it easy to store and use colors that you utilize often in your images. By clicking on a color in the color swatches, you can change the Foreground or Background color. You can even add or delete colors to the swatch to create custom colors, then you can save them for use in future images.
To open the Color Swatches palette:
Go to Window>Color Swatches.
Choose the swatch library name from the dropdown menu.
Now, to choose a foreground color, all you have to do is click a color in the palette.
To choose a background color, click Ctrl + the color in the palette.
Add a Color
Change the foreground color in the toolbox to the color that you want to add. This can be a custom color you created using the Color Picker.
Click the new swatch button  at the bottom of the palette.
Click to add color.
To Delete a Color
- Drag the color you want to delete to the trashcan at the bottom right of the screen.
- Or select the color you want to delete, then click on the trash can.
Selecting Colors Using the Eyedropper Tool
With the Eyedropper tool, you can copy a color in your image without having to go through the steps to select a swatch. If you want to save the color, however, make sure you add it to the Color Swatches palette.
To use the Eyedropper tool:
Select the Eyedropper tool  from the toolbox.
Point the eyedropper on the pixel color that you want to copy to change the foreground color.
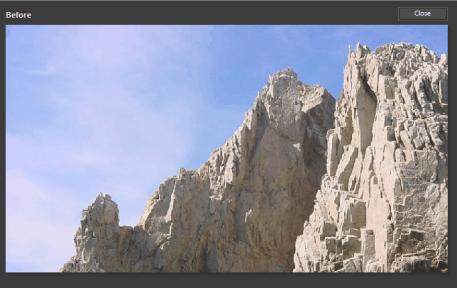
In this example, we're going to change our foreground color to the color of the rock in this image:
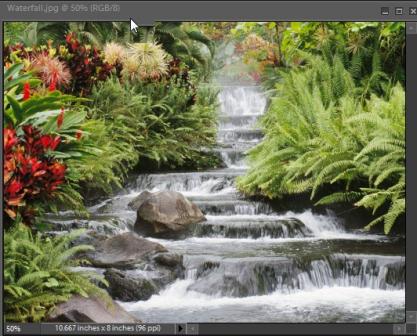
We'll point the eyedropper at the rock, then click.
The foreground color changes to the color of the rock, as seen below.
 to
to 
To change the background color, simply hold down the Alt button while clicking the eyedropper.