Microsoft Outlook 2010 is the email client and personal information organizer that comes with the Microsoft Office Suite. Unlike other email programs such as Windows Live Mail, Outlook 2010 gives you several ways to manage and organize your personal information, manage your time, organize your contacts and make the most hectic person's communication online a lot simpler and easier.
If you've used Outlook before, this may seem more like a refresher to you, as well as a chance to get acquainted with the 2010 version and learn some advanced features. But if you've never used Outlook before and are feeling lost because of all its features, don't worry.
Getting Started
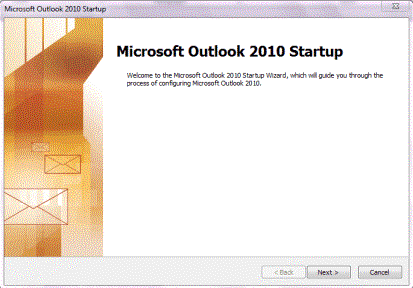
If this is the first time starting Outlook 2010, the first thing you're going to see when you open the program is the wizard. This wizard will guide you through all the information you need to configure Outlook to send and receive your emails.
Above is the first window you'll see. Simply click Next, and the window below will appear.
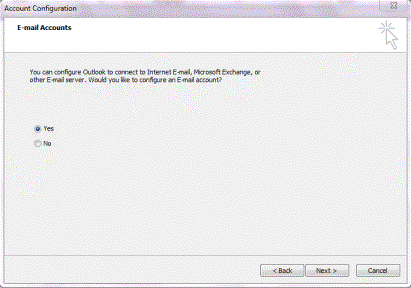
In the window above, Outlook asks you if you want to connect to an email server. Select Yes if you want to be able to use Outlook to send and receive email, then click Next.
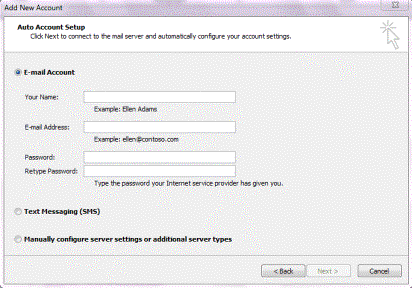
In the snapshot below, you'll see that the next thing Outlook is going to want is your name (as you want it to appear in the subject line of an email), your email address, and your password that has been given to you by your ISP for your email.
You can also choose if you are configuring Outlook for text messages or an email server. If you're setting Outlook up to check email on your computer using a regular email address, check Manually Configure Server Settings or Additional Server Types. Then, click Next.
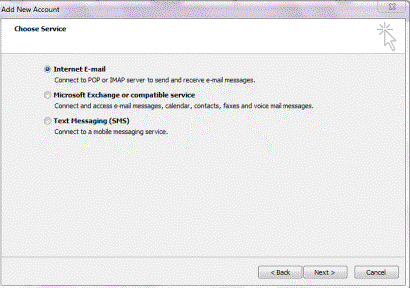
Now, choose what type of service you want to set up (pictured above). We've chosen Internet mail because we want to use Outlook to check the email on our server. This will be the option you choose if you want to check email from Hotmail, Yahoo, Gmail, or your own specific domain.
Click Next.
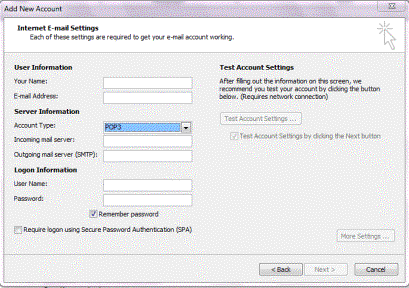
The next window you'll see will look like the one below. Enter in your name and the email address that will correspond to the account. Then enter the server information that your ISP gave you. If you want to test the account settings to make sure they work, you can do that on the right. Click Next when you're finished.
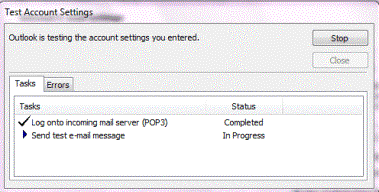
The test window (shown below) will appear as Outlook attempts to send and receive email using the configurations you entered in the previous window.
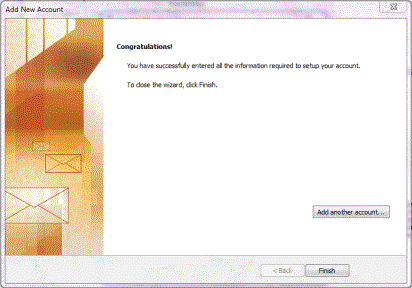
Once everything is okay, the next window you see will be to let you know that your account was set up successfully. Congratulations! You're now ready to begin using Outlook 2010.
The Outlook Environment, Ribbon, and Toolbars
Outlook 2010 is organized differently than any other Microsoft Office program. All the work that you can do in Outlook is separated into modules - or sections. Outlook 2010 has these modules:
o  Mail. By clicking the mail button and going to this module, you will be taken to your inbox where you can send/receive mail, as well as compose new emails.
o  Calendar. This shows your schedule and all your appointments.
o  Contacts. Shows you all of the names and addresses you've saved, as well as new ones you might add.
o  Tasks. This is simply your To-Do list.
In addition to these main modules, you also have:
 Notes. This is just as it sounds: a module where you can keep notes.
 Folder list. This displays your Outlook folders. You can just click on a folder to see its contents.
That said, when you open Outlook 2010, you will be taken to the Mail module, as shown below.
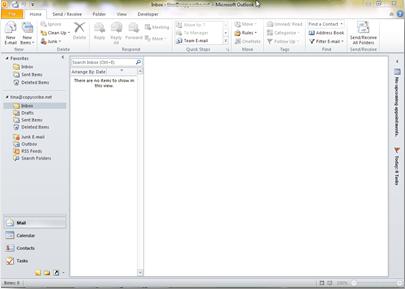 |
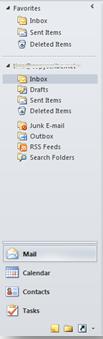
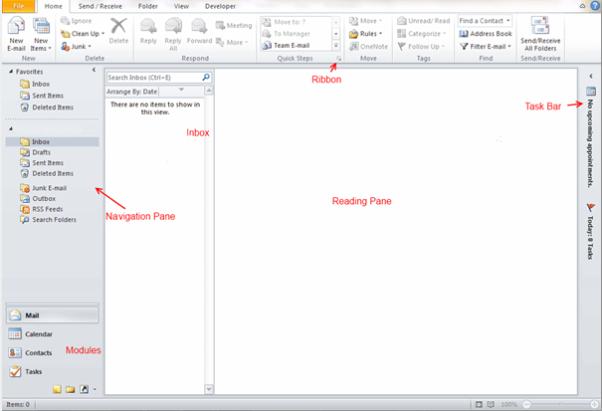
To the far left, you have the Navigation Pane. This helps you navigate through the Mail module. At the bottom of the Navigation Pane, you'll see the other modules listed. You can switch between modules by clicking the one you want in the Navigation Pane. The Navigation Pane will appear in all modules. You can click on the chevron (or left pointing arrow) at the top right of the Navigation Pane to make it disappear from sight.
Next to the Navigation Pane in the Mail module, you have your inbox as well as buttons to navigate to other modules. This is where you will see all new emails as Outlook downloads them for you.

Next to your inbox, you have the Reading Pane. This is on the right side of the Outlook window and takes up the majority of space. If you click on a message in your inbox, it will be displayed in the Reading Pane for you.
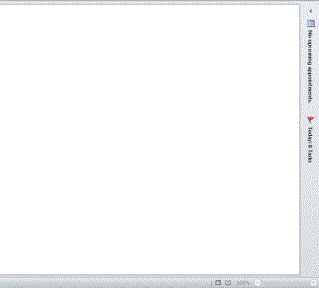
The To-Do Bar
The To-Do bar is a region where you can go to manage everything that you have to do. It shows your appointments, tasks, and lets you add things that you need to do. Of course, you have the Task List in the Task module where you can track projects and errands, but this allows you to quickly add things you need to do from any module. For example, if something comes in email that you need to add to your list of things that you need to get completed.
Just click on the little chevron to the right of the Reading Pane to access the To-Do Bar.
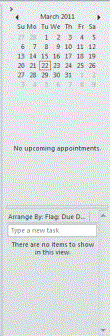
To add something to the list, click on a date on the little calendar. This window will appear:
You can now add the things you need to do.
The Folder List
By clicking on the Folder List at the bottom of the Navigation Pane, you can see all your Outlook folders. This includes any folders that you've created as you use Outlook for emails or tasks.
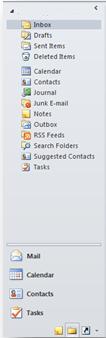
You can see all the folders in the snapshot above. You'll see all your folders for mail, but you'll also see folders that represent other modules such as Task list, Calendar, etc. The only time you must use the Folder list is when you want to create a new folder.
The Ribbon
If you've used other Microsoft Office 2010 products, then you're already familiar with the Ribbon. The Ribbon is located at the top of your Outlook window below what used to be called the Menu bar (File, Home, Etc.). We've pictured the ribbon for the Mail module below.

The ribbon is broken down first into tabs (File, Home, Send/Receive) and then into groups. The tab you click on gives you a broad description of what you can do within that tab. The groups within a tab represent different types of tasks that you may do. For example, in the New group, shown above, you can create new things such as emails and items.
Buttons are located within each group. In the Delete group, you have buttons to delete things. In the Respond group, you have buttons to respond.
Just to make sure you know your way around Outlook 2010 we've inserted a snapshot of the Outlook window below with the different parts that we've discussed labelled for you. Please study this if you aren't yet sure where everything is at.
Accessing Help
 ), or simply hit F1.
Address Books
About Address Books
If you've used other email programs before such as Windows Live Mail, you already know that you can have several address books. You can organize them by different types of contacts, such as work, family, friends, etc. Outlook uses several different address books itself, but they are already created for you. They are a part of Microsoft Exchange server. Just like with other email programs, these address books are several separate lists of names and email addresses.
If you click on the Contacts button in the Navigation Pane, you'll then see the Outlook Contact lists (pictured below).
This contains all kinds of personal information for your contacts. However, an Address Book is what you see when you click on the To button in a new message. (Pictured below.)
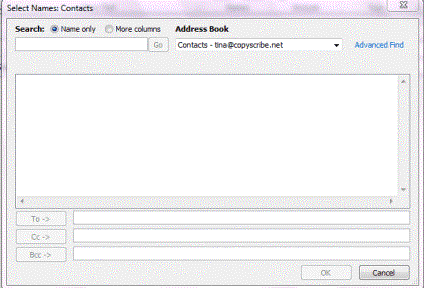
This address book focuses on email addresses only. The Contacts gives all information that you have about any particular contact.
Listed below are the different address books that you have in Outlook.
The Global Address List
The Global Address List is for corporate networks and contains the email addresses of everyone in your company. This is created by your system administrator so that you don't have to search for an email address of someone within your company.
The Contacts Address Book
The Contacts Address Book is more like your personal address book. It is simply a list of email addresses from your Contacts list.
Additional Address Books
These are created if you create additional folders for Outlook contacts. These folders become separate Address Books. A system administrator can also create Address Books.
Adding New Contacts
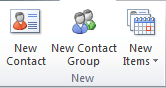
Adding contacts in Outlook 2010 is unbelievably easy. Simply click the Contacts module in the Navigation Pane, then click New Contact in the ribbon in the New group.
A window will open up that allows you to add as much or as little information about the contact as you wish.

Now, click the Full Name button. This dialogue box will appear:
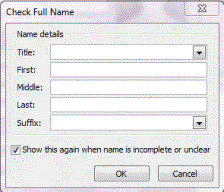
Click the downward arrow to select a title, such as Mr, Mrs, etc.
Click the First textbox to type the contact's first name.
Type a middle name or initial in Middle, and their last name in Last.
If there's a suffix such as Jr., click the downward arrow to select it. You can also type it in the box. Click the OK button.
Now you're back to the New Contact Form. You can enter as much or as little information as you like. You don't have to fill in every box. If there's a dropdown list beside a text box, you can choose an option from the dropdown list, or type in your own. It is not mandatory that you select an item from the dropdown list as it is with other programs.
You can also select how the contact is filed. If you don't want to file it by someone's last name, for example, you can click in the File As box and state your filing preference.
Click in the Email text box and type the contact's email address. You can also add a website address if you want to link to that from the Address Card.
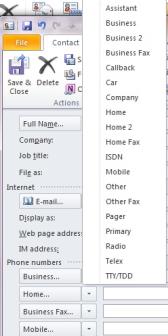
Also, you can enter business phone number and home phone by entering the numbers in the appropriate boxes in the Phone Numbers section. However, you do not have to add Business, Home, etc. You can click the downward arrow beside Business, Phone, etc. and select from nineteen different ways to classify phone numbers. See the snapshot below to see what we mean.
In the Address section, you can do the same thing and choose from Business, Home, or Other. If this is the mailing address where you send mail to, make sure the This is the Mailing Address box is checked.
You can simply click in the Notes section and add anything you want about or regarding the contact.
When you're finished, click Save & Close on the left hand side of the ribbon.
Viewing Contacts
Once you've entered your contacts, you have several ways in which you can view them. The way you view them will be determined by how you want the information arranged. These are called views. Outlook 2010 comes with 5 to 12 predefined views in each different module. Plus, you can easily alter any view. You can then name and save the altered view to use again in the future.
Here's how you change the view:
1. Click the Contacts button in the Navigation Pane.
2. Pick the view you want from the Current View category in the ribbon.
Now the view appears. If you select Business Cards view, you'd see something like this:
To create a new view, click the downward arrow in the Current View group. Select Manage Views.
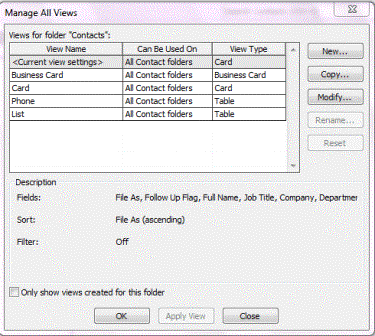
In the window shown above, you'll see all your current views and what types of folders it can be used on. You'll also see the view type. To modify a view, click Modify. You'll then see this window:
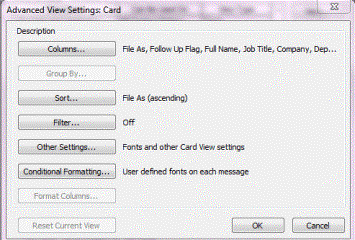
You can now alter the columns, how your contacts are sorted in that view, the fonts, etc. Click OK when you're finished.
To add a new view, click Manage Views on the downward arrow in the Current View group again.
Click New.
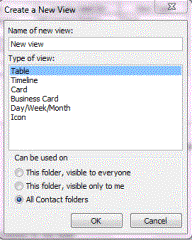
Now, create a name for the view, then select the type of view. Also select who can view this view. Click OK.
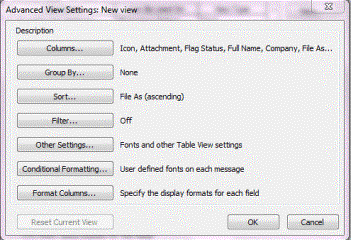
Next, specify the columns, etc. just like you did when you altered a view. Click OK when you're finished.
Outlook Contact Options
Contact options allow you to specify how names are entered into your Contact Lists, such as Last, Middle, First or First, Middle, Last, as well as how they are filed. You can specify preferences to help customize Outlook to better suit your needs.
To set your options for Outlook 2010, click on the File tab. You'll see the window below.
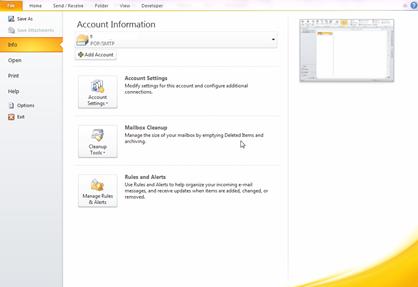
Now click Options on the left.
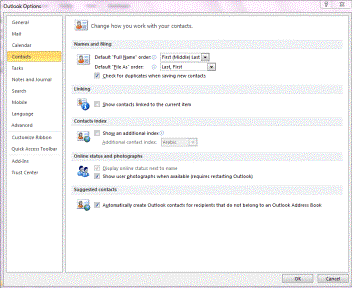
All the options you can select are simple and self-explanatory. Set your options, then click OK.
Contact Folders
When you open the Contacts module, your contact folders are located on the left hand side of the screen, in the Navigation Pane, as shown below.

To create a new folder, right click on any existing folder, then select New Folder from the dropdown list.
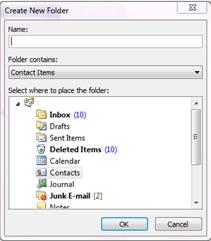
Enter the name for the folder, then specify Contact Items from the Folder Contains dropdown list. Your new folder will appear in the Navigation Pane. You can now add contacts to it.

Adding Contacts from Email
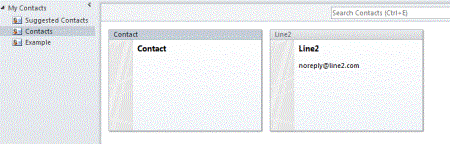
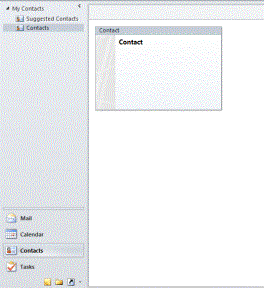
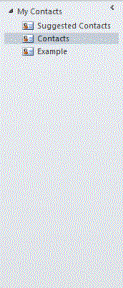
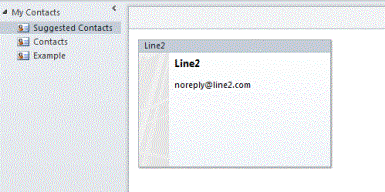
Let's say that you receive an email from someone, and you want to add that person to contacts. If we refer back to the Contacts module and look at the Navigation Pane again, you'll see a folder called Suggested Contacts.
If you reply to an email, Outlook will add that email address to Suggested Contacts for you.
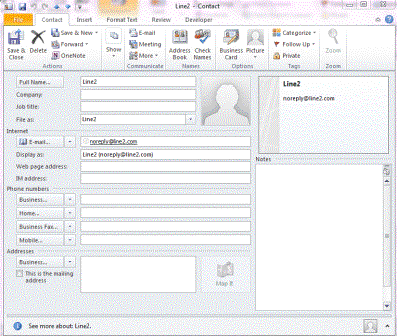
Now, if you double click on the contact, the Contact information box will open. We already showed you how to fill that out.
Once you've filled out the information for your contact, you can now just drag and drop the contact (we have it in Business Card view) to the folder where you want the contact to be. To drag, just click your mouse and hold it down over the contact (for our example, it would be over the business card), then, while holding the mouse button down, drag it to the folder you want to place it in (in the Navigation Pane) then release. We've dragged ours to the Contacts folder. You can see that it now appears there.