What's New In Microsoft Excel 2010
There are plenty of new features in Microsoft Excel 2010 to get excited about and to make using the program easier than ever before. For now, let's introduce those of you who are familiar with Excel already to a few of them.
- Backstage View – Easy Access to behind-the-scenes functions like printing, protecting and sharing files.
- Customizable Ribbon – Create your own tabs and groups, and add or remove buttons.
- Integration with Excel Web App – Create, edit, and share your Excel files from any computer in your web browser.
- Background Removal Tool – Remove backgrounds from pictures.
- Sparklines – Allows you to create a visual representation of the information in a range of cells – in a single cell.
- Improved charting
- Improved PivotTables
Navigating MS Excel 2010
In order to be able to use MS Excel 2010 efficiently, it's important to know your way around the program. Knowing where ribbon is or where a certain group is located will be important. It's useless to know how to use a program if you can't navigate and find what you need.
That said, let's start with the layout of MS Excel 2010 and identify (and be able to locate) the major components. We'll start at the top.
When you open MS Excel 2010, you'll see a workbook in front of you. At the very top, is a bar going across the screen that reads "Microsoft Excel – Book1." This bar is called the title bar. It's pictured below.
The title bar will always tell you the name of the file you have open. The default file name for all Excel workbooks is Book1. If you have more than one new, unsaved file open, then Excel will assign each a number, in chronological order. Book1, Book2, Book3, etc.
To the far right on the title bar, there are three buttons that allow you to minimize the screen  , maximize the screen
  , and close out MS Excel 2010
  .
.
To the far left, you can click the Excel icon to minimize, maximize, or close the screen. Next, you can click the picture of the little disk to save a file, and the arrows to undo and redo. By clicking the downward arrow, you can access the Quick Access Toolbar. This is a way to access features you use frequently with quickness and ease.
Below the title bar is what's termed the ribbon. The ribbon houses all your toolbars. As you can see below, the ribbon contains the tabs: File, Home, Insert, Page Layout, Formulas, Data, Review, View, and Developer. Within these tabs are "toolbars." Each toolbar is divided into what is called a group.
If you look at the snapshot below, the PivotTable and Table tools are together in the Tables group. The toolbars for pictures, clipart, and shapes are in the Illustrations group. This makes MS Excel 2010 easier to navigate than 2003 and previous versions (once you get used to it).
Here is a zoom of the left and right sides of the Insert ribbon shown above


On the right side of the window – across from the tabs- you'll see a blue circle with a white question mark inside it. Click on this to access Help. Type in what you want to learn to do, such as "format a cell," and Excel will give you a list of answers that match your query.
Then, of course, below the ribbon are the spreadsheets that you'll use in MS Excel 2010. A picture of a new file in MS Excel 2010 is shown below. Below that is a zoom of the left and right sides of this screen

 Cells, Rows, and Columns
 Below the toolbar area, you'll see a blank worksheet (if you opened a new Excel file). Worksheets are comprised of cells. One cell is simply one block on your screen.
Individual cells are organized into rows and columns. Rows are cells that go horizontally across the screen. Columns are vertical.
Columns are labeled with letters. In MS Excel 2010, rows are listed by number.
You can use this to coordinate the exact location of a cell. The exact coordinates of the cell below is A1.
To discover the coordinates of a cell, or the name of a cell, simply look above column A. You'll see a box (using the example above) that has A1 inside it. This is the Name Box. A closer snapshot is below.
Formulas The formulas and equations that you enter will be entered in and displayed in the Formula Bar. It is located to the right of the Name Box.
The Formula Bar has the fx to the left of it.
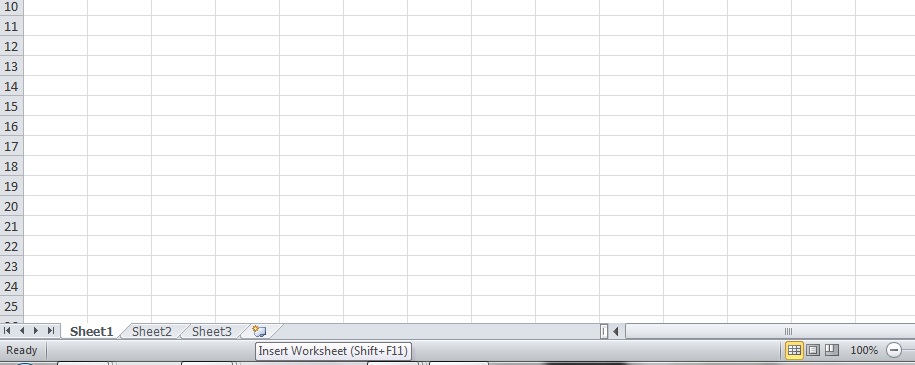
Sheet Tabs
Each new file that you open in MS Excel 2010 is comprised of three worksheets. These three worksheets comprise a workbook. You can add or subtract worksheets, as you'll learn later. For now, it's important to know how to access the sheets.
At the bottom of your spreadsheet in MS Excel 2010, you'll see Sheet Tabs.
In the picture above, Sheet 1 is in white and the other two sheets on in gray because we have Sheet 1 open on the screen. If we wanted to view Sheet 2, we'd just click on it, etc.
-------------------------------------------------------------
|
Excel 2010 Changes and New Features
Excel 2010 introduced a number of new features, including an improved ribbon, an Excel web app and Microsoft Office Backstage View.
The ribbon was first introduced in Excel 2007, but in Excel 2010 you can now customize it. You can create your own tabs and even make your own groups.
To customize the ribbon, go to the File tab (which is where the newly introduced Backstage View is) and click Options. From the options window, click Customize Ribbon. You'll see something like this:
On the left are the commands you can choose from. On the right are the tabs and the groups within those tabs. For instance, the Home tab has been expanded so we can see the different groups. Clicking the plus sign expands a list, clicking the minus sign hides it.
Uncheck a tab to disable it.
Use the buttons at the bottom right to add new tabs or groups or to rename them. Click OK when finished.
Backstage View
The Backstage View is where you go to do things that relate to the management of a workbook. You can save files from here, open new ones, choose a security theme, etc.
|
Worksheets and Workbooks
The Definition of Worksheets and Workbooks
There are three default worksheets when you open a new MS Excel 2010 file. You can add or subtract worksheets. All of the worksheets included in your MS Excel 2010 file comprise a workbook. The default MS Excel 2010 setting gives you three worksheets in a workbook.
Opening Worksheets and Workbooks
When you open a new or existing MS Excel 2010 file from your computer, you are opening a workbook. Individual worksheets within the workbook may be opened by clicking on the Sheet Tabs at the bottom of the spreadsheet screen.
Labeling and Naming Worksheets The default names that MS Excel 2010 assigns worksheets are Sheet1, Sheet2, Sheet3, etc. However, as you use Excel to create your own spreadsheets, you'll want to assign different names so you know which spreadsheets contain what information.
Let's rename Sheet1 for this example.
The easiest way to rename a sheet is to move the arrow over the sheet tab you want to rename, then right click on it with your mouse.
Select Rename.
When you do this, Sheet1 will be highlighted (selected). You can type in the new name.
Adding and Deleting Worksheets
To add a worksheet, go to the Sheet Tabs. Click on the worksheet name that will come afterthe new one you're going to add. Right click and select Insert. The window below will appear.
Once you insert your new worksheet you can rename it whatever you wish
Note: You can also go to the Home tab on the ribbon. Go to the Cells group and click Insert, then select Insert Sheet.
Deleting Worksheets
To delete a worksheet, go to the Sheet Tabs, select the worksheet that you want to delete, right click, and select Delete.
Hiding/ Unhiding Worksheets
Hiding a worksheet allows you to remove it from view of others or simply get it out of your way. When you hide a worksheet, you or anyone else accessing the file will not be able to see it. There will not be a Sheet Tab for it. You'll have to unhide it to be able to view it again.
To Hide a Worksheet:
Click on the Home tab and go to the Cells group. Click Format.
Select Hide and Unhide from the Visibility group in the dropdown menu, then Hide Sheet.
To Unhide a Worksheet:
To unhide a worksheet so that you may view it again, follow the same steps as you took to hide the worksheet, except this time select Unhide Sheet.
Hiding Columns and Rows
You can also hide data by hiding cells, rows, and columns within a worksheet. There are a few reasons you may choose to do this. It may be to simplify the worksheet and make it easier to navigate or to protect certain information.
Columns
As with all Microsoft products, there is more than one way to do a certain task. You can use the steps above for hiding sheets to hide columns and rows. But there's also another way. Let's learn how to hide columns by using the Column Header Bar. This is the bar where the column letters are: A, B, C, etc.
Remember, when you hide a column, data in that column can still be used in the worksheet.
To hide a column:
Right click on the column header of the column that you want hidden. We're going to use column A in this example.

When you right click on the column, the entire column will be highlighted, and a menu box will appear. Select Hide from that menu box. This will hide the column.
To unhide the column, follow the exact same steps and, instead, select Unhide.
Hiding Adjacent Columns
Let's say, for example, that we want to hide columns A, B, and C. The first thing we're going to do is left click the mouse on the column A header. This selects column A. Keeping the left mouse button pressed in, we're going to drag it over columns B and C to select them as well. See the screenshot below.

When the columns are highlighted, right click the mouse and select Hide. This will hide all three columns.
Hiding Separated Columns
If you want to hide more than one column, but the columns aren't adjacent, there's an easy way to do it. Simply click on the first column to be hidden. Press and hold down the control key on your keyboard while you left click on the other columns to be hidden. Now, right click on one of the columns that you selected and choose Hide from the menu. This will hide all the selected columns.
Hiding Rows You can easily hide rows in MS Excel 2010 in the exact same way that you hide columns. The only difference is that you're going to click on the number of the row that you want to hide. In the snapshot below, we clicked on row 1. This selected (highlighted) the entire row. Next, right click your mouse and select
Hide.

Note: Remember, to unhide a row, you follow the exact same steps, but select Unhideinstead.
Saving Workbooks Since worksheets are part of a workbook, when you save a file in MS Excel 2010, it will be saved as a workbook. It doesn't matter if you have one or ten sheets – it will be saved as a workbook.
Naturally, MS Excel 2010 offers you several ways to save a workbook. To decide which method you need to use, you need to determine whether you want to save the file under its current name or rename it. If it's a new file/ workbook, of course, you'll want to give it a name so that you can identify the file in the future.
To save files that you want to name/rename:
Click The File tab. Select Save As.
In the File name box, you can type in a name for your workbook. If you do not assign it a name, MS Excel 2010 will do it for you. The default file name is Book1.
Saving an Existing File
If you need to save a file / workbook, but do not need to rename it, you can simply go to
theFile tab, then click Save on the left or click the

icon in the Quick Access toolbar.
Headers and Footers
To add headers or footers to your Excel worksheets or workbooks:
Click the Insert tab. In the Text group, click Header & Footer.
Click on "Click to Add Header" and a cursor will appear. You can start typing your header. Click anywhere on the spreadsheet when you're finished typing.
If you scroll down, you'll also see "Click to Add Footer." Follow the same instructions for adding a header.
Customize Headers and Footers When you click the Header and Footer button, you'll also notice a new toolbar opens in the ribbon (pictured below).
Below are zooms of the previous ribbon, left and right


You can use this to add page numbers, the date, time, as well as specify the design of your headers and footers. For example, perhaps you want two different headers: one that will appear on even numbered pages and one that appears on odd pages, much like you'd see in a book or magazine. The best way to learn how to customize your headers and footers is to take the time to experiment. All the options given to you in the Header & Footer tools are easy to use and self-explanatory.
About Printing Worksheets and Workbooks
When you're finished creating the worksheets in your workbook, you may want to print them out. Printing in MS Excel is very easy. It's even easier in Excel 2010.
With previous versions, you had to use Print Preview to see how your worksheets looked before printing, then go to Print to actually print them. In Excel 2010, this is all combined into one step.
To print your workbooks and worksheets, click the File tab then Print

On the left hand side, you'll see all the options that you had with the Print feature in previous versions of Excel. On the right hand side, you'll see the print preview.
To prepare your workbook or worksheets for printing, first select your printer in the Printer section on the left.
Then, specify your settings.
Under Print Active Sheets select what parts of your workbook that you want to print. This allows you to print all or just portions of your file. You can choose:
- Print Active Sheets to print the worksheet that is currently active (or being displayed) in Excel.
- Print Entire Workbook to print all worksheets in the workbook.
- Print Selection to print just the cells that you have selected.
Under Collated, you can select how you want multiple copies to print. For example, let's say you print 10 copies each of Sheet1 and Sheet2. Do you want the printer to print 10 copies of Sheet1 first, followed by 10 pages of Sheet 2? Or would you prefer to print Sheet1, Sheet2, then Sheet1, Sheet2, etc., until then copies have been printed?
Next, decide if you want to print in Portrait (the shortest side of the paper is horizontal) or Landscape (the longer side of the paper is horizontal) orientation.
Finally, select Paper Size, Margins, and if you want to print the worksheets at their full size or scale them down to smaller sizes to fit easier on paper.
Now, let's look at the right side of the Print screen – or the print preview. In the right bottom corner, you'll see these two icons:
The first icon (from left to right) is the Show Margins icon. When you click this, Excel will show you the margins as you have them set:
The next icon is Zoom to Page (highlighted). This shows you the active worksheet as it appears at 100% magnification.
You can flip through to view other worksheets by either entering a page number or pushing the back or forward arrows located in the left hand corner of the print preview area:
Set Margins for Headers and Footers To enter a new distance from the top of the page to the header, change the number in the header box.
Note: Do not switch over to the Header/Footer tab.
To enter a new distance from the bottom of the page to the footer, change the number in the footer box.
When you're finished, click OK.
Again, you can view your margins in the preview section to see how the changes will look on the printed worksheet.
Select Print Area Selecting the print area simply means that you will define the parts of the spreadsheets and workbooks that you want to print. If you do not wish to print an entire workbook or an entire spreadsheet, you'll need to do this.
To do this, click on the File tab, then Print.
Click Page Setup (which is a link located at the bottom of the Print dialog box). The Page Setup Window will appear as shown below. Then click the Sheet tab..

In the Print area box, select the range of cells that you wish to print. For example: A1: B10. This would print all cells in columns A and B, and rows one through ten.
In the Print titles section, you'll set the row that you want to set as a title. If it's row 1, you would type $1:$1. This row will print at the top of every page. You could also type $1:$2 to print rows one and two at the top of every page.
For columns that you want to appear on the left of every page, type, for example, $A:$C to print columns A through C on the left of every page in the Columns to repeat at left box.
In the Print area, you can select preferences, including if you want the gridlines to appear on your printed worksheet.
Using the Page order section, you can tell MS Excel 2010 in which order to print your sheets.
Print a Range of Pages If you don't want to print the entire worksheet, you can set the pages that you do want to print.
Click the Print Active Sheets under Settings. We already talked about this earlier. Here you can print active sheets, the entire workbook, or a selection.

Below this box, you'll see Pages. You can enter the pages that you want to print. The pages must be within a range. For example: pages 2 through 5.
Printing
To print your MS Excel 2010 workbooks and worksheets, click the File tab, then click the Print button.