In this article, we're going to start talking about sending and receiving emails. This article is going to be very basic, so chances are, if you've used another email program before � even if it wasn't Outlook � this article will be very easy for you.
Creating Email Messages
Creating new email messages in Outlook 2013 is easy. All you have to do is start Outlook, then click the New Email button in the ribbon under the Home tab.
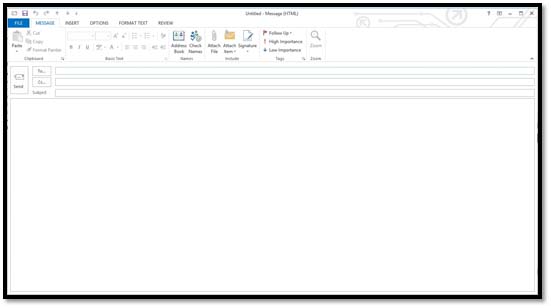
A new, blank email will open up.
If you already have Outlook started and are in a different module, simply click the Mail label at the bottom of the Folder Pane, then New Email in the ribbon.
Addressing Messages
Once you have a new email in front of you, it's time to address it to the intended recipient(s). You have a few options to do this:
1. You can type in one email address to send an email to just one person, or multiple email addresses for multiple recipients. For multiple email addresses, separate each one with a semi colon (;).
2. You can also click the To button at the top of the email message and find names in your address book. Double-click the names of people you want to select to receive the email message, and they'll be added for you. We'll cover address books later in this article.
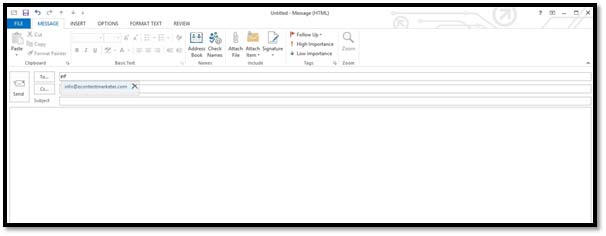
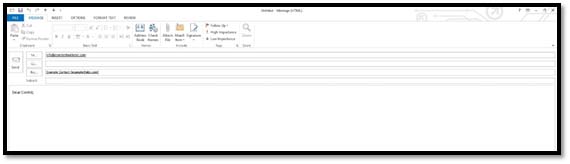
3. You can also start typing email addresses/names into the To line and Check Names will look up the address for you based on addresses you have in your contacts. Just make sure that it selects the right address. As you can see in the snapshot below, we typed the letter "I" and Outlook gave us the matching names/addresses from our Address Book. We can either click on the address it suggests (the address is highlighted in blue) or keep typing. Outlook 2013 will continue to offer suggestions.
To, CC, and BCC
In the last section, we started to learn how to address email messages. It's easy enough to start typing an address in the To line. However, you can also type addresses into the CC line. CC stands for carbon copy. You can also type addresses into the BCC line, or blind carbon copy.
Let's cover all three of these options.
The To Line
The To line appears below. In this line, you can put the email addresses of everyone that you want to send the email to. As we said, you can also click on To, so you can add names and addresses from your address book.

The CC Line
The CC line appears below the To line. CC stands for Carbon Copy. Let's say you're sending an email to a co-worker about a project the two of you are working on. You might put your co-worker's email address in the To line because the email is to your co-worker. However, you might want to send other people a copy of the email, such as your boss or other people involved in the project, just to keep them in the loop.
Here's the CC line:

Let's clarify just in case we've confused you. The To line is for anyone you are sending the email to. If you want to send copies of the emails to others, use the CC line. Of course, you can put all the names in the To line, if you want.- That's up to you. But email etiquette in this day in age requires that you use the To and CC lines when sending email to people, and sending "reference" copies to others.
The BCC Line
The BCC line does not appear in a new email message by default. To make it so that it appears, click on To or CC. At the bottom of the window that appears, you'll see BCC. Click on the names in your address book that you want to BCC. As you can see below, they then appear in the BCC line.
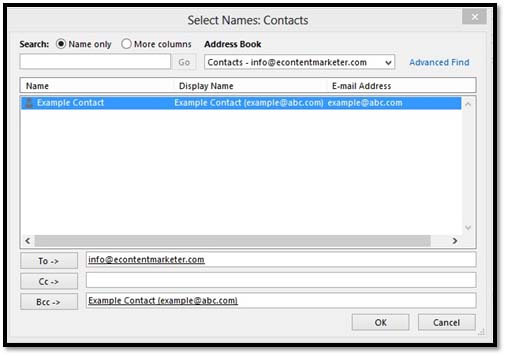
Click OK.
BCC stands for Blind Carbon Copy. Any address that you put in this line will not appear on the email when your recipients receive it. This means that you can send an email to your co-worker by putting his/her address in the To line, berating him/her for not doing his work, then BCC your boss. Your co-worker will never know you sent a copy to the boss.
Once you have your email addressed, you can enter a subject for the email in the Subject line.
The Subject Line is pictured below:

Composing Email Messages
Microsoft Outlook 2013 allows you to type an email message, of course, but it also gives you formatting tools to create a professional email message, much the same way as you can create professional documents in MS Word.
To compose an email message, simply click your mouse in the body of the email. A cursor will appear. The body of the email is the large white space below the subject line. When you see the cursor, you can start typing.
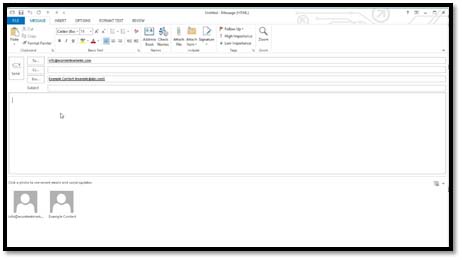
As you can see in the box above, the cursor is displayed in the far left. We can now start typing our email message.
Mail Formats
There are three mail formats you can choose from when creating email messages in Outlook 2013. Which one you choose will depend on what you want to send.
The three formats are:
- HTML
- Plain Text
- Rich Text
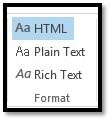
You can find these formats under the Format Text tab in the ribbon of your email message. You will only see the Format Text tab when you are creating, replying, or formatting an email. It does not appear on the main Outlook interface.
The three mail formats are located within the Format group.
Which format you'll want to choose when starting to create a new email message will depend on what you're sending.
Below is a description of the three formats.
- HTML is a web programming language used to create web pages. You may want to use this if you are adding images to the body of the email or using formatting, such as bullet points, bold, italics, etc.
- Plain Text. Plain text is just as it sounds: plain text. It doesn't allow for special formatting, such as bold, italics, or underlining.
- Rich Text . This supports formatting, including bold, italics, and underlining. However, RTF messages are usually converted to HTML when they're sent. Unless requested by the recipient or your employer, you may just want to send HTML.
Spell Check
Spell Check is a feature that is common in the Microsoft Office suite of products. If you've used it before with other programs, then you already know what we're talking about.
Spell Check allows you to check emails for common spelling and grammar mistakes before you send them. You should still read over your emails and check for errors yourself, but Spell Check is an added back up and will catch errors you might miss.
To use Spell Check in Microsoft Outlook 2013:
With your email open, click on the Review tab in the ribbon. The Review tab is not shown on the main Outlook interface. It only appears in the ribbon of opened email messages.
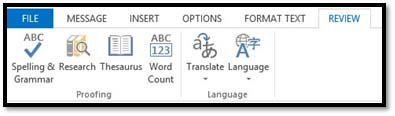
Click on the Spelling and Grammar button in the Proofing group.
Outlook starts to proofread your email.
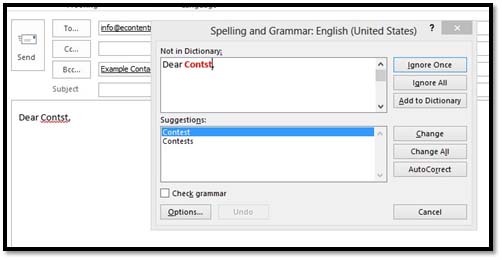
As you can see in the message above, the word "Contact" is misspelled. Spell Check underlined it in red in our email. When we clicked on Spell Check on the ribbon, it showed us that the word is not in the custom dictionary, and it gives suggestions to correct the spelling.
To use a suggestion, click on the suggestion you want to use in the Suggestions box, then click the Change button on the right. You can click Change All to change all instances of the misspelled word.
We can also ignore the fact that Outlook thinks it's a misspelled word and accept the misspelling as correct, by clicking the Ignore Once button. That will leave our typo as is.
We can ignore all instances where this typo exists by clicking the Ignore All button. Sometimes a word isn't misspelled. It's just not a common word and not listed in Outlook's dictionary. In cases like this, you'd want to Ignore All.
You can also add this word to the dictionary by clicking Add to Dictionary. If this is a word that you commonly use and want to prevent Outlook from marking it as a misspelled word, it's your best bet to add the word to the dictionary. If you click on Add to Dictionary, Outlook will add the word for you. It's that easy!
AutoCorrect
AutoCorrect automatically corrects commonly misspelled words as you type. However, in order for it work best, you need to configure the AutoCorrect feature.
We'll show you how to do that, as well as how to turn Spell Check on, so your emails are automatically proofed for you. You won't have to click the Spell Check button. That's a real time saver!
Go the File tab and click options on the left. Then click on the Mail category on the left.
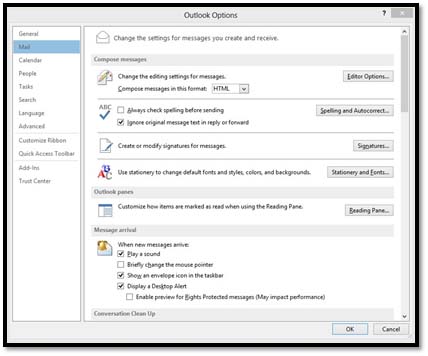
Under Compose Messages, go to the ABC with a check mark. If you want Outlook to automatically check spelling before you send an email, put a check in this box. This way, if you forget to run Spell Check, Outlook does it for you. It is unchecked by default.
Now, click on the Spelling and AutoCorrect button to set options for AutoCorrect.
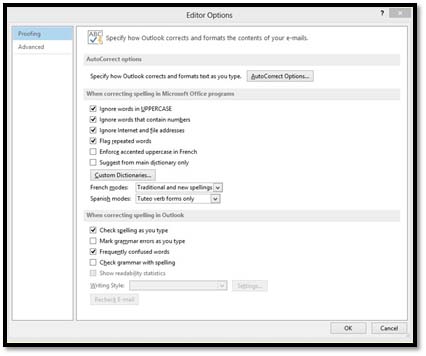
In the window above under the Proofing tab, specify how you want Outlook to correct your documents. If you want to use AutoCorrect, click the AutoCorrect Options button.
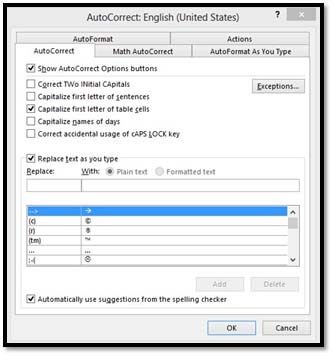
Now, specify what you want Outlook to correct for you as you type. Remember, Auto Correct means Outlook fixes errors as you type. You can also correct math, and format your text as you type, by clicking the appropriate tabs.
When you're finished, click OK.
Sending and Receiving Email
Sending and receiving email in Outlook 2013 is as easy as it gets. Let's go back to our email message:
To send this email, simply push Send (to the left of To, CC, etc.) Your email is then sent.
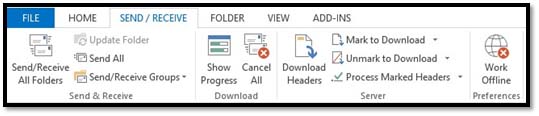
- To send and receive all messages, click Send/Receive All Folders.
- Select a folder from the Navigation Pane on the left, then right click on the Update Folder button in the ribbon. It will update that folder by sending and receiving all items that are queued or pending.
- The Send All button will send all unsent messages.
Note: If you only have one email account in Outlook 2013, you just need to click on your Inbox, then Send/Receive All Folders.
Reading Messages
Outlook 2013 gives you three ways to read the emails you receive. The first way is in the Information Viewer where your emails are shown in a list. This method of reading emails is new to Outlook 2013.
Look at our emails listed in the snapshot below:
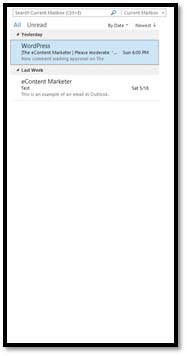
Look at the email we've selected. It's highlighted in blue.
First, we see the sender:
Next, we see the subject line, as well as the time and date it was sent to us:

Then we see a preview of the message:

We can preview one, two, or three lines of a message in the Information Viewer. We have ours set to one line.
To change the number of lines you can preview in the Information Viewer, go to the ribbon and click the View tab. Go to the Arrangement Group.
Click the Message Preview button and choose 1 line, 2 lines, 3 lines, or to turn the preview feature in the Information View off.

The second way you can view email messages is in the Reading Pane. This is located to the right of the Information Viewer.
If you click on an email in your inbox, you will be able to view it in the Reading Pane.
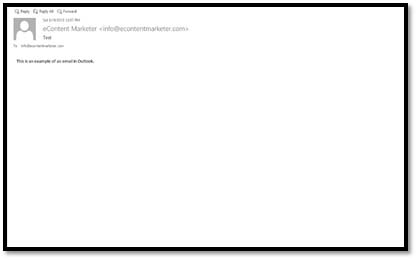
The other way to read emails is to open emails from your inbox. Simply double-click on any email (in the Information Viewer), and a new window will open with your email message. To close the email, click the "X" at the top right hand side of the screen.
Replying to Messages
When you receive an email message, you may want to reply to it, or send it to other people.
To reply to a message, you have two ways to do that. You can:
- Reply
- Reply All
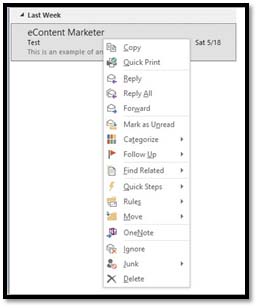
Reply means that you send a reply to the person who sent you the email, and only that person. To send a reply, right-click on the message and select Reply from the drop-down menu, as shown below.
Or double-click to open the email, then click the Reply button in the ribbon under the Message tab. You can then type your reply.

You can also reply to a message directly from the Reading Pane. To do this, click on the email you want to read in the Information Viewer. The email now displays in the Reading Pane.
Click Reply (or Reply All) at the top left of the email message.

When you do this, you can reply by typing out your message right inside the Reading Pane. This is new to Outlook 2013.
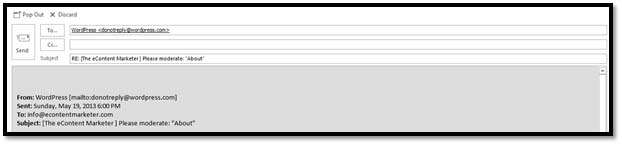
As you can see above, you can click "Pop Out" to open the reply message you're composing in a new window, or discard (delete) your reply to the message.
When you select Reply All, you reply to the person that sent the email to you, plus anyone else they sent the email to, including you. For example, if Doris sends an email to you, and she CCs 10 other people, when you select Reply All to answer that email, you will send a reply to Doris AND those 10 other people.
To use Reply All, follow the steps for Reply, but select Reply All, instead.
Forwarding a Message
When you forward a message, you take a message that someone else sent you, and you send it to other people. It makes sense, doesn't it? You get the message, then send it forward.
To forward a message, you can do one of two things. You can right click on the message (as shown below), then select Forward.
Or you can double-click on the message to open it, then select Forward from the ribbon under the Message tab.
You can also forward messages from the Reading Pane, just as we did above with Reply.
Add Attachments to Emails
If you've ever attached a file to an email before, then this is going to be easy for you. An attachment is a file (picture, document, spreadsheet, folder, etc.) that you attach to an email so that it sends with the email.
To add attachments to your emails in MS Outlook 2013:
Go ahead and create your email.
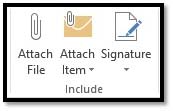
Click on the Home tab (in the email), go to the Include group and select Attach File.
You can then browse through your computer's files to find the file you want to attach. If you want to attach more than one file, repeat this process.
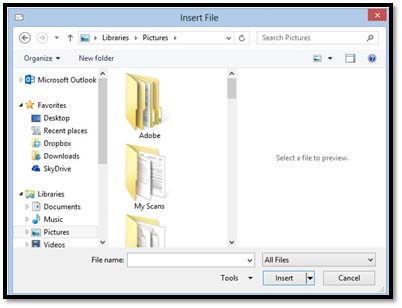
You can also attach files from your SkyDrive if you have SkyDrive set up.
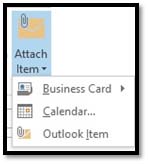
In addition, you can also attach items such as your business card, calendar, or Outlook items. To do this, click on Attach Item, then select the item you want to attach.
Previewing Attachments
Outlook 2013 makes it possible for you to preview attachments without actually opening the attachment. You can preview them in the Reading pane, right where the body of your email appears.
To preview an attachment in an open email, click on the email in the Information Viewer to display it in the Reading pane.
Below is our email open in the Reading pane.
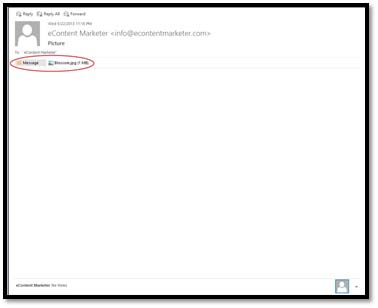
We've circled two buttons that are located in our message in the Reading Pane. The first button is for our message, where we can see the body of our message displayed. The second is for the attachment.
If you click on the attachment, it will display in the Reading pane.
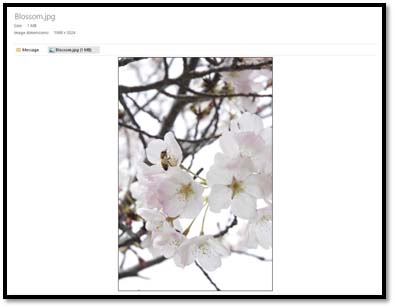
To return to the message, click Message.
That said, because of viruses that come embedded in attachments, you may not want to preview attachments at all. Outlook 2013 lets you preview attachments by default, so if you don't want to preview attachments, you must turn it off manually.
To do this, click the File tab, then click Options on the left.
Click Trust Center.
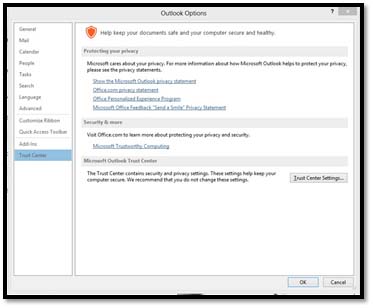
Now click the Trust Center Settings button, then click Attachment Handling.
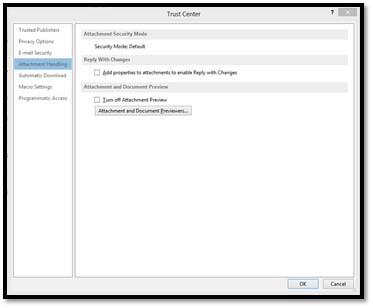
Put a check in the box beside Turn Off Attachment Preview.
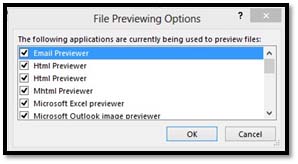
If you want to turn off a specific previewer, click Attachment and Document Previewers.