You can use the Bills page to easily manage your scheduled bills, transfers, deposits, and paychecks. What's more, you can select to view these in a timeline, a list, or calendar view.
In the screenshot below, we've viewed our bills as a list on the Bills page.
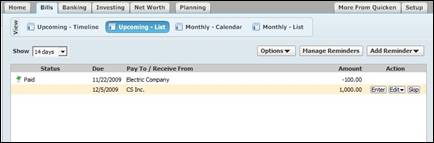
You can change the view by selecting the view that you want from the Action Bar below the tabs.
If you want to schedule a reminder for a bill on the Bills page, simply click Add Reminder, then choose Bill, Transfer, Paycheck, or Income from the drop down list.
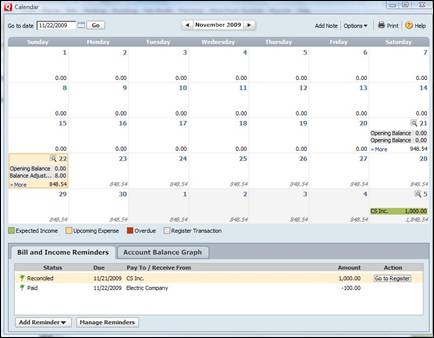
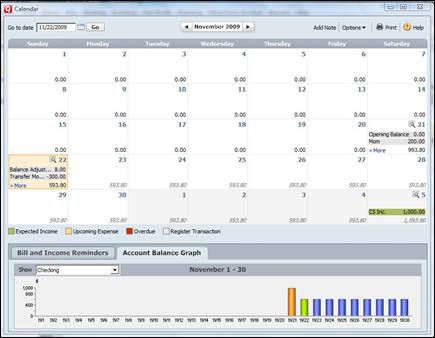
If you select the calendar view on the Bills page and click the Show Full Calendar button at the bottom right hand side of the screen, you will see a pop up window that contains a view of the financial calendar, the bill and income reminders you have scheduled, and an account balance graph. (See snapshot)
Using the Calendar
You can use the Quicken calendar to see daily or weekly views of your financial status. You can see daily available cash balances and a snapshot of your scheduled bills and deposits. You can also pay bills from your calendar if you use Quicken Bill Pay.
To access the calendar, go to Tools>Calendar.
If you want to view transactions from specified accounts on the calendar, click Options on the upper right hand side of the window, then choose Select Calendar Accounts.
Choose the accounts that you want to see on the account balances graph. The accounts you select will have a green check mark next to them.
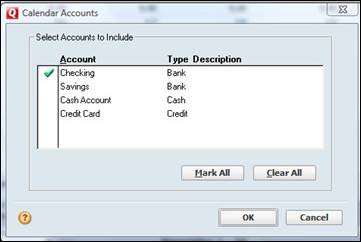
Click OK.
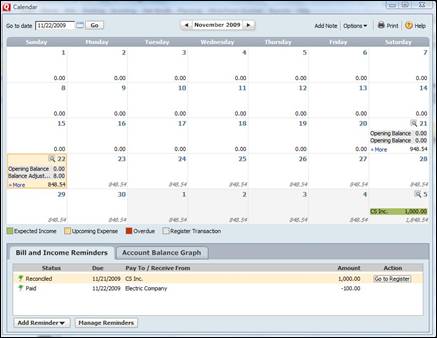
In the following snapshot, we chose to view our checking account on the account balances graph.
Now, if you want to view both recorded and scheduled transactions, go to Options again and select Show Recorded Transactions in Calendar and Show Scheduled Bills and Deposits in Calendar.
You can also add transactions using the calendar. Simply double click on the date for which you want to enter a transaction.
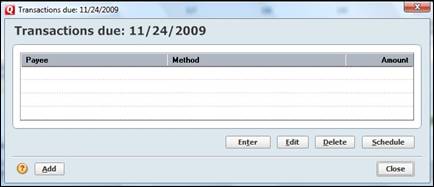
Click Add.
You'll now see this window:
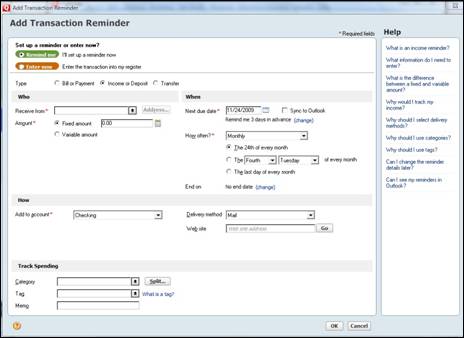
Specify if you want to set up a reminder or actually enter a transaction, then fill out the rest of the fields. You have already learned how to fill out these fields when you learned to schedule reminders. This should be easy.
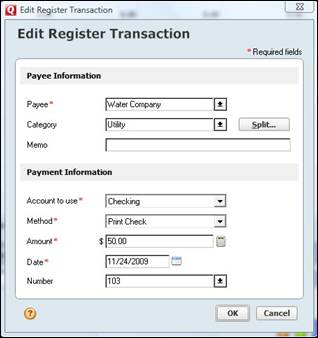
Did you know that you can also edit a transaction using the calendar? Simply double click on the date that has the transaction you want to edit.
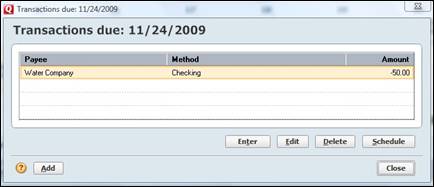
Click Edit in the box above.
This dialogue box will appear:
Did you also know you can schedule your updates in advance so they are automatically done for you?
You can schedule updates to get stock quotes, update your Quicken portfolio, and track your online activated accounts with financial institutions.
To schedule online updates, go to Tools>Schedule Updates.

If necessary, you can select the items you would like to update.
Then, you can decide what day of the week and what time. Also, you'll need to establish when you want to be asked for your Password Vault password.
Loans
Quicken allows you to enter and keep track of loans that you owe or that are owed to you. To enter a loan, go to Net Worth>Add a New Loan.
You'll see the following dialogue box. This will be one of several dialogue boxes that will ask you to fill in information regarding your loan. Although it will take a few minutes to get the loan set up, it's as easy as can be. It'll help if you have your loan balance, interest rate, and original amount of the loan in front of you � as well as the length of the loan.

Click Next.
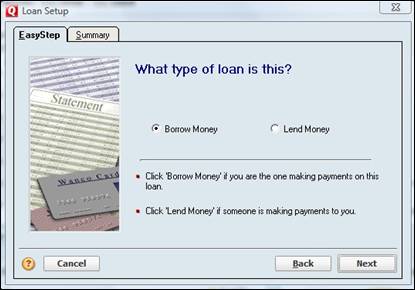
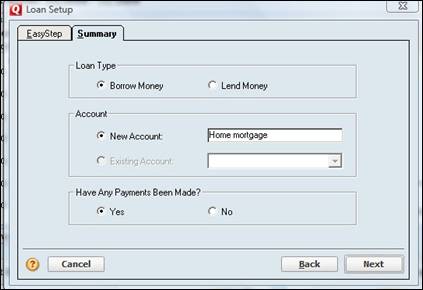
In the dialogue box above, you'll be asked if this loan is one where you've borrowed money � or if you've loaned money that's being paid back to you.
We're going to pretend that this loan is a mortgage, so we're going to select Borrow Money.
Click Next.
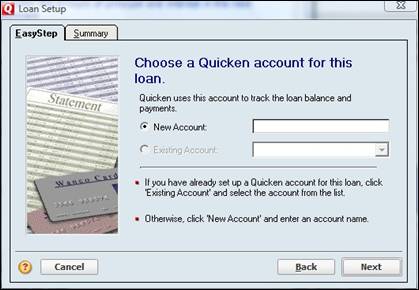
Enter a name for the new account. Give it a name that will help identify the loan to you. We've chosen Home Mortgage.
Click Next.
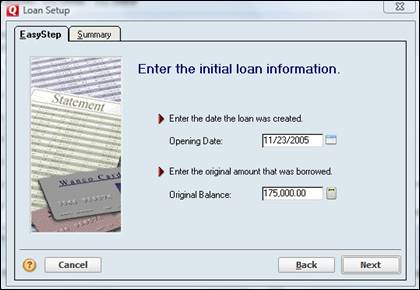
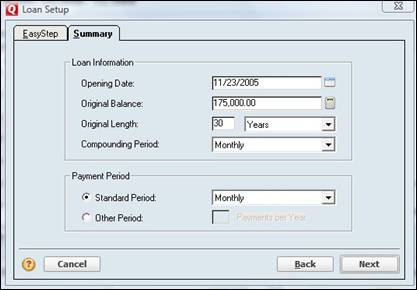
Enter the date that the loan was created. This should be in your loan statement, on your payment remittance form, or in your original loan documents. Also, enter the original balance.
Click Next.
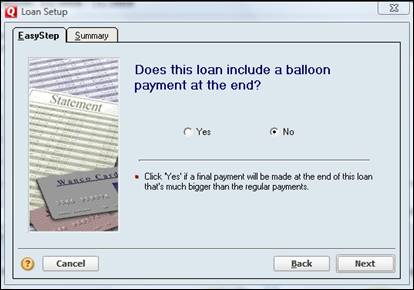
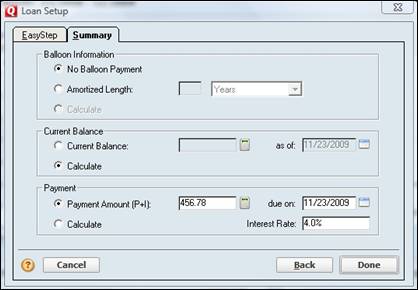
A balloon payment is a final payment that is greatly larger than all the other payments. Select Yes or No for this question, then click Next.
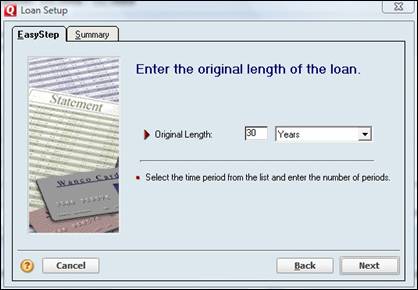
We've selected 30 years for the length of the loan since it's a mortgage. Enter the original length of your loan.
Click Next.
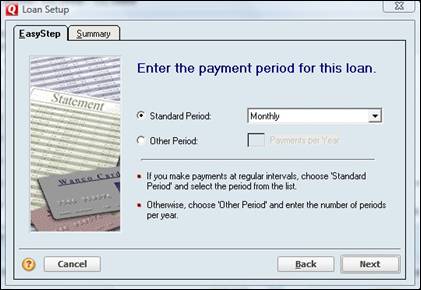
Enter how often you are required to make payments on the loan.
Click Next.
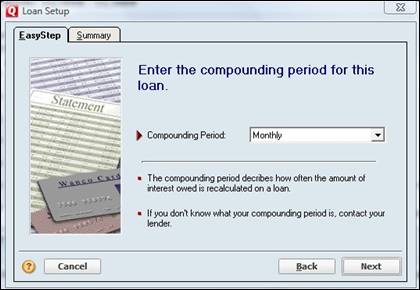
How often is your interest compounded? Select your answer, then click Next.
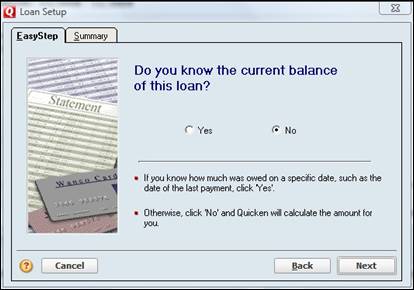
In this dialogue box, Quicken simply wants to know if you know the current balance. It's no big deal if you don't. Quicken will calculate it for you. Enter your answer, then click Next.

Enter the date that the next payment is due. Click Next.
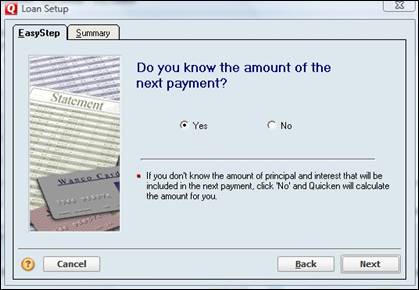
Now, Quicken wants to know if you know the amount of the next payment. Click Next.
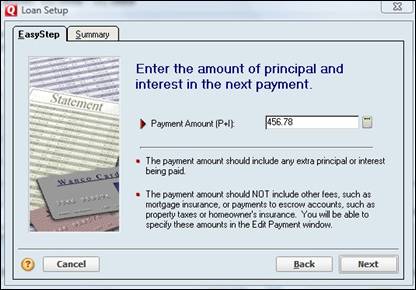
Enter the payment amount. Only include the principal payment plus interest. Do not include any other fees included. You will be able to add these fees later.
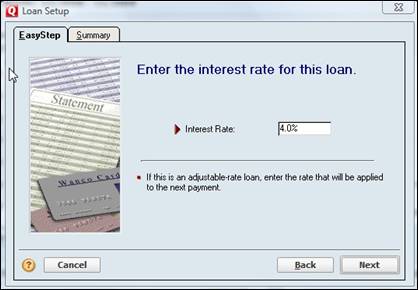
Enter the Interest rate for the loan.
Click Next.
Now, if you noticed, Quicken has switched tabs in the dialogue box. Before this box, you were working in the EasyStep tab. Now, we have moved forward to the Summary.
In this box, make sure your new account has been given a name. We've named ours Home Mortgage.
Click Next.
Review this information and make any necessary changes. Click Next.
Again, review the information, then click Done. You will then see the dialogue box that follows.
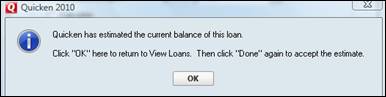
It says to OK to return to the View Loans window. When we get there, we will click Done again to accept Quicken's estimate.
Click OK.
When you get that finished, you'll see the following window. You can now set up your loan payment.
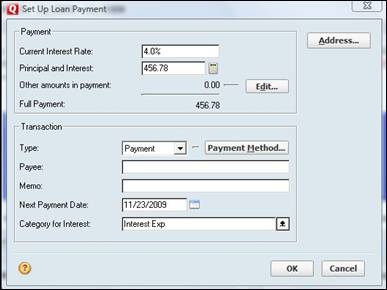
Make sure to add the Payee and a memo. The memo is optional. Click OK.

Since this is a mortgage, the house that we've mortgaged is an asset. If your loan has an associated asset, click Yes.
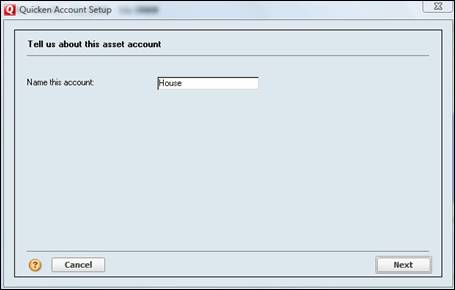
Enter a name for the asset account. Click Next.
Quicken will then ask you the current value of your asset. Please enter in the current value, not what you owe.
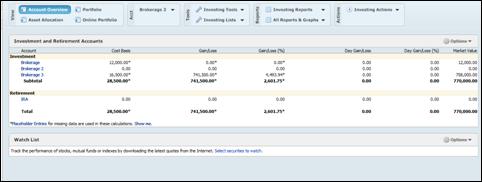
Once you've finished, you can see your loan and assets, as well as your new net worth, on the Net Worth page. (Click the Net Worth tab.)
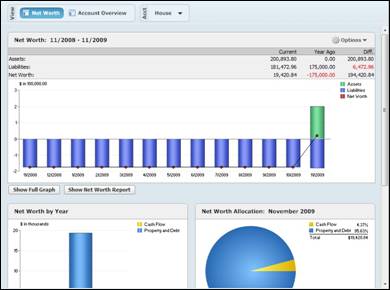
You can now view your new Net Worth by viewing the Account Bar or by scrolling to the bottom of the Net Worth page:

Editing Loan Information or Deleting a Loan
You can easily edit your loan information once you have it set up or if your terms change. Go to the Net Worth page by clicking the tab.
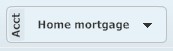
In the Actions Bar, select your loan. Be careful not to select the asset.
Doing this will take you to the account register, as shown below.
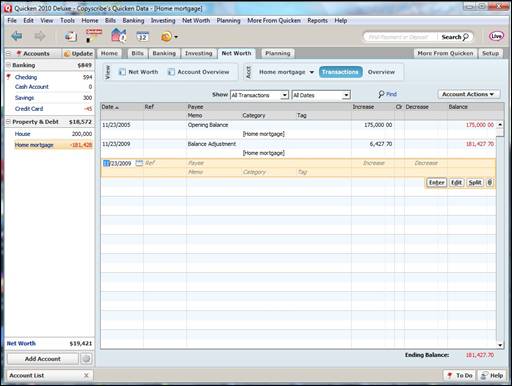
Click the Account Actions button at the top right hand side of the register.
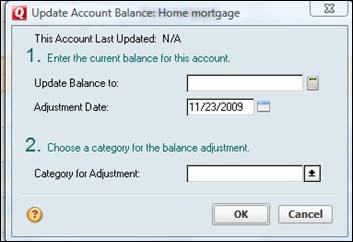
You can select Update Balance to update the balance of your loan.
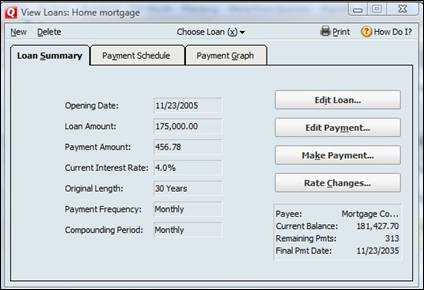
Or you can select loan details to change the payment information, edit information about the loan, or change the interest rate. You can also use this window to make a payment. Just click on the appropriate button.
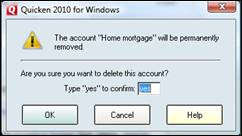
If you want to delete a loan from Quicken, click the Account List Button at the bottom of the Account Bar.
You'll then see the following window. Find your loan and select it. Then click Delete.
You'll be asked to type YES in the box to confirm that you want to delete the account.
Adding investment accounts is just as easy as creating any other kind of account. In fact, the steps are identical. Click the Setup tab, scroll down to the Investments and Retirement Accounts section. It's the second box from the bottom and it looks like this:

Click the Add Investment Account button. This will open the Account Setup window.
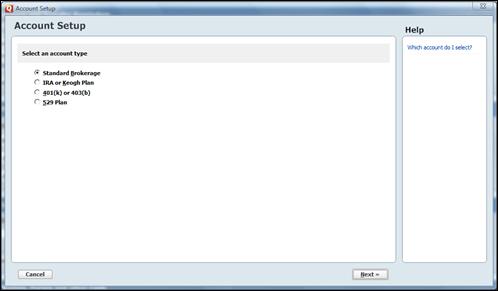
There are four types of investment accounts available to you.
- Standard Brokerage
- IRA or Keogh Plan
- 401(k) or 403(b)
- 529 Plan
Select the desired account and click Next. Quicken will guide you through the process. Because the process is pretty much the same for each kind of account, we'll just create a Standard Brokerage account. Still, I'd encourage you to click through the steps for each kind of account, just to become familiar with the particulars of each one.
Just like when we created our checking account, you are will be asked to enter the name of your brokerage. If you elect to do so, the next window will ask you to enter your username and password associated with your account. What you are doing is giving Quicken permission to access and download information from that account. This really automates the process of keeping Quicken up to date.
You may also elect to manually enter your transactions into Quicken, which is what we are going to do.
The next window will ask you to enter a name for the account. We'll call it "Brokerage 3", and click Next.
Now we are asked to enter a Statement Ending Date, a cash amount, and a money market amount.
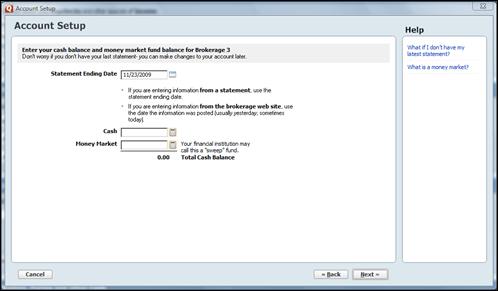
For the simplicity's sake, we'll just accept he default date, and then enter in, say, $15,000 in the cash box and $1,500 in the Money Market box.
Click next and another window pops up, this one asking us to specify what securities are in this account.
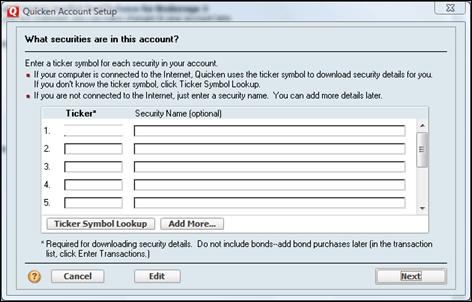
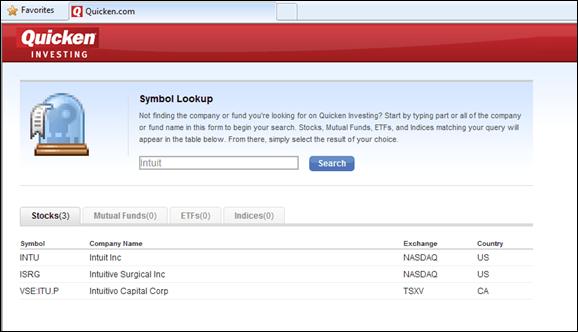
If you know the Ticker Symbol, simply type it into the Ticker box; Quicken will automatically download the details. What's more, if you don't know the symbol, you can have Quicken look it up for you by clicking the Ticker Symbol Lookup button. Clicking this button will launch your web browser and direct it to Quicken.com, where you can simply type in the company name to find out the associated ticker symbol. For instance, in the example below, we entered "Intuit" and find that there are 3 companies with similar names offering stocks.
We'll enter INTU into our ticker box and click Next. Now we are asked to enter how many shares of the said stock we own. We've entered 25,000 and clicked Next.
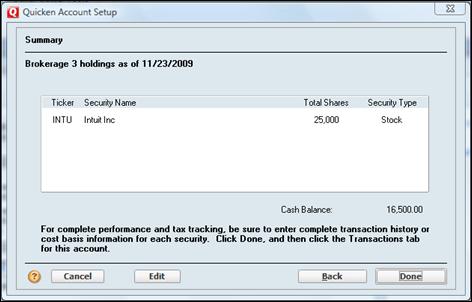
So let's click Done, and go to our Investments tab.
Select Brokerage 3 from the list.
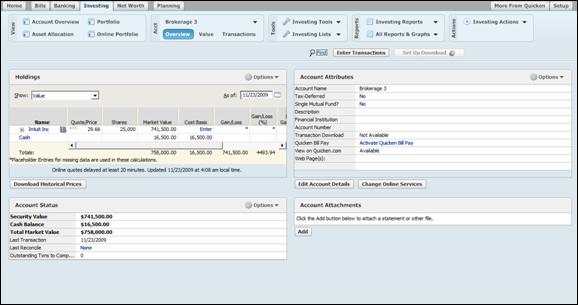
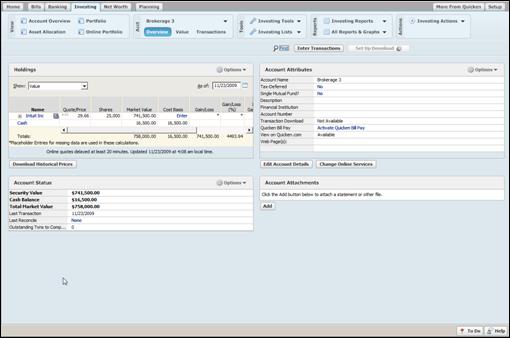
Now take a look at the Holdings pane in the upper left hand portion of the window. Here you can see how Quicken automatically entered the unit price of our Intuit stock, multiplied it to our number of shares, and came up with the market value of our holdings for us.
So now that we've created our investment account, we'll take a closer look at the investments tab and examine the tools it offers to help us manage it.
Below is an example of the Investments Action Bar.

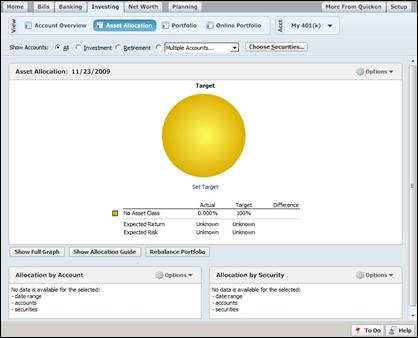
From here we can access the Account Overview, Asset Allocation, as well as our portfolio. The Account Overview is pictured below.
We can use this page to edit our account numbers, assign limits to credit cards, and set tax attributes for retirement accounts. However, we can also just use it to help remember when we last balanced our bank account.
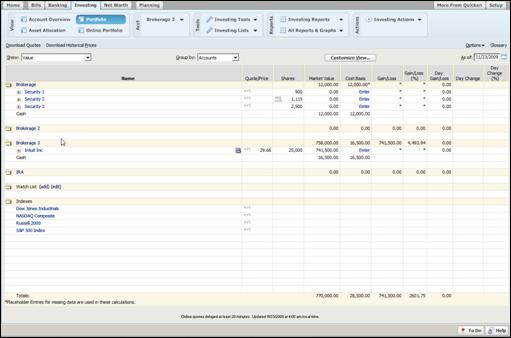
In the next snapshot, you'll see our portfolio. This is where all of our investments our listed, as well as our Watch List. We'll learn what a Watch List is in just a minute.
Next, we can also view our asset allocation. This shows you where you are with your investments today.
In addition, we can also fill in the login information to access our online portfolio.
To the right of the View box, is the Acct box. To select an account, simply click the arrow and select its name from the dropdown menu. When an account is selected, three view options become available. These three options will determine how you view your account in Quicken. Each way provides a slightly different perspective.
These three ways are:
1. Overview. This is an overview of your account.
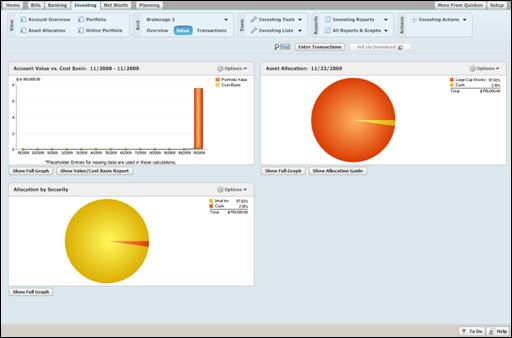
2. Value, which comes in the form of graphical illustrations to show you your account value vs. cost basis.
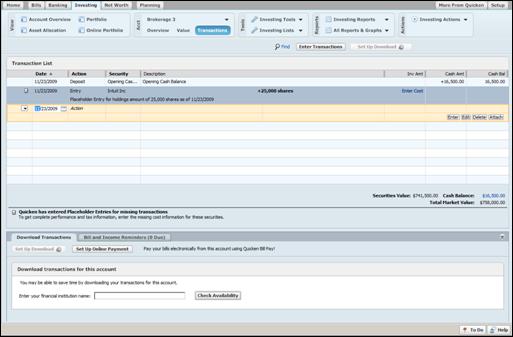
3. And Transactions. This shows your individual transactions in your account register.
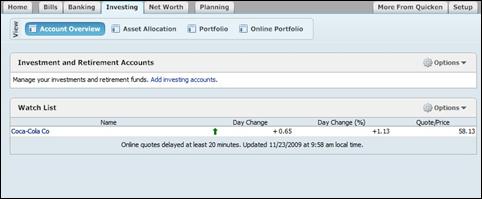
Creating a Watch List
A Watch List is used to track the prices of securities that you don't own or to follow a more popular index in Quicken.
To create a Watch List:
Go to the Investing tab (shown below).
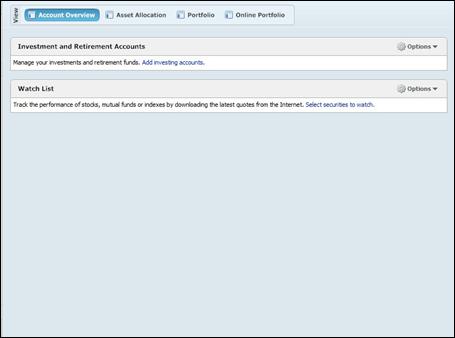
Go to the Watch List section and click Options.
Select Add Security to Watch List.
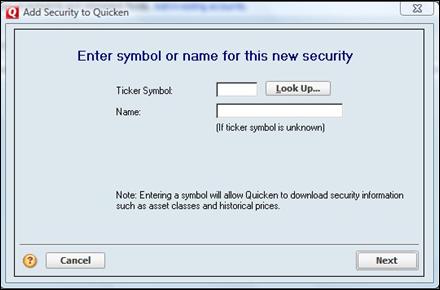
Enter the Ticker Symbol or click the Look Up button to look it up. If you don't know the symbol, you can enter the name.
We're going to enter KO to the Coca-Cola Co.
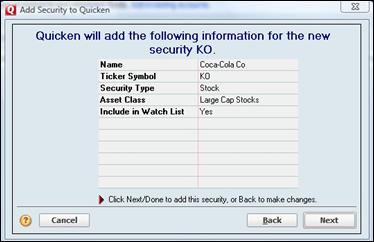
Click Next.
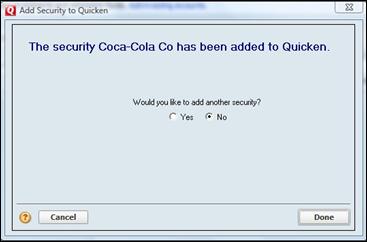
When you're finished, your securities will appear in the Watch List.
Update Investment Accounts
The easiest way to keep your investment accounts up to date is to connect with your broker or financial institution to update transactions and balances. As you already know, Quicken provides two ways that you can do this: either through Direct Connect or Web Connect. We're going to show you how to do it both ways.
First, open the account that you want to use.
Open the Investing tab and click the Update Transactions button. Enter any passwords that Quicken prompts you for. Then, click Update Now.
NOTE: You may need to click the Setup Download button at the top of the workspace window to get started.
One of the great things about using Quicken for all your financial transactions is that you can easily see how your investment choices are impacting your finances. In the Investing tab, you can view your entire portfolio and track each investment you make right from the screen.
To make it easier to track your investments, you can customize your portfolio to show fundamentals, different performance measures, as well as other details.
You can customize the views by clicking the Customize View button on your portfolio page.
You can customize calculations to include all the dates for which you have investment data. Or you can customize to include a range of dates. To do this, click Options. Choose Preferences from the drop down menu.

What's more, you can also print your portfolio. This is helpful if you're going to meet with a financial planner. To print your portfolio, go to File> Print Portfolio.