In Quicken, an account refers to anything that you want to keep track of. It might be a checking or savings account; however, it could also be your investments or cash flow.
Whenever you open an account in Quicken, it will appear in the Account Bar and the Account List.
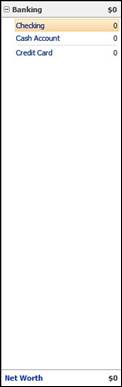
The Account Bar is pictured below. If you don't see the Account Bar, go to View>Account Bar, and select an option for it to appear. You can also use these steps to hide the Account Bar.
You can view Account Lists by going to either Banking>Account Lists or Investing>Account Lists.
Categories in Quicken help you to track the source of a deposit into or a withdrawal from an account. For example, you might have a deposit into your checking account from your paycheck. Salary would be the category. A category can also be something you spend money on (an expenditure) such as clothes, or it can be the name of an account that you're transferring money into (Savings). Categories help you know where you're money is coming from and exactly where it's going.
Tabs help you track where your money is going and manage it in an organized fashion it so you can easily see it at-a-glance. They also help you plan for the future. If you look at the tabs on Quicken, you'll see what we mean. Some of the tabs are Bills, Banking, Investments, and so on.
Accounts, categories, and tabs, when used all together, make it easy for you to track and manage your money in Quicken.
Here's how:
� Tabs are the broadest group because they define what type of account you're going to track.
� From there, it's broken down into accounts. For example, when you use the Banking tab, you'll enter all of your banking accounts.
� Next, where your money goes is all broken down into categories so you can tell where it's going and how it's being spent by just taking a glance.
If you remember, we briefly showed you how you can create a checking or savings account in the Setup tab. You can still do it that way if you prefer. However, there may be times after you start to use Quicken that you want to add more accounts. That said, we're going to show you another way that you can add checking or savings accounts.
To add a checking or savings account:
Go to Banking in the Menu bar, and select Banking Accounts>Add Account.
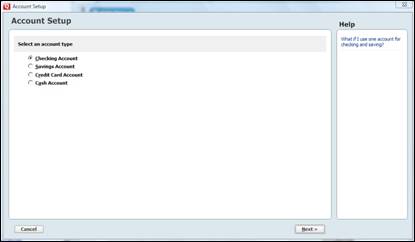
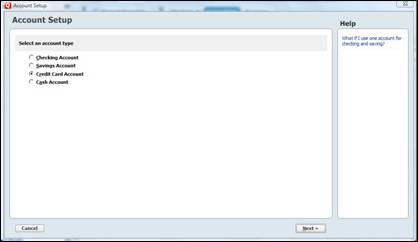
Select either Checking Account or Savings Account. We're going to select Checking.
Now, click Next.
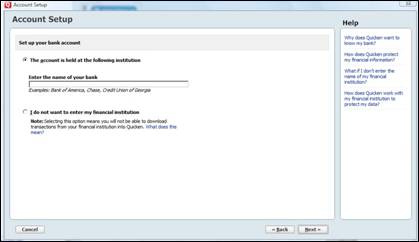
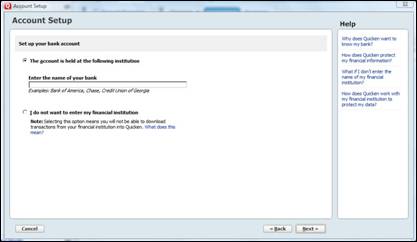
Enter the name of your bank. (As you see in the snapshot above, you can choose not to enter the name of your financial institution, but if you choose not to then you will not be able to download transactions from your bank.)
When you start to type in the name of your bank, Quicken will start to provide similar names of banks for you. Select the name of your bank.
Click Next.
If you typed in your bank's name, Quicken will ask you to wait while it gathers information about your bank. After a minute or less, you will see this screen:
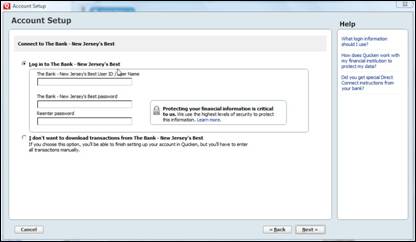
You must enter your login information that you use on your bank's website to access your transaction data. If you don't want to enter this information, that's fine. But once again, you will not be able to download transactions from your bank.
For the purpose of this article, we're not going to download transactions. This is only an example.
Click Next.
If you choose to not enter information, Quicken will give you a warning window to let you know that you won't be able to have automatic downloads in Quicken without your bank's login information added.
It looks like this:
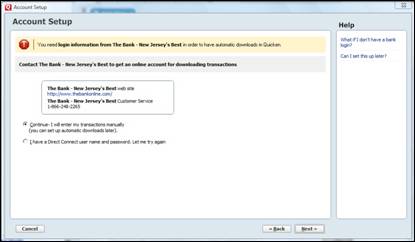
You can choose to continue, which means you'll have to enter all transactions manually.
Or you can check that you have a Direct Connection user name and password.
For now, we're going to select Continue, then push Next.
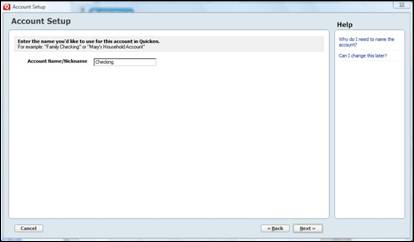
Now, add an account name or nickname for your checking account. Checking is the default name. We're going to keep it like that, but you can change yours so the account is identifiable to you, especially if you have more than one checking account.
Push Next.
Quicken then asks you to put your statement ending date and ending balance, as shown below. Do not worry if you don't have a statement on hand. You can go back and change this later. Just remember that the amount that you enter will be the opening balance of your Quicken account. You may want to get a current balance so that it's correct.
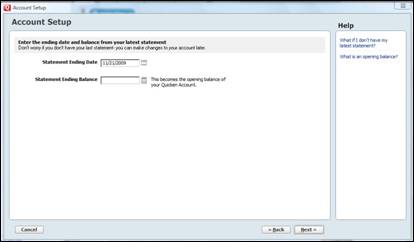
After you've entered this information, click Next.
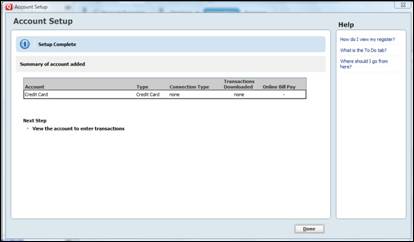
Your account setup is now complete. Quicken will show you the summary window below:
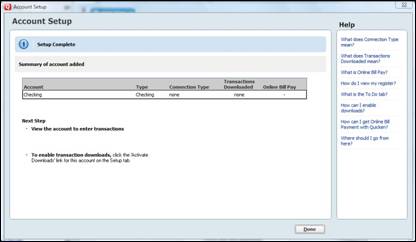
Let's look at the Summary of Account Added section in this window:

� Under Account, you'll see the unique name that you gave your checking account. We stuck with the default name of "Checking."
� Under Type, you'll see the type of account. Of course, that's Checking.
� Connection Type refers to how you download your account information to Quicken. Since we didn't enter bank information, None is listed for Connection Type.
� Transactions Downloaded refers to the transactions that you've downloaded.
� The last part is Online Bill Pay.
Push Done to close out the window. You're checking account is now entered.
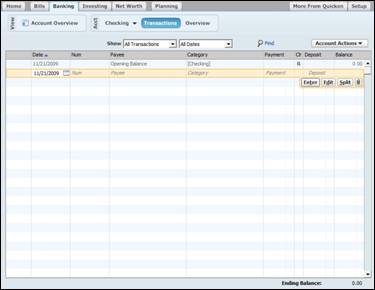
It will appear in the Banking tab workspace.
Let's move on to credit card accounts.
To create a credit card account, we're going to start by using the same first step that we used to create a checking account. Go to Banking>Banking Accounts>Add Account. This time, select Credit Card Account.
Click Next.
In the window shown below, you'll enter your financial institution's name just like you did for the checking account.
For the sake of this article, let's say that you want to enter the name of your bank, but it doesn't appear in Quicken's list. What should you do? First, don't worry about it. Simply enter the name of your bank as it appears on your statements.
If you enter the name of a bank that Quicken doesn't recognize, it will display the following window:
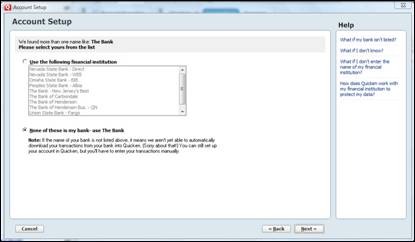
If you see the name of your bank, select it now. If not, check "None of these is my bank � use The Bank." If you don't see your bank listed, that means Quicken won't be able to download transactions for you. You'll have to enter your transactions manually.
Click Next.

Give a name to your account like you did for checking.
Click Next.
In the window above, you'll enter your Statement Ending Date as well as your Statement Ending Balance. The balance that you enter will become your opening balance for this credit card in Quicken.
NOTE: To add your credit card limit, you'll have to go to the Setup tab. Go to the credit card section, then click the Edit button to the right of your credit card. You can enter your limit in the dialogue box that appears.
Your credit card account is now setup. You can view this account in the Banking tab workspace.
To create a cash account in Quicken, go to Banking>Bank Accounts>Add Account.

Select Cash Account and click Next.
Just as you've done with checking and credit card accounts, you're going to create a name for your cash account.
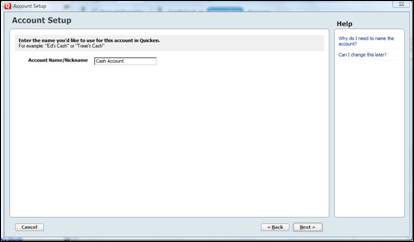
When you've created a name, click Next.
In the next window (pictured below), you're going to enter the date that you want to start tracking, as well as the amount of cash that you have. This becomes your opening balance in Quicken.
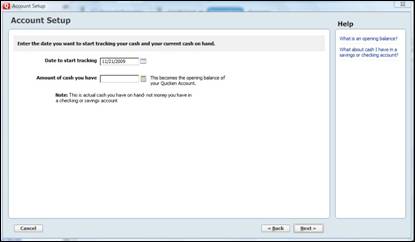
Click Next.
Setup is now complete, as shown in the window below.
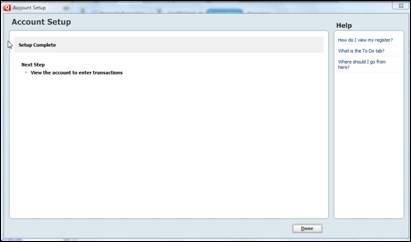
To add transactions to your cash account, view the account in the Banking tab workspace.

You can click in the different sections of the highlighted area to enter transactions. This can be done for checking, savings, and credit cards also.
We can now view the three accounts we've just created in the Account Bar.
Earlier in this article, we told you how to view your account list. Just in case you forgot, let's go over it again. To view your account list for the banking tab, go to Banking>Bank Accounts>Account List.
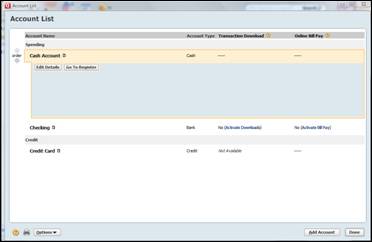
You can view all your accounts in this window, and you can also add accounts by clicking the Add Account button at the bottom right hand side.
When you're finished, click Done.
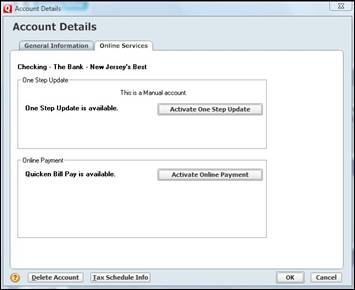
To edit information in your accounts or change/activate online services, go to the Setup tab.
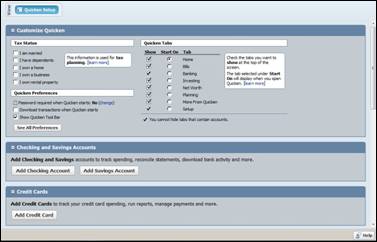
Scroll down to the type of account that you want to edit. We've chosen to edit our checking account. Click the edit button to the right of the account, as pictured in the next snapshot.

This window will pop up:
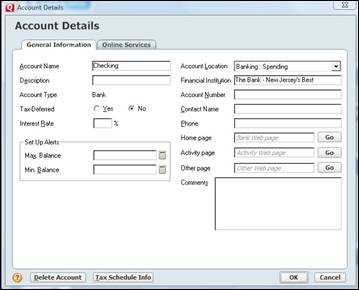
Now you can enter more information about your checking account or add information.
Let's take a look at what types of information you can enter.
� Account Name. This is the name of your account.
� Description. If you want, you can give a short description for this checking account. Perhaps it's a joint account that you share with someone else. Or maybe this account is dedicated to certain bills. Entering a description is optional.
� Account Type. This is a bank account. The other type of account would be investment.
� Tax-Deferred. Is your account tax-deferred? Check yes or no.
� Interest Rate. If you're charged interest on this account, add in the interest rate here.
� Set Up Alerts. If you want to be notified if this account drops below a certain amount � or goes above a certain amount, you can have Quicken notify you.
� Account Location. This is the account's location in Quicken.
� Financial Institution is the name of your bank.
� Account Number. You can enter an account number for this account here.
� Contact Name. The contact name should be someone at the financial institution.
� Phone. Enter a phone number for your contact name.
� Home Page. This is the home page of your financial institution.
� Activity Page. This would be the URL of the page where your transactions appear. This is especially helpful to have if you're manually entering transactions.
� Other Page. If there's another page on your financial institution's website that you view frequently, you might want to add the URL here.
� Comments. You can add any comments you have about the account or the financial institution.
The other tab in this window is Online Services. We've pictured it below for you. For now, it's just helpful that you know you can access Online Services using the steps given to you in this article.