Most presentations that are created are composed of slide after slide of bulleted lists.
For presentations like these, the Outline View makes it easier for you to focus on your points and subpoints. You can simply focus on the content of your presentation (the bullet points) without worrying about how it looks (images, charts, etc.).
Going to Outline View
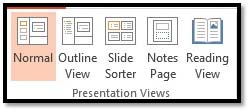
So far, we have worked only in Normal View as we learn to use PowerPoint. Normal View shows you thumbnail images of each of your slides in the Slides pane. To switch to Outline View, go to the View tab on the ribbon, then click Outline View. It's located to the right of Normal View, as shown below.
When you click on the Outline View button, your presentation appears as an outline.
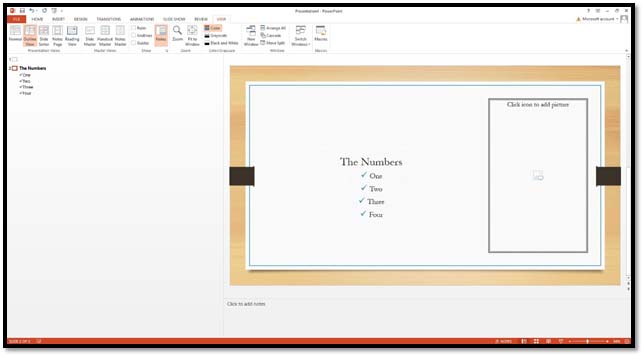
Look at the Slides pane. As you can see, your content is all that appears. You don't see background effects or anything else. Only the text.
You'll see the title of each slide at the highest level of the outline, then the text, which will appear as lower level headings.
Let's take a look at the Outline View and point out important things you should know.
1. The outline is made up of titles and body text for each slide. There aren't any images, backgrounds, etc. included in the Outline View.
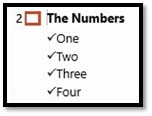
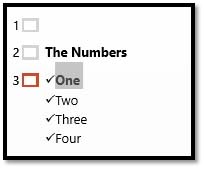
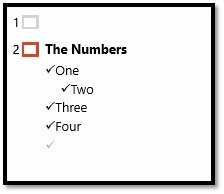
2. The high-level heading on the slide is used to represent the slide. This could be the slide's title. Look at the snapshot of our outline below.

In slide #2, "The Numbers" is our highest level heading, so "The Numbers" represents slide two. It can also be representative of the content that slide contains.
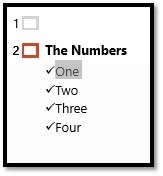
3. All headings that are subordinate to the slide's highest level heading are indented, as shown above.
4. An outline can also contain subpoints. These would be subordinate to the main points. You can have nine levels of headings on a slide. However, that could get confusing for anyone who views the presentation, so it's best to stick with two.
Editing Entire Slides
You'll find that when you work in the Outline View, you'll have to select an entire slide in order to edit it. To do this, just click on the little square that represents the slide on the left, as shown below.
This will select the entire slide, including the slide title and all text. Any nontext objects that appear on the slide will also be selected, but you won't be able to see those.
Once you have an entire slide selected, you can delete, cut, copy, or duplicate it.
To delete a slide, select it, then press Delete on your keyboard.
To cut or copy a slide, select the slide, then use the Cut or Copy button under the Home tab on the Ribbon. Use the Paste button to paste the slide from the Clipboard.
To duplicate an entire slide, select it, then press CTRL+D. The copy of the slide will appear after the original.
Editing One Paragraph
You can also select a paragraph to edit. All you have to do is click the bullet that's next to the paragraph you want to edit. As you can see below, it's now selected.
You can also delete the paragraph while it's selected by pressing Delete on your keyboard. You can also cut or copy the paragraph by going to the Home tab on the Ribbon and choosing Cut or Copy.
Promoting or Demoting Paragraphs
If you promote a paragraph, you move it up a level in the outline. If you demote it, you move it down a level.
To promote or demote a paragraph, first select the paragraph, then right-click on it.
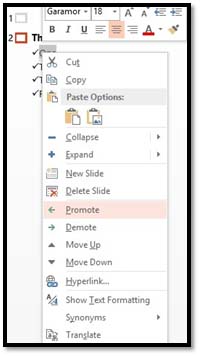
Select Promote or Demote from the drop-down menu.
Let's promote the paragraph we've selected by choosing Promote.
Since the paragraph we promoted was the second highest level (before promoting it), it becomes the first highest level and is moved to another slide. When you promote a paragraph, it moves it up to the next highest level. If the next highest level is the highest level, it's moved to another slide.
Now, let's go back to our original slide and demote the next paragraph.
As you can see, it is indented, which means it was lowered down a level.
Add New Paragraphs
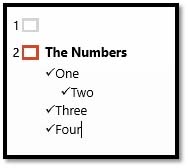
To add a new paragraph to a slide, move the insertion point (the cursor that you see before you type) to the end of the paragraph where you want the new paragraph to begin.
Below, you can see our insertion point after "Four."
(Note that if you start a new paragraph after the slide title text, it will create a new slide.)
Press Enter to create a new paragraph.
Now you can enter in the text for that paragraph.
Add a New Slide
You can add a new slide using several methods in Outline View.
1. You can promote a paragraph to the highest level. This will create a new slide.
2. You can add a new paragraph, then promote it to the highest level.
3. Put the cursor after the slide's title text, then press Enter.
4. Go to the Slides group under the Home tab, then click Add Slide.
5. Place the cursor in the slide's body text, then press CTRL+Enter. A new slide is created and placed after the current slide.
6. You can duplicate an existing slide.
Move Text Up and Down
You can also move text up and down within the presentation using Outline View. You can change the order of points on your slide, or you can rearrange the order of the slides.
To rearrange your presentation, right-click the paragraphs you want to move, then click Move Up or Move Down from the drop-down menu. You can also point to the bullet next to the paragraph you want to move, then click and drag when the cursor changes to a four-cornered arrow.
Collapse the Outline
If you have dozens of slides, it may be hard to work within the outline, because you have to scroll too far down to look for what you need. For this reason, you can collapse the outline so only the slides' title text shows.
To collapse the outline, right-click anywhere in the outline, then select Collapse>Collapse All from the drop-down menu.
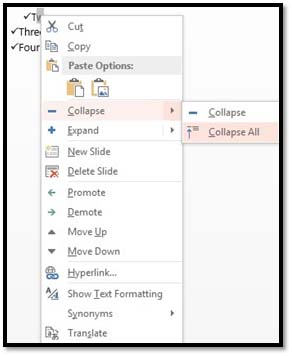
If you want to collapse just a single slide, right-click anywhere in the slide, then choose Collapse>Collapse.
Proofing Presentations
With all this talk about text in presentations, it's also important to learn how to proof your presentations for typos and other types of errors. PowerPoint 2013 offers you three tools to do this: Spell Check, the thesaurus, and AutoCorrect.
Check Spelling as You Work
Spelling errors are bound to happen if you create a lot of text within presentations. You can simply type too fast and accidentally misspell a word, or you might not know exactly how a word is spelled and type in your best guess. Either way, PowerPoint 2013 gives you several options to proof your presentations for spelling errors.
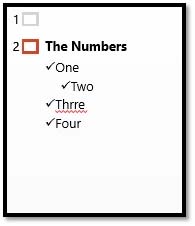
PowerPoint 2013 highlights any spelling errors that it detects by putting a red squiggly line underneath the presumed misspelled word. You can see that red line below in Normal View.
And in Outline View:
When you see that red line, you can do several things.
You can retype the word into your presentation using the correct spelling.
You can right-click on the word to see suggested spellings and choose one (if you find the correct one), as shown below.
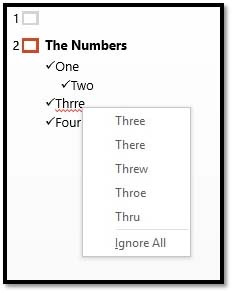
You can also ignore PowerPoint's warning that the word is misspelled. Perhaps it's not. You can do this by right-clicking on the word and choosing Ignore All.
Check Spelling for an Entire Presentation
You can also wait until you're finished creating a presentation before you check for spelling errors. After you're finished, you can simply run a spell check from the Ribbon. Simply click on the Review tab and click the Spelling button on the right. It looks like this:

When you click the Spelling button, PowerPoint will then start checking your presentation for errors. If you have a lengthy presentation, this may take a minute.
When PowerPoint has located all your errors, the Spelling pane will open up on the right side of the PowerPoint screen. It looks like this:

You will see your misspelled word at the top of the pane. Below it, there will be two buttons: Ignore and Ignore All. If you want to keep your spelling of the word in this instance in the presentation, click Ignore. If you want PowerPoint to keep your spelling of the word in ALL instances in the presentation, click Ignore all. This will get rid of the red squiggly line.
Below the Ignore and Ignore All button, you will see spelling suggestions. If you see a suggestion that represents the correct spelling of the word, click on the suggestion to use it, as we've done below.
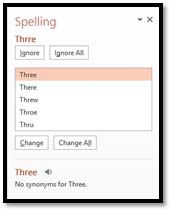
Next, click Change to change this instance of the word in the presentation to the suggested spelling � or Change All to change all instances of the word.
The Thesaurus
A thesaurus offers synonyms (or words that have the same definition) for words that you use in your presentation. To use PowerPoint's thesaurus, select a word in your presentation that you'd like to find a synonym for, then go to the Review tab and click the Thesaurus button.
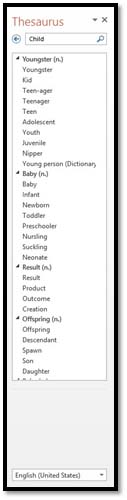
Find the synonym you want to use in the list, then right-click on that word. We've selected "offspring" as the synonym we want to use for "child."
When you right-click on the word, click Insert from the menu, as shown below.
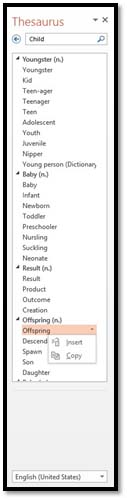
The synonym is now inserted in place of the original word.
Capitalizing
You can use the Change Case command to make sure that you capitalize the text properly in your slides. To use this command, select the text that you want to capitalize.
Go to the Home tab and click  .
.
From the drop-down menu, choose an option:
-
Sentence case. The first letter of the first word in each sentence is capitalized.
-
Lowercase. Everything appears in lowercase.
-
Uppercase. Everything is uppercase.
-
Capitalize Each Word. The first letter of each word is capitalized. This is often used for slide titles.
-
Toggle Case. Uppercase letters are turned to lowercase and vice versa.
AutoCorrect
The AutoCorrect feature automatically corrects spelling and other errors as you type. If you accidentally type teh instead of the, PowerPoint will automatically correct it for you. Also, if you forget to capitalize the first word of a sentence, PowerPoint will do it for you.
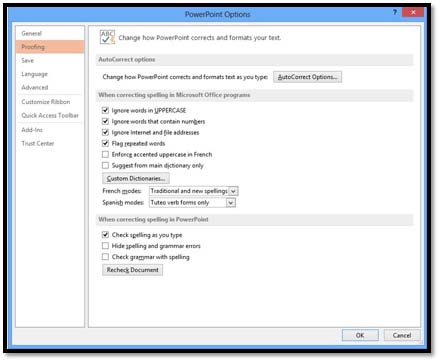
To set your options for AutoCorrect, go to the Backstage View and select Options from the left.
This will bring up the PowerPoint Options window.
Now click Proofing from the left column, as shown below.
Click the AutoCorrect button.

Now you can adjust the options to tell PowerPoint what you want AutoCorrect to correct for you � and remove things you don't. You can also use the Replace and With feature in this dialog box to have PowerPoint replace text with symbols, etc.
Click OK when you're finished.