Now that you've created your presentation, it's time to get it ready to share with others � then to present it to the people who want or need to see it. Don't worry, though. Most of the work goes into creating the presentation. Getting ready to share your slide show is the easy part.
Print Slides and Slide shows
To print your slides and slide shows, you're going to go to the Backstage View. To get to the Backstage View, click on the File tab, then click Print on the left side.
This is what you'll see:
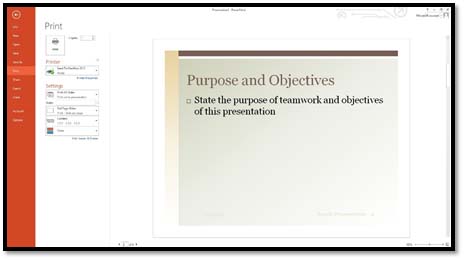
Now, look for the Print button at the top of the screen, but don't click it yet. To the right of the Print button, specify how many copies you want to print.
Next, in the Printer section, specify the printer that you want to use to do the printing.
In the Settings section, you'll be able to specify how you want everything printed.
In the Print All Slides drop-down box, you can choose how much of your presentation you want to print (or all of it). The options are:
-
Print Selection allows you to print the part of the presentation you selected before selecting the Print command.
-
Print Current Slide allows you to print the current slide. The current slide is showing on the right side of your screen.
-
Custom Range allows you to enter the slide numbers you want printed.
-
Custom Shows allows you to select the custom shows you want to print.
Next, in the Settings section, you'll see a box that reads "Full Page Slides." Here you can decide how many slides per page. You can also print the Notes Pages or outline instead of the slides.
The box that reads "Collated" allows you to tell PowerPoint to print each copy one at a time. For example, if you're printing two copies of your presentation and you want the first copy to print, then the second copy, choose Collated. If you don't select Collated, PowerPoint will print two copies of the first slide, followed by two copies of the second slide, etc.
The Color box allows you to choose to print your presentation in color, black and white, or gray-scale.
To the right of your print options, you'll see the Print Preview, as shown below.

Here, you can zoom in and scroll through pages to see how your slides will print.
Set Up a Show
You have several choices once you've finished creating a presentation. You can print it out, or you can set it up to show to other people. You can still print it even after you set it up to show, but if you plan to deliver your presentation, the process of setting it up is very important.
That said, once you've created your presentation, it's time to start setting it up for delivery. To set up your slide show, click the Slide Show tab, then the Set Up Slide Show button  .
.
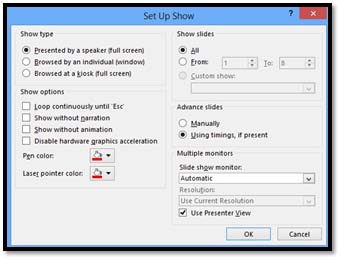
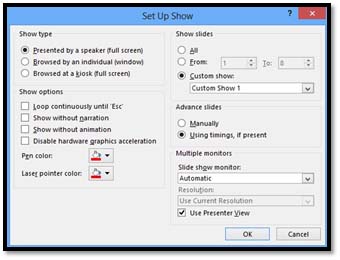
Using the dialog box above, you can set all your preferences for your slide show. We are going to cover the different sections of this dialog box below to make it easier for you.
Show Type. These options give you the choice of having your slide show presented in full screen, or in a computer window.
Show Options. Decide if you want the slide show to keep playing over and over again until Escape is pressed. Also, if you want to show it with or without narration and animation. You can also choose the pen and laser pointer color that you'll use in your slide show. You can also disable hardware graphics acceleration to make the show run quicker.
Show Slides. Do you want to show all of the slides or just some of them? You can specify the slides that you want to show.
Advance Slides. The slides can either advance manually, or by using the established timers.
Multiple Monitors. Use this if your slide show will be playing on more than one computer.
Click OK when you're finished.
Start a Slide Show
To start a slide show, click the Slide Show tab on the ribbon, then click one of these two buttons:
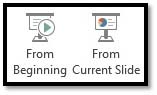
From Beginning starts your slide show from the first slide.
From Current Slide starts your slide show from the current slide you have showing in PowerPoint.
Presenter View
If you use a project or second monitor to use when showing your presentation, PowerPoint shows the presentation's slides on the other monitor or projector and changes the primary monitor to Presenter View, as shown below.
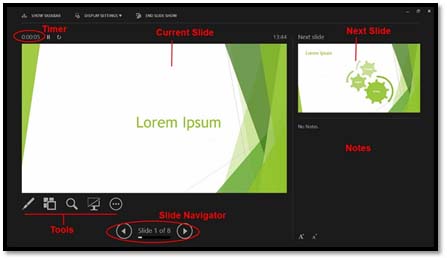
As you can see, the current slide is shown on the left-center side of the screen. A small image of the next slide is shown at the top right.
Any notes you've added are shown beneath the next slide.
The timer lets you know how far into the presentation you are � time-wise.
The tools allow you to do things, such as draw on your slides, hide the current slide, and other things.
The slide navigator lets you go forward and backward through your show.
Keyboard and Mouse Tricks to Use during Slide Shows
Below is a list of keyboard and mouse shortcuts you can use when presenting a slide show.
|
Do this: |
By doing this: |
|
Display the next slide |
Enter or Space bar |
|
Display the previous slide |
Backspace |
|
Display first slide |
1 + Enter |
|
Display a certain slide |
Slide number + Enter |
|
Toggle screen (black) |
B |
|
Toggle screen (white) |
W |
|
Show/hide pointer |
A |
|
Erase doodles on screen |
E |
|
Restart or stop an automatic show |
S |
|
Display the next slide, even if hidden |
H |
|
Change the pen to an arrow |
CTRL+A |
|
Change the arrow to a pen |
CTRL+P |
|
End the slide show |
ESC |
|
Display the next slide |
Click the mouse |
|
Move through the slides |
Roll the wheel on your mouse |
|
Call up action menu |
Right click your mouse |
|
Show the first slide |
Hold down both the right and left mouse buttons for two seconds |
|
Bring up the laser pointer |
Hold CTRL, then hold left mouse button and move mouse |
|
Doodle |
CTRL+P |
Rehearse a Show
It's always a good to idea to rehearse your slide shows before you present them. Not only can you catch things that aren't running as smoothly as you'd like in the slide show, it also gives you a chance to perfect your presentation. Maybe you're talking too fast or saying "uh" or "um" too many times. Listen, the best performers rehearse, so this isn't a step that you should ever skip over.
When rehearsing your slides:
-
Run through the slides using the Set Up Show feature we discussed above.
-
Make sure every aspect of the presentation is as you want it.
-
Check for graphics or clips that may be taking too long to load.
When rehearsing narration:
-
Record yourself to catch places where you are stumbling, not annunciating clearly, and to find other trouble spots. Something that sounds good on paper may not sound as good when you actually speak, so read your presentation out loud and record it.
-
Rehearse your narration with the slides. Yes, go through your whole presentation as you will deliver it.
When you do this, PowerPoint 2013 offers you a neat feature called Rehearse Timings. You can read your narration aloud as you go through the slide show and see how long it takes you to speak the narration for each slide. This way, the slide transitions are timed to match the narration, giving you enough time to talk, and your audience enough time to hear you, and read the information on the slide.
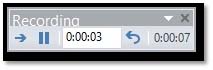
To rehearse timings, go to the Slide Show tab, then click the Rehearse Timings button.

You'll see a timer in the upper left corner that runs from when the second the slide comes on the screen.
Start your narration.
When you've finished the narration for that slide, click the forward arrow.
If the time on the timer is different than the timing you set when you created the presentation, MS PowerPoint 2013 will ask you if you want to change the timing.
Creating and Saving Custom Shows
You may create one presentation that's going to be shown to various groups of people. For example, you may create a presentation for work that's going to be shown to the Accounting, Marketing, and Sales departments, but you may not want to show the entire show to all of these groups. After all, marketers only want to see information relevant to them, as do accountants and sales staff. You may want to show slides 1, 2, and 6 to all of them, but you only want Marketing to see 9 and 10, Sales to see 10, 11, and 12, and only the Accounting department to see the rest.
The good news is you do not have to create different presentations for all of them. You can create and save custom shows to show each of these groups. The custom shows will only display the slides you want them to see.
To create a custom show:
Open the presentation for which you want to create custom shows. All slides must be showing.
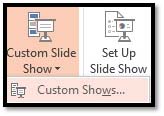
Go to the Slide Show tab, then click Custom Slide Show>Custom Shows, as shown below.
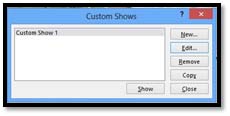
You'll then see this dialog box:

Click New to create a custom show.

Specify a name for the custom show.
Select the slides you want to appear in the custom show, then click Add.

Click OK.
Click Close in the Custom Shows window.
To view the show, click the Show button.
Set up a Custom Show
To set up your custom slide show and view it, go to the Slide Show tab, then click Set Up Slide Show.
Under Show Slides, click Custom Show, and then select the custom show you want. Then click OK.
Show a Presentation Online
It is easy to show your presentation online. All you have to do is go to the Slide Show tab.
Click the  button.

Check the box if you want remote viewers to be able to download the presentation.
Click Connect. (You may have to sign in with your Windows Live ID.)