MS PowerPoint 2013 is Microsoft's modern-day answer to the old slide show and overhead projectors. It can also be used as an easier-to-use software program to create videos to publish on YouTube or your website. Whereas MS Word replaces the typewriter and makes creating and editing presentations easier than ever before, MS PowerPoint makes it easier for you to create slide shows and other multimedia presentations � and even to present them to an audience. You can use PowerPoint to create slide presentations, handouts, transparencies, and much more. Then, you can design the presentations so the slides are on a timer; you can add audio, link to another slide within the presentation, a slide outside of the presentation, or present a hyperlink to the World Wide Web. PowerPoint offers you all the solutions you need to create stunning, professional presentations. And the best news is that it's not hard at all to learn. If you're familiar with MS Word, then learning PowerPoint will be a piece of cake.
Downloading PowerPoint 2013
With the launch of Office 2013, Microsoft made changes in how they sell their most popular software package. You can download a free trial by simply going to the Microsoft Office page, picking out what version you want to try, then downloading the software. You don't need a credit card to try the software.
If you want to purchase the software, Microsoft now gives you two choices. As always, you can buy the software either online, or from most office supply or computer stores. The prices to buy the software vary depending on what version you wish to purchase. There are three versions: Home and Student, Home and Business, and Professional. As with other versions of Office, it's a one-time charge and the software is yours to use as long as you wish.
However, with Office 2013 also comes Office 365, which is another method you can use to buy the Office suite of software. With Office 365, you subscribe to the software instead of just purchasing it like you've done in the past. You can pay for your subscription by the month, or yearly on the Microsoft Office website. The price of your subscription will be determined by the version you want: Home, Small Business, or Midsize Business.
Once you purchase a subscription, you'll be able to download Office 2013 on your computer just as you would if you had bought the software in a store. As part of Office 365, you'll also be given multiple licenses which will give you the ability to install the software on other computers as well. This is a perk that doesn't come with buying the software in a store. For the Home version, you get up to five licenses (five devices). The Small Business version comes with licenses for up to 25 users. The Midsize Business provides for up to 300 users. There's also an Enterprise version for larger companies that offers unlimited users.
Once you subscribe to Office 365, you'll never have to worry about purchasing a new version of Office ever again. When a new version comes out, your software will be updated for you.
What's New in PowerPoint 2013
Microsoft 2013 is arguably the best version of PowerPoint yet. It contains the same great features you loved in past versions, which have been fine-tuned and improved for better usability. In addition, it contains some great new features that make PowerPoint even more useful and functional than ever before.
Here are the improvements and changes :
-
Get started with several options. Open PowerPoint to a blank presentation, or choose from hundreds of templates � all sorted by category so you can find what you need.
-
New presenter tools. You can use Presenter View to see your notes on the monitor, but the audience will only see the slide. This takes the confusion out of figuring out if your audience can see your notes on the monitor � or having to use two monitors.
-
Zoom in on slides for your audience.
-
Slide Navigator allows you to browse slides in the presentation.
-
Automatic set up means PowerPoint detects your computer setup, then chooses the right monitor for Presenter View.
-
Wide screen friendly. There's now a 16:9 layout, and also themes developed for wide screens!
-
Start meetings online. You can send out a link to slides, or start a Lync meeting. Audience members can attend the meeting from any device using the Office Presentation service or Lync.
-
Improved design tools that include more theme variations and fonts.
-
Easier ways to line up and space objects using Smart Guides.
-
Improvements to motion paths. When you create a motion path, PowerPoint now shows where your object will end up.
-
Merge common shapes. When you select two or more common shapes on a slide, you can combine them to create new shapes.
-
Greater audio and video support. More formats are now supported, such as .mp4 and .mov with H.264 view and Advanced Audio Coding. Also included are more built-in codecs.
-
The Play in Background feature allows you to play music in the background, while your audience views the slide show.
-
Use the Eyedropper tool for color matching.
-
Use PowerPoint on a touch screen device.
-
Save files to your computer or to the cloud � right from PowerPoint. PowerPoint 2013 makes it as easy to save to the cloud as it is to save to your computer.
Getting Started in Microsoft PowerPoint 2013
You open Microsoft PowerPoint by clicking on the icon on your desktop (if you have one there) or in the program bar. The icon for Microsoft PowerPoint 2013 looks like this:

When you click on the icon, PowerPoint 2013 will open, and you'll see the Start Screen. This is new to 2013.
The Start Screen looks like this:
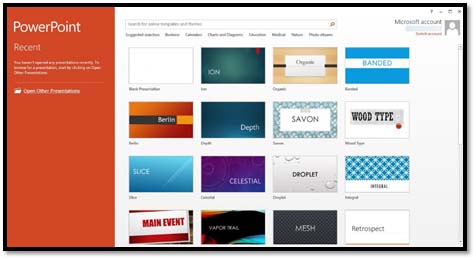
On the left, you'll see the dark orange column that contains your recently opened presentations. You can click on any of these to open them. To the right, you'll see templates you can use to start a new PowerPoint presentation. You can also choose to just open a blank presentation, as we've selected above.
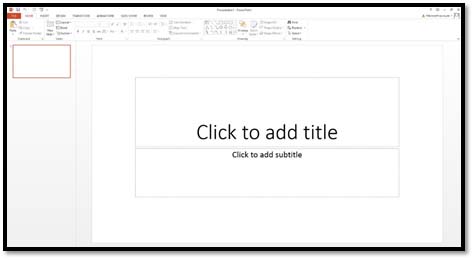
Let's open a blank presentation.
This is a new presentation for which the default name is Presentation1. You can see the name in the Title bar.
For each additional new presentation you open, the name increases by one digit: Presentation2, Presentation3, etc. If you start MS PowerPoint by clicking on an already existing presentation on your computer, it will open automatically and your presentation will be displayed in the MS PowerPoint window.
Touring the PowerPoint 2013 Interface
Let's take a look at the blank presentation again.This time, however, we've labeled the different parts of the interface you'll use in PowerPoint 2013.
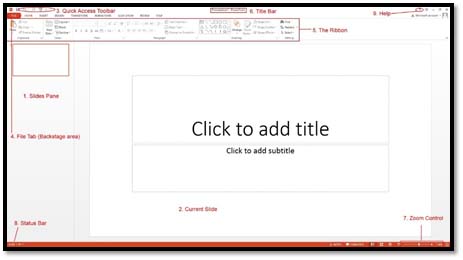
Take a few minutes to look at the features we've labeled for you. It's not important that you know how to use these things right now. You'll learn that later in the course. For now, just take a second to familiarize yourself with where everything is located. The items labeled above help to make using PowerPoint 2013 easier, but they're not the bread and butter.
If you look below the Quick Access Toolbar (as labeled above), you'll see the Ribbon.The Ribbon was first introduced in Office 2007.

The ribbon is divided into tabs. These tabs are also menus. The tabs are Home, Insert, Design, Transitions, Animations, Slide Show, Review, and View.
Below each tab are commands (or tools) that you can use. The commands (or tools) located beneath each tab relate to the tab. For example, under the Animations tab, you would find tools to add animation to a slide.
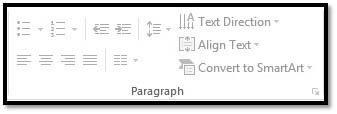
That said, the tools under each tab are broken down into groups so that you can easily find what you need. In the snapshot above, we're looking at Home. The groups within the Home tab are Clipboard, Slides, Font, Paragraph, Drawing, and Editing. Below is a snapshot of the Paragraph group.
Working with PowerPoint 2013 on a Tablet
If you're using PowerPoint on a tablet, you can adjust the spacing between buttons on the ribbon to make it easier to use. You do this by activating Touch mode.
To do this, click or touch the Quick Access Toolbar button: 
Select Touch/Mouse Mode from the drop-down menu.
You can now see the button in the Quick Access Toolbar, as shown below:

Now, touch or click the button and choose Touch.
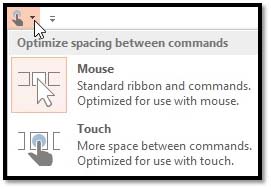
There is now more space between commands on the Ribbon, which makes it easier to use touch. That way, your fingers don't accidentally press the wrong command or tool.
About the Backstage View
It's important to point out the Backstage View as we tour the interface, because it's where you can work behind the scenes, so to speak. The Backstage View is what you'll see whenever you click on the File tab.
When you first click the File tab, you'll see information about your current presentation in the Backstage View. But if you look in the column on the left, you'll see other familiar options you had under the File tab in other Office programs.These include saving, exporting, printing, sharing, opening new presentations, and even setting options for your PowerPoint 2013 program. We'll cover these as the course progresses.
You'll go to the Backstage View to create new presentations, and to open existing ones. In fact, you'll find that being able to navigate the Backstage View is as important as learning your way around the Ribbon!
Opening Presentations
Let's talk about presentations that are already created. Perhaps you have a PowerPoint presentation someone has sent to you � or one that you have saved to your computer. It's important to know how to open presentations.
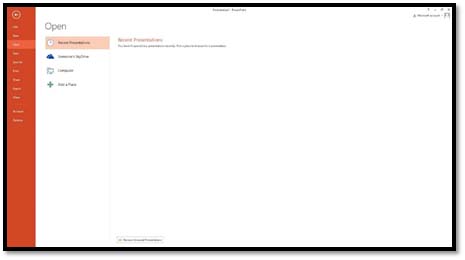
To do this, go to the Backstage View, then click Open in the left column.

Under Open, choose where you want to search for the presentation.
Find the presentation you want to open, and click the Open button.
It's important to note that you can create slide shows using PowerPoint. However, when you're working in the PowerPoint program, you aren't creating slide shows. You're creating presentations. We'll learn to create slide shows later in the course.
Saving Presentations
If you want to quit working on a presentation for a while, or just want to save it, click the File tab. Choose either Save or Save As from the column on the left.
If you click Save, it will save the presentation by the current file name at the location where the current file is located. If this is your first time saving a new presentation, it will name it the default Presentation1.
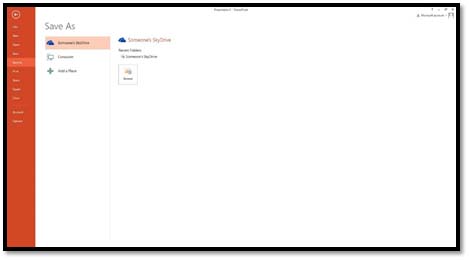
First, choose where you want to save the file.
You can:
-
Save it to the cloud (SkyDrive)
-
Your computer
-
Or you can add a place, such as SharePoint.
Let's choose computer.
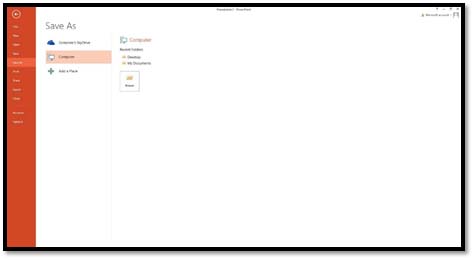
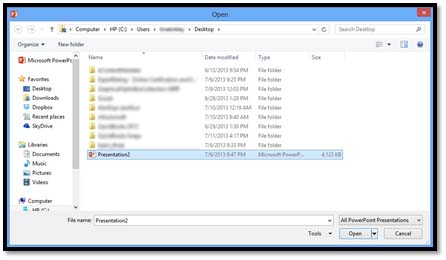
As you can see, you can now choose a location on your computer. You can choose one of the recently used folders or click Browse to locate the location where you want to save the presentation to.
We're going to choose Desktop.
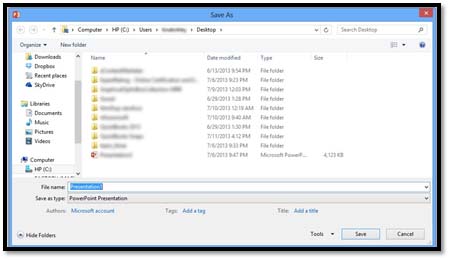
Type in a file name in the File Name field.
Select a format type for your presentation in the Save As Type field.
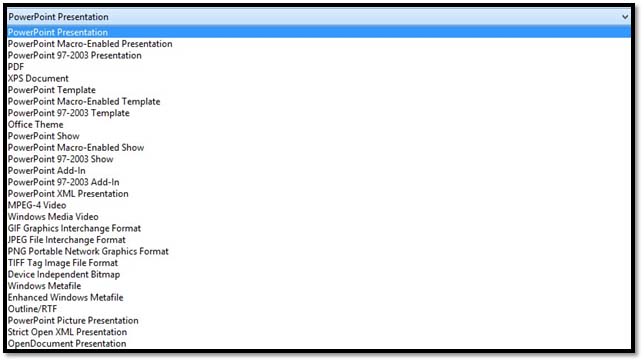
PowerPoint Presentation is probably the most common format. The presentation format allows you to open, edit, and work on your PowerPoint file. However, you can also save your presentation as a slide show by choosing PowerPoint Show.
If you don't want to save your presentation as a PowerPoint file at all, you can also save it as a PDF, an image file, an outline (it will open in MS Word), or even a MPEG-4 Video or Windows Media Video. Yes, you can now make a movie using PowerPoint!
Click the Save button when you're finished.
Closing a Presentation
To close a presentation, you can do two things.
You can click the "X" at the top right of the PowerPoint window, or you can go to the Backstage View.
Click Close on the left.
Getting Help with PowerPoint 2013
There may be times when using PowerPoint 2013 that you forget how to do something, or need assistance completing a task. To access the help files in PowerPoint 2013, click the question mark symbol at the top right side of the screen.
It looks like this: 
When you click on Help, you'll see this window open:
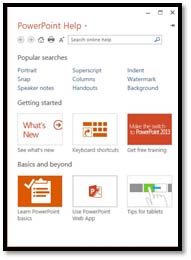
You can search PowerPoint's online help by entering what you need help with in the search box, or you can choose a popular search topic.
Click the "X" at the top right of the screen to close Help.