Conversations
One of the new features in Microsoft 2013 is the ability to sort your emails by conversation. It helps to keep your inbox more organized, and you can also see what's being discussed in emails. By default, the conversations feature is turned off. We're going to show you how to turn it on, how it works, and how you can use it.
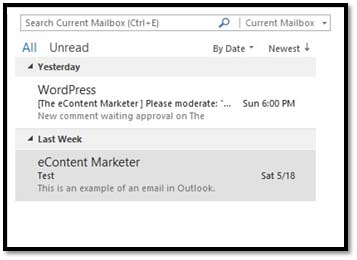
Right now, your emails are simply organized by date, as in our inbox shown below.
To view your emails by conversations, click on the View tab. Then, put a check mark in the box Show as Conversations in the ribbon (shown below).

A box will appear asking you what folders you want to show as conversations.
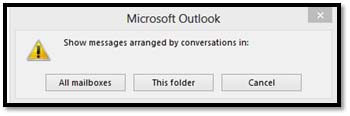
Since we only have one email account tied to Outlook, we're just going to select This Folder. If you have more than one email account, you may want to select All Folders.
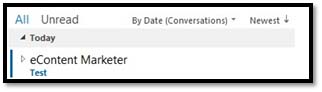
Now, emails within a conversation will have a white triangle beside them as shown below. You can click on the triangle to view all the emails in the conversation.
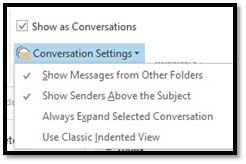
You can also edit the way you view conversations. Go back to the View tab and click Conversation Settings. In the drop-down menu, you can choose to show the sender of the email above the subject line, expand conversations (so they're not collapsed like in the above snapshot), or indent conversations as they go down like threads on an online discussion board.
Ignore Conversations
Sometimes you can get emails that don't pertain to you. Perhaps they did at one point, but as the conversation drags on between multiple people, the topics of the email are no longer relevant in your corner of the world. Perhaps, for example, John, Jane, and you are emailing about Project A. After a few emails between the three of you, John and Jane start talking about Project B � which you are not working on. Instead of having to look at those conversations in your inbox, you can ignore them so you don't have to see them at all.
To do this, select the message in your inbox.
Then, click on the Home tab and click Ignore.
You'll then see a dialog box asking you to confirm you want to ignore the conversation.
Click the Ignore Conversation button.
Creating an Auto Signature
An auto signature is something that is automatically put at the end of every email you send. It might just be your name, so you don't have to type it out each time you create an email. It could be your name, phone number, and address. However, it could also be something such as a favorite quote or saying. Whatever it is, it becomes your signature, so to speak, because it appears at the end of all your emails � just like your name would appear at the end of a handwritten letter.
Putting an auto signature at the end of your emails is totally optional. However, if you want to do it, click on the File tab, then click Options on the left.
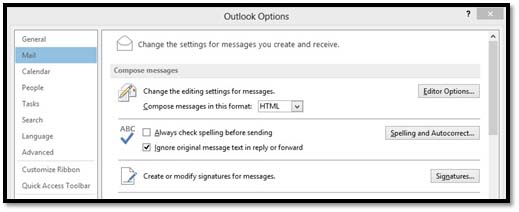
Click the Mail category on the left, then go down to Create or Modify Signatures for Messages (it's right below Spell Check). Click on the Signatures button.
The Signatures and Stationary dialog box will now appear:
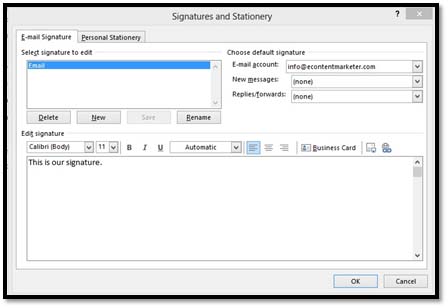
To add a new signature, click the New button under Select Signature to Edit.

Enter a name for the signature, then click OK.
Select the email account for which you want to add a signature. Also select if you want it to add it to New Messages and Replies/Forwards in the Choose Default Signature box.
Now, in the Edit section at the bottom of the window, you can create your signature, as we did below, by simply clicking in the text box and starting to type.

You can also add a business card as your signature by clicking  . If you select this option, you'll then see the window below:
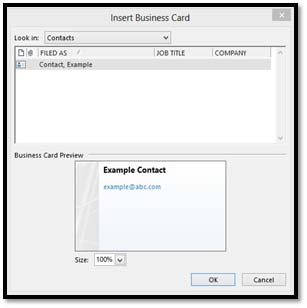
As you can see, you can insert your business card by adding yourself as a contact.
Also, you can insert a picture from your computer or a link to a website : .
: .
When you're finished, click OK.
Set Importance and Sensitivity
When you set the level of importance for a message, you tell the recipient if the message needs their attention quickly or if they can just read it later. Your recipients will know if you've set a level of importance by a visual indicator in their inbox.
You can also add a sensitivity setting. This advises the recipient on how to treat the contents of your email message.
Change the Importance Level
In your email message window, click the Message tab. In the Options group, select High Importance or Low Importance.

This changes the importance level for just the one email message.
This is what your recipient will see in their inbox if the message is set for high importance:
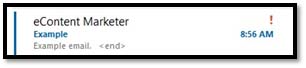
You can see the red exclamation mark to the right of the message. If it had been set to low importance, you would have seen the blue downward arrow (as shown beside Low Importance in the ribbon).
To change the importance level for all email messages, go to the File tab, then click Options on the left. Click on the Mail category on the left. Under the section Send Messages, change the Default Importance Level to high, normal, or low. Click OK when you're finished.
Change Sensitivity Level
Remember, a sensitivity level is only an advisory on a message. Recipients can still do what they want, including forwarding the message to others, even if you don't want them to.
When you assign a sensitivity level to a message, a recipient will see one of the following messages in the InfoBar of the message.
- Normal � Nothing is in the InfoBar, because it's a normal setting.
- Private � The recipient will see: Please Treat This as Private.
- Personal � The recipient will see: Please Treat This as Personal.
- Confidential � The recipient will see: Please Treat This as Confidential.
To add a sensitivity setting to an individual email, click on the Message tab (in your email window), click the Options tab, then click to display the options box for the More options group.
NOTE: Remember, click the arrow at the bottom right of the group to display all options for that group. It looks like this :
:
You'll then see this dialog box:
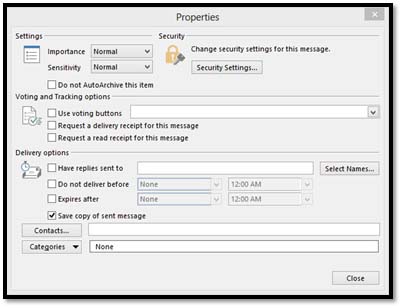
In the Settings section, set the sensitivity for the message. Click Close when you're finished.
To change the sensitivity level for all emails, go to the File tab, click Options. Under the mail category, go to the Send Messages section, and change the default sensitivity level.
Read and Delivery Receipts
Read and Delivery Receipts are just as they sound. A Read Receipt is a receipt you can request that will tell you when the recipient of an email has opened and viewed the email. On the other hand, a Delivery Receipt will let you know when the email has been delivered to the recipient's email server.
To request Read Receipts or Delivery Receipts for all emails you send, go to the File tab, then click Options. Select the Mail category from the left, then scroll down to the Tracking section.
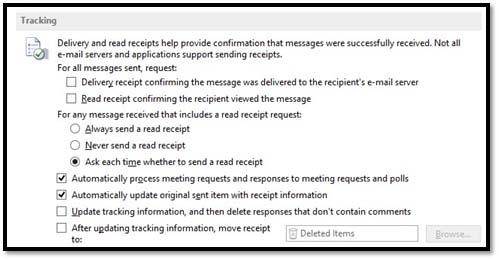
If you want notification when emails are delivered, put a check mark next to Delivery Receipt Confirming the Message Was Delivered to the Recipient's Email Server.
If you want a Read Receipt, put a check mark next to Read Receipt Confirming the Recipient Viewed the Message.
Click OK.
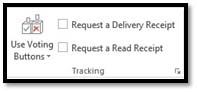
To request a Read Receipt or a Delivery Receipt for an individual email message, click the Options tab (in the email ribbon), then in the Tracking group put a check in the box requesting a Read Receipt or a Delivery Receipt.
Have Replies Sent to Someone Else
Let's say you send out an email for your boss. Since the email is from your boss, and you are just sending it for him, you do not want the recipient to reply to you. Instead, you want the recipient to reply to your boss. In Outlook 2013, this is easy to do.
In your email message window, click on the Options tab.
In the More Options group (on the far right), click the Direct Replies To button.
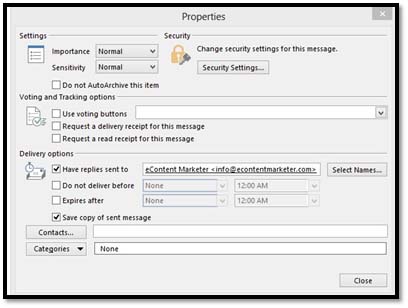
Add the email address of the person you want replies directed to in the Delivery Options section of the dialog box. You can click on the Names button to select names from your contacts or type an email address in. Click Close.
Now if anyone replies to your email, it will be sent to the person you specified, instead.
Expires After, Do Not Deliver Before Options
You can request that Outlook 2013 not send a certain message before a specified date. Outlook will wait, then send your message on the date you requested. At the same time, Outlook 2013 can also mark an unread message as expired after a specified date. An expired message will have a line through it. This is helpful for time-sensitive materials (for example, announcing a meeting), so that once the day has passed, there's a line through the email and the recipient knows he/she doesn't have to bother reading it.
To set Expires After or Do Not Deliver Before Options, go to the Options tab in your email window. In the More Options group, click the gray arrow at the bottom right side.
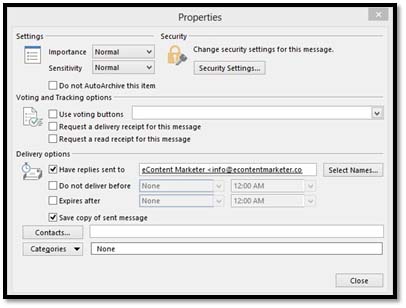
Go down to the Delivery Options section.
If you don't want your message delivered before a specified time, put a check mark before Do Not Deliver Before, then set the time.
If you want the message to expire, put a check mark before Expires After and set the specified time.
After you've set your options, click Close.
Voting Buttons in Messages
Outlook 2013 provides you with a way to add voting buttons to the emails you send. When you add voting buttons, people who read the message can vote for options that you give in the email. You get the votes returned to you as a special email message.
To add voting buttons to an email, start a new email or look at an existing one you're creating.
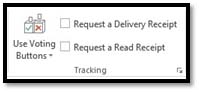
Click on the Options tab, then click on Use Voting Buttons in the Tracking group.
Now you'll get a list of voting options.
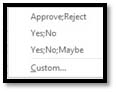
You can select one of these options. These are the options your recipients will have when they vote. For example, the Yes;No option will mean they can vote Yes or No.
Once you select an option, you'll see a message saying you've added a voting button to your email. It appears above the To line.
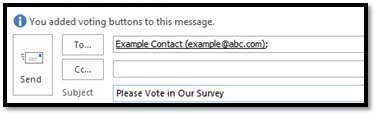
Now you can send the message, and your recipients can vote. You'll receive special email messages letting you know how each recipient voted.
Flagging Messages
In Outlook 2013, you can flag messages that require action � either as a reminder to you, or to a recipient. It's a way of saying, "Hey, you need to take care of this now," without actually saying it or putting it in the body of an email. In fact, you or a recipient will see the message is flagged for action without even opening the message.
Here's how you flag messages in Outlook 2013:
To flag a message as a reminder to yourself to follow up with the recipient about the email, go to the Message tab (in your email message). Go to the Tags Group.
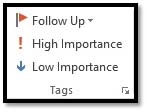
Then under Tags, click Follow Up.
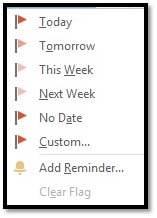
Choose an option for when you need to follow up on this message.
When you do that, you'll see a message in the email, above the To line.

If you want to be reminded about this flagged message so you don't forget to follow up, go back to Follow Up and click Add Reminder.
Choose when you want Outlook to remind you. At the time that you select, Outlook will display a pop-up dialog box with your reminder.
Click OK when you're finished.
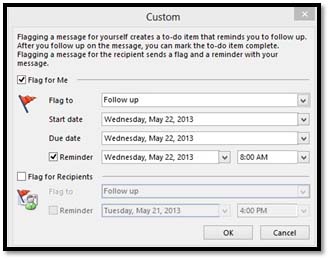
To flag messages for recipients of the email, go to the Message tab, then click Follow Up in the Tags group. Click on Custom.
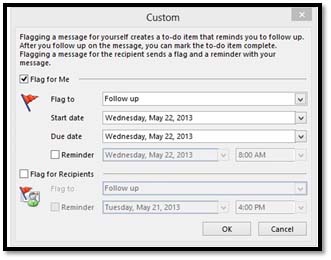
The Flag for Me box will be checked by default. If you don't want to flag this message for you, uncheck it.
Put a check in the Flag for Recipients, then enter your information. Click OK.
There's now a note in your email letting you know that you've flagged it for the recipient.
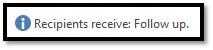
When a recipient receives the email, they'll see this icon:  . It will be displayed with the email in the Information Viewer:

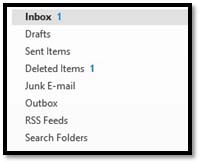
Flagging From the Information Viewer
You can also flag messages in the Information Viewer. You can flag received or sent messages. If you want to flag received messages, go to your Inbox. If you want to flag messages you sent, go to your Sent Items folder. These are both displayed below in the Folder Pane:
Now, select the email you want to flag by clicking on it.
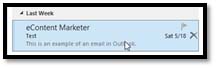
When you hover your mouse over the selected email, you'll see a little gray flag appear on the right side, as shown below.
Right-click on the flag, and flag it the same way as you did earlier in this lesson.
One-Click Flagging
If you flag a lot of messages, you can set options for one-click flagging. This means you can flag messages with just a click of the mouse and not having to go through all the steps we did above.
To do this, select the email in the Information Viewer that you want to flag. Hover your mouse, then right-click on the gray flag.
Choose Set Quick Click from the drop-down menu.
You'll then see this dialog box:
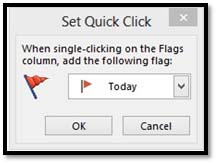
Now, set what flag you want displayed when you single-click on a flag in the Information Viewer. We're going to choose Complete from the drop-down menu so that whenever we take care of a flagged email, we can quickly mark it complete by just clicking once on the gray flag.
Quick Steps
By definition, Quick Steps are one-click buttons that allow you to perform several actions at once. For example, if you file your mail into folders before you even read it, then you can just do one click and have your mail marked as read and filed away for you.
Let's say you send email to the same people frequently. Just one click and you can send a new email to those people, instead of digging through your address book.
You can configure Quick Steps the way you want to make the things you do quicker and easier.
Okay, so let's dig in, and let's use our mail filing example from above to learn how to do Quick Steps. We're going to use this example, because it's proven that more than 70 percent of people file mail away into folders.
Before Quick Steps, you dragged and dropped it in the appropriate folder (after marking it read) or you right clicked and selected Move to Folder. Quick Steps makes it a lot easier.
Select an email you want to file to a folder. Let's say you get a lot of emails from Jane Doe that you file. Select a message from her, then right-click on that message in your inbox.
We're going to show you two different ways to create a Quick Step so you will know exactly how to create your own Quick Steps.
Method 1.
Select Quick Steps from the drop-down menu, then New Quick Step, and then Move to Folder.
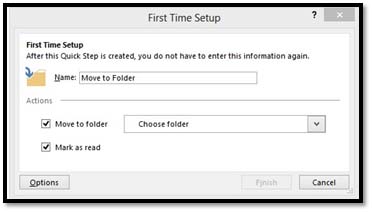
Enter a name for the Quick Step. Our name is going to be Move to Blog since we have a folder set up for blog emails.
Now, we're going to check the boxes for Move to Folder and Mark as Read, then specify the folder Blog.
Click Finish.
Method 2 . This method involves creating a new Quick Step and determining the actions for it.
Select Quick Steps from the drop-down menu just as you did above, but this time select Create New.
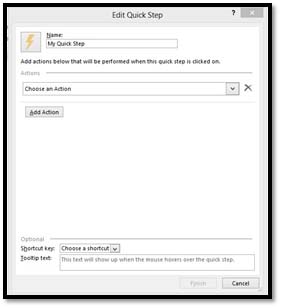
Enter a name for the Quick Step, then select an action.
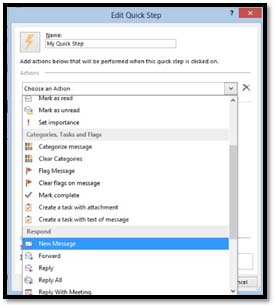
We've chosen New Message.
Now we're asked to specify a recipient.
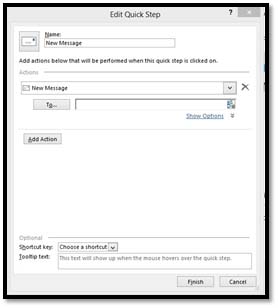
We can now add more actions. We can also create a shortcut key to "activate" this Quick Step.
Click Finish when you're done setting options.
Now, click on the Home Tab and look in the Quick Steps Group. This is where you find the preset Quick Steps as well as the ones you create.
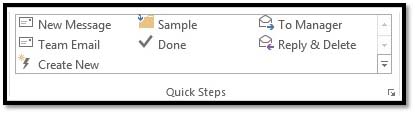
You can see our Quick Step added above (New Message). Now we can just click on it or use the shortcut we created.
Now all we need to do is click on our Quick Step to take those actions.
Assigning Messages to Junk
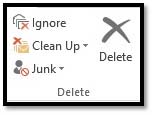
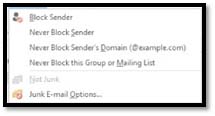
If you get a lot of spam or junk mail, you can make it so you don't have to even look at it in your inbox. To assign mail to Junk, go to the Home Tab and in the Delete group, click on Junk. If you select an email in your inbox (don't open the email, just click once on it), you can choose to block the sender so you don't get the email messages, never block the sender, never block the sender's domain (the name after the @ sign), or never block the group or mailing list.
You then see these options in the drop-down menu:
NOTE: Remember, you have to have an email selected in the Information Viewer.
Choose an option.
You can also click Junk E-Mail Options to be more specific.
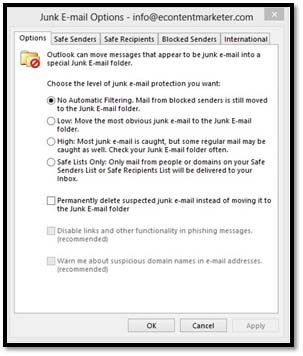
Under the Options tab (shown above), you can tell Outlook what you want to do with junk mail.
If you click on Safe Senders , you can make sure mail that's important to you is never marked as junk by adding those names to the list.
Under the Safe Recipients tab, you can make it so that anyone you send an email to will not be put on your junk mail list.
Under the Blocked Senders tab, you can list email addresses that will ALWAYS be treated as junk mail.
Under the International tab, you can block emails written in different languages, or those with foreign domain codes such as .de or .ca.
After you make changes, make sure you click Apply so the changes are saved and take effect.
Saving an Interrupted Message
It's bound to happen. You start to create a new email message, but you don't have time to finish it � or you need more information to add to it before you send it.
These types of messages can be saved to your Drafts folder in the Folders pane.
Simply click on the File tab (in the email message) and click Save. The email will be in your Drafts folder.
Saving a Message as a File
You can also save a message as a file and save it to a location on your computer. To do this, go to the file tab, then choose Save As.
Choose the location where you want it saved, then the format you want it saved as.
Save a Copy of a Sent Message
Messages that you send are stored in your Sent folder in the Folders pane. However, you can also specify the folder where you want to store a copy of a message that you sent.
Here's how.
Go to the Options tab, then the More Options group.
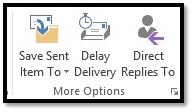
Click on Other Folder in the drop-down menu.
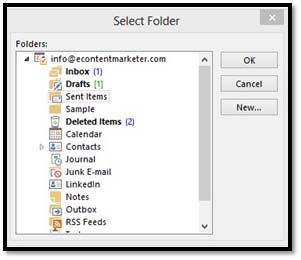
Choose the folder you want to save it to, or create a new folder by clicking the New button.
Click OK when you're finished.