If you're a photography enthusiast or have the need to edit photos or graphics, then you'll absolutely love Photoshop Elements 8. This software program is simply a condensed version of the well-known software program Photoshop. It offers a lot of the same features, but has fewer and much simpler options. Overall, it's much easier to use once you become familiar with it.
While Adobe's Photoshop was created for the professional and contains tools that printers and graphic artists benefit from, Elements was created with the consumer in mind. It's the perfect, easy-to-use software for anyone who wants to crop or otherwise edit photos and graphics.
Using Elements, you can:
- Resize photos
- Crop photos
- Create and manage photos and albums
- Share photos and albums
- Add text to photos and albums
- Manipulate images
- Add, erase color
- Adjust color
- Extract images from a photo
- Draw
- Work with layers
- And much more.
Learning how to use Elements isn't going to be all that difficult or complex because the software isn't either one of those things. However, how easy it is for you to use will depend on how well you learn the features and options, as well as how to navigate through the software program.
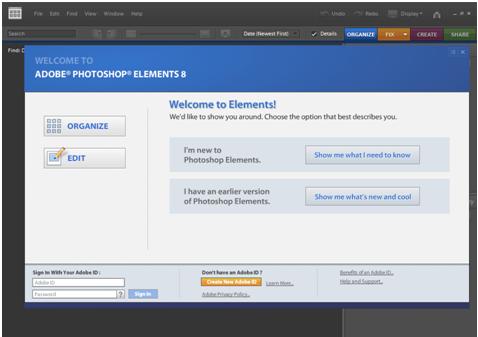
The Welcome Screen
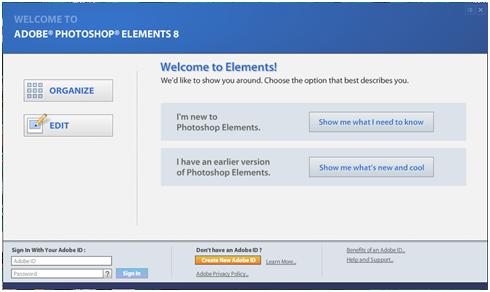
Unlike most software programs, simply clicking on the icon does not open the complete Elements program. With Elements, you get the Welcome Screen instead that allows you to choose how you want to use the program. The option that you choose will dictate what part of the Elements software will open for you.
The first choice you have when you see this Welcome Screen is to decide if you are new to Elements or if you have already used a previous version. If you click "Show Me What I Need to Know" or "Show Me What's New and Cool," Elements will give you a tour of their software.
Instead, you can choose:
 Organize. Organize allows you to organize your photos. You can use this option to import photos from your computer, CDs, or other files as well.
Edit. If you want to crop, resize, add text, or in any way edit photos or graphics, then you will choose this option.
Removing the Welcome Screen
We will be using Elements 8 for all screen shots, etc. If you have an older version, that's not a big deal. There are only two differences that you will notice. The first is that the screen appearance may be slightly different. Second, if you're using an older version of Elements (6 and prior), you can get rid of the Welcome Screen if you wish to do so. In Elements 7, you are just stuck with it unless you want to make programming changes.
Elements 8 doesn't give you a way to remove the Welcome Screen, but it does give you a way go ahead and bring Elements up instead of having to click through the Welcome Screen to get to it.
To do that, click the little box to the right of the X at the top right of the window (as shown below.)

This dialogue box will appear:
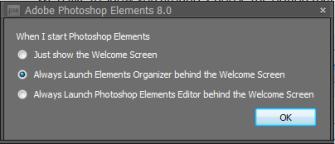
You can choose to launch the Organizer behind the Welcome Screen -- or the Editor. For now, let's just select to launch the Organizer behind the Welcome Screen as an example, so you can see what it does.
Click OK.
To get rid of the Welcome Screen, just click the X in the upper right corner.
This could come in handy if you use the Organizer a lot -- or the Editor. It may not be a time saver, per se, but it can take you where you want to go immediately without having to navigate.
The Organizer Environment
In this article, we're going to discuss the features and options associated with the Organizer environment. Let's start by opening Element and clicking on Organizer on the Welcome Screen.
When you click on Organizer, this window appears:
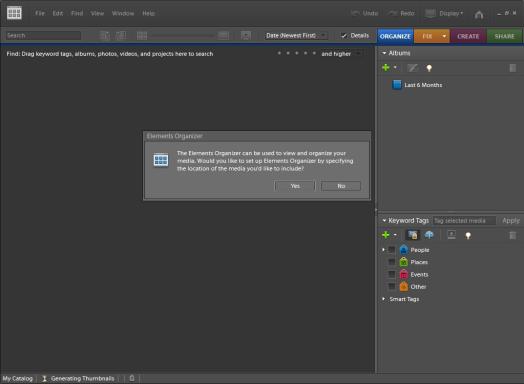
The first time you launch the Organizer, the dialogue box that appears in the above snapshot will appear to you. It will ask you if you want to specify a location for media (pictures, graphics), that you want to use in Organizer.
Let's show you how to do that. We'll click Yes.
In the dialogue box above, you'll select the location on your computer that contains the media you want to use, then click open.
Select the media and click the Get Media button. To select more than one photo or graphic, left click on your mouse and drag it over all images that you want to import in Organizer.
We've selected a photo in the example below.