OneNote is really a simple program; however, it can do a lot. With OneNote installed on your Android or iOS based device, you can access Office files on the go. You can also insert content from other Office apps into your notes. You can insert office documents as printouts, attachments, or manually as raw data. Although you can't do much editing of the data you insert, you can access it via OneNote.
Inserting a Printout of Data
If you choose to insert data as a printout, OneNote will treat it as if it was a true printout that you stuck in a binder. The data can't be edited, but you can mark it up with ink.
To add a Word document as a printout in notes, open the note you want to use, then click to place the cursor where you want the printout.
Next, go to the Insert tab. Click File Printout.
Locate the file you want to insert as a printout.
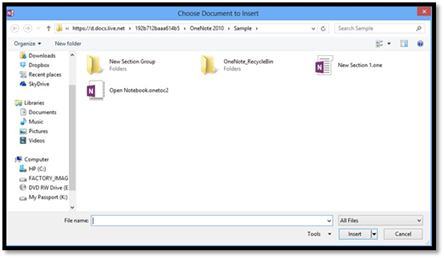
Click Insert.
The file is inserted into your notes as an image.

Inserting Data as Attachments
If you insert data as an attachment to your notes, an icon of the associated Office program will appear in your notes. You can then double click it to open the file.
To attach data, click in your notes where you want the icon to appear.
Go to the Insert tab. Click File Attachment.
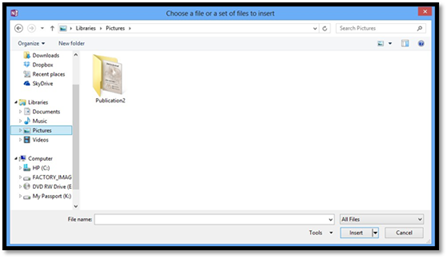
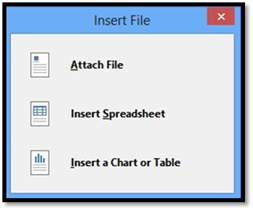
Select the file you want to attach, then click the Insert button.
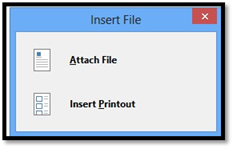
Select Attach File from the dialogue box pictured above.
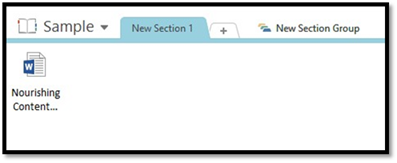
Your file is then attached to your notes:
Inserting Data Manually
If you just want to insert certain elements of a data file into your notes, you can do so by inserting data manually by using copy and paste . You'll be able to edit some data that you paste, such as text. However, you won't be able to edit other elements, such as an image from a Visio file.
Inserting Existing Data from Excel
So far, we've focused on MS Word for the most part, but what about Excel? OneNote allows you to add spreadsheets to notes. You can also add charts and tables from a spreadsheet into your notes. The only way you won't be able to edit the data is if you insert it as a printout.
When you insert data from an existing spreadsheet, all cells that contain information or are between cells that contain information will be inserted into your notes.
Here's how to do it.
Place the cursor where you want the Excel data to be.
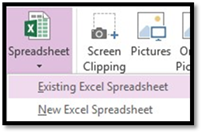
Go to the Insert tab.
Click the Excel icon, then Existing Excel Spreadsheet, as shown below.
Find the spreadsheet that you want to insert.
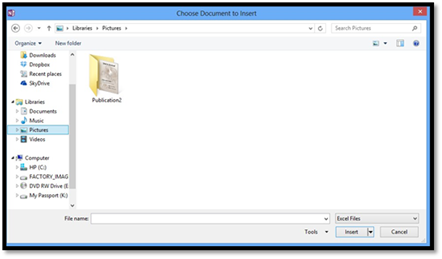
Click the Insert button.
Choose Insert Spreadsheet in the dialogue box pictured above.
Your spreadsheet now appears in your notes.
NOTE: You can also insert an individual chart or table using these steps. Just select Insert a Chart or Table from the dialogue box pictured above.
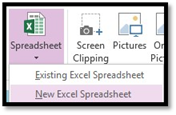
Insert New Data from Excel
As you have probably noticed, OneNote doesn't give you the extensive chart and table tools that come with other Office programs such as Excel. However, that doesn't mean you can't use those tools with OneNote. You can by inserting data.
As you're creating notes, perhaps you realize that you need a fancy table or a chart inserted into your notes. This is easy to do using the Spreadsheet button under the Insert tab.
Select New Excel Spreadsheet from the dropdown menu.
As you can see, a new spreadsheet is inserted.
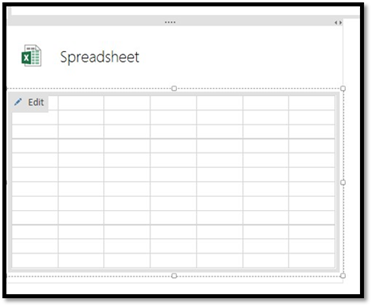
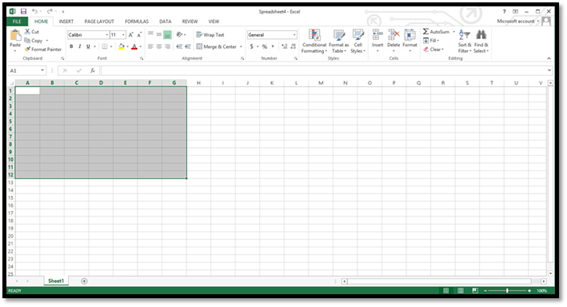
Now click the Edit button in the upper left hand corner of the spreadsheet.
MS Excel opens.
Tagging Notes and the Send to OneNote Tool
When you have a real notebook in your hands, you may use things like post-it notes or paper flags to tag content that you want to remember. Unfortunately, when you're on a computer using OneNote, a post-it note or paper flag isn't going to do any good. However, you can use tags.
OneNote 2013 has a tagging feature so that you can mark important content that's on your pages. There's a long list of tag types so that you can tag text, video, audio, images, tables, and everything else easily.
Tagging Notes
To tag content or objects in your notebook, go to the Home tab and click Tags in the Tags group.
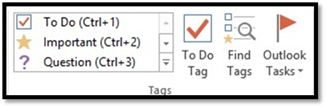
In the box that says To Do, Important, and Question, click the downward arrow.
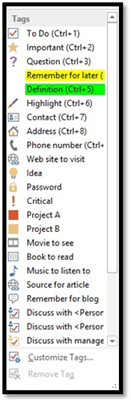
Above is the dropdown list of all the tags you can use.
Now, go to your notebook and select the content that you want to tag.
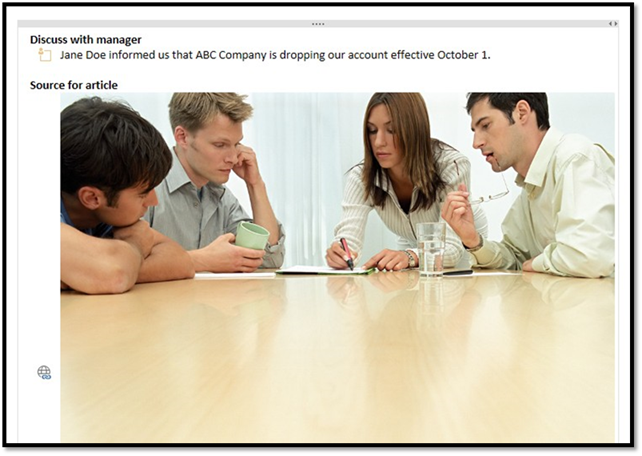
We've tagged the following text with the tag "Discuss with Manager."

You can see the icon beside it that lets us know that it's tagged.
Let's tag some more things in our notebook.
We tagged this picture with Source for Article:

Now, let's say we have a lot of things in our notebook tagged, and we want to find our tagged content. Click Find Tags. It's under the Home tab to the right of your tags.
The Tags Summary Pane will appear.
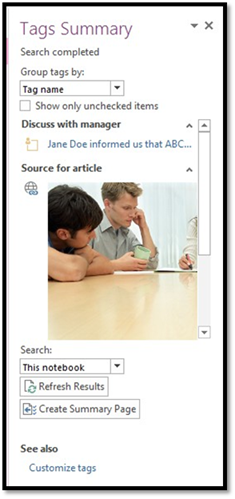
You can see the tags we've added.
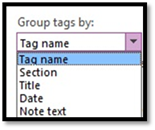
In the Group Tags By section, select how you want to view the tags. OneNote will group your tags as you specify here.
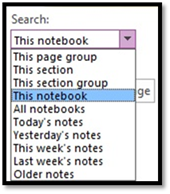
You can also search for tags by clicking the downward arrow in the Search section.
You can also create a Summary Page that lists your tags. Just click the Create Summary Page button.
The Send to OneNote Tool
The Send to OneNote tool has been improved in OneNote 2013. You can use it to clip and save a portion of the screen you're viewing, but you can also use it to send information from one program to another � or to take quick notes.
The Send to OneNote tool opens with OneNote. However, if it doesn't, you can turn it on by going to the View tab, then clicking the Send to OneNote tool button.
The Send to OneNote tool is pictured below:

As you can see, you can take a screen clipping, send data to OneNote, or create quick note.
Capture Screen Clippings
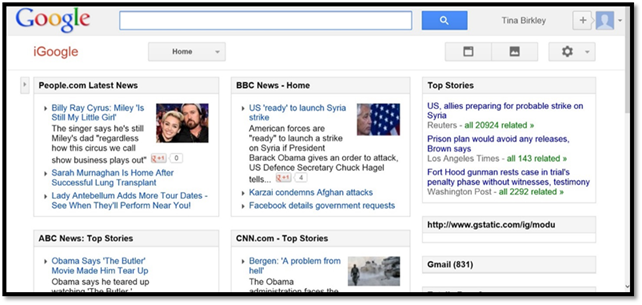
Screen clippings are another phrase for screen captures � or snapshots of your screen. For example, if you're looking at a page on Microsoft Internet Explorer, you can take a screen clipping of that page.
Here's how to do it.
We're looking at this page on Internet Explorer.
If we want to take a screen clipping of the page, we click on the OneNote tool in the task bar (at the bottom of your screen.) It looks like this:

The screen will have a haze over it. Use the crosshairs (the cursor) to drag over the portion of the screen you want to clip.
When you release your mouse, you'll see this window:
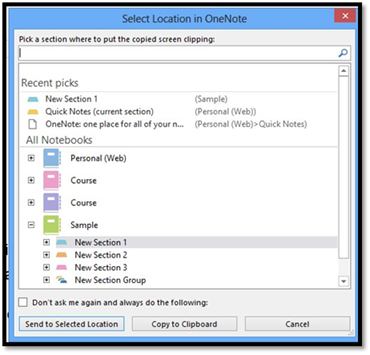
Choose where you want to place the screen clipping, then click the Send to Selected Location button.
You can also click the Copy to Clipboard button to manually place the clipping in notes or another program.
Send Data to OneNote
You can also use the OneNote tool to send data from one program to OneNote. When you do this, OneNote will assume you want a printout of the file, so it won't be attached.
First, choose the data you want to insert. It might be a Word file, for example.
Then, go to the OneNote tool and click Send to OneNote.
You'll then see this window:
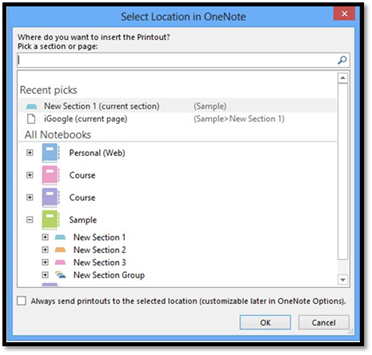
Choose where you want to insert a printout of the file.
Taking Quick Notes
Quick notes is a way that you can take quick notes (just as the name implies) without having to add them to a certain page or section immediately. You can put the quick notes that you take where you want them in your notebook at a later time.
You can use quick notes by going to the OneNote tool and clicking the New Quick Note button � or by selecting Quick Notes from the dropdown list for your notebook.
Let's open quick notes using the Send to OneNote tool.
When you do, a little window opens.
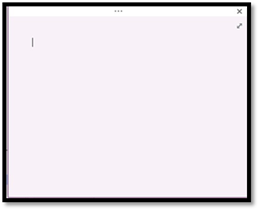
You can start typing your notes. The cursor is already in place for you.
However, if you click the dots at the top of the screen, you can also see commands and tools for you to use with quick notes.
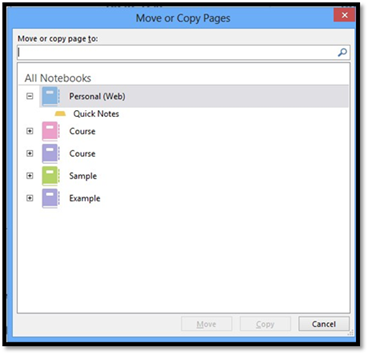
When you're ready to file your quick note, you can do so by going to the Pages tab and selecting Move Page.
You can then choose whether to move the quick note or copy it to another page.
Working with Unfiled Notes
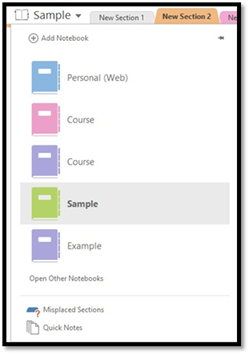
When you create notes from a mobile device the page will go into Unfiled Notes that you can find in your Personal (Web) notebook on your SkyDrive.
Linked Notes
Linked notes are notes that are taken in a docked window when OneNote is docked beside MS Word, Excel, or Internet Explorer. Let's learn exactly what that means.
First, dock OneNote 2013. You can do this using the Quick Access Toolbar. You can also click the View tab, then Dock to Desktop.
You'll see this message appear when you start to take notes.
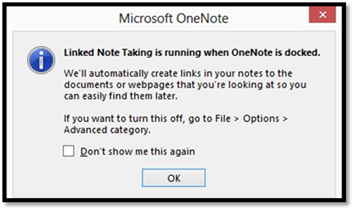
Click OK.
If you look at OneNote and click on the notes you typed, you'll see an icon for the program you had OneNote docked beside.
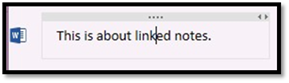
If you undock OneNote, the notes you typed appear on your page. If you select the note, you'll see the icon again. You can click on the icon to access the program or file you were working on when OneNote was docked.
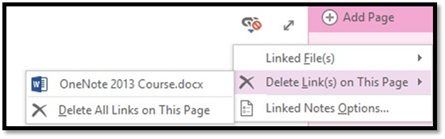
If you want to unlink notes, click the button pictured below.
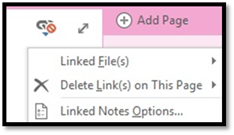
Choose Delete Link(s) on This Page, then choose the link you want to delete. Select Delete All Links on this Page to delete all links.
History
If you want to see previous versions of pages within your notebook, open the page that you want, then click the History tab, then Page Versions in the History group.
Select Page Versions from the dropdown menu that appears when you click on the Page Versions button.
On the right side of the page where your page list appears, you'll see the dates for which previous versions of your page existed:
Click on the date to view the previous version of the page.
Using the Page Versions button, you can also:
-
Delete the history for the entire notebook. When you do that, you won't be able to access previous versions anymore.
-
Delete all versions in a section. This deletes previous versions in a section of your notebook.
-
Delete all previous versions in a section group.
-
Disable history for the entire notebook so that previous pages won't be stored.
Researching
Did you know that you can also use OneNote 2013 to do research? You can, and it is easy to do.
Go to the Review tab and click the Research button in the Spelling group.
You will then see the Research Pane appear on the left side of your screen, as pictured below.
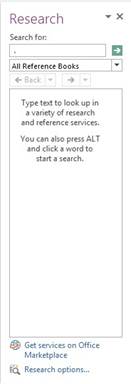
Type in what you want to research in the Search For box.
Below the Search For box, specify what you want to use to do your research by clicking the downward arrow.
Your results appear in the column:
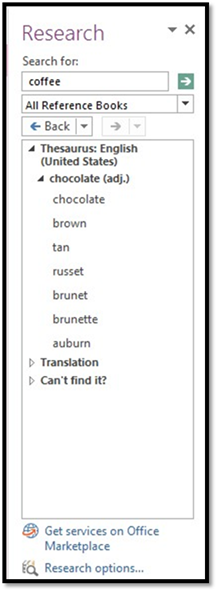
Now, if you click on any one of these results, a browser window will open where you can see the information on your screen.
If you click Research Options at the bottom of the Research Pane, you will see this window:
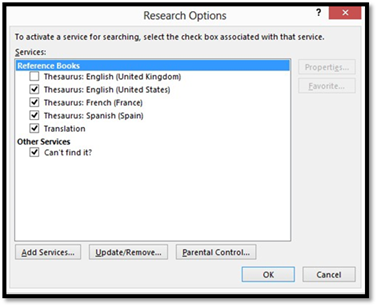
If you want to be able to use more reference books, you can put a checkmark by the books you want to use.
Integrating OneNote with Outlook
If you use Outlook as your email program, you can easily integrate it with OneNote to make scheduling meetings and tasks easier than ever before. You can add meeting details to notes and create tasks to send to Outlook. Because this is highly useful feature of OneNote 2013, we're going to dedicate this article to it.
Inserting Data from Outlook
There may be times when you want to include an email you've sent or received into your notes, perhaps as a reference. Rather than copying and pasting the email, OneNote gives you a way that you can insert emails from Outlook into your notes.
To do this, open Outlook. Select the email that you want to insert into your notes.
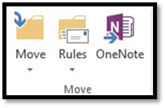
Go to the Home tab in Outlook. Click the OneNote button in the Move group.
When you click on the button, you'll see this dialogue box:
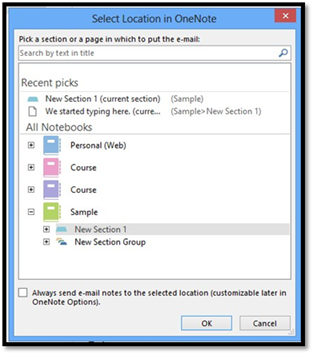
Select the notebook, section, and/or page where you want the email to appear, then click OK.
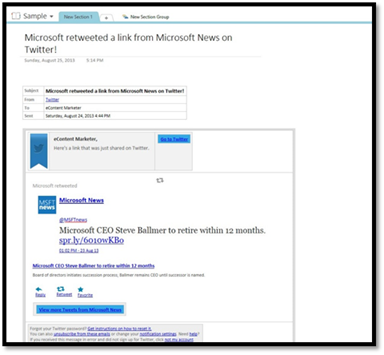
The email is inserted into your notes.
Sending Outlook Tasks from OneNote
If you use Outlook 2013, you know that you can create, schedule, then manage tasks in that program. But did you know that you can also send tasks to Outlook from OneNote to help manage and schedule them better? Let's show you what we mean.
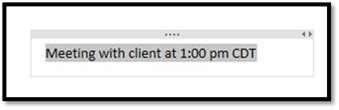
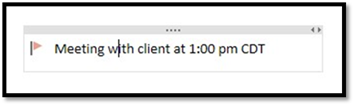
Go to a page in your notebook and select the text that you want to convert to a task in Outlook 2013.
You can see that we've selected our text below.
Now go to the Home tab in OneNote and click Outlook Tasks in the Outlook group.
Select the date for this task from the dropdown menu. We're selecting tomorrow.
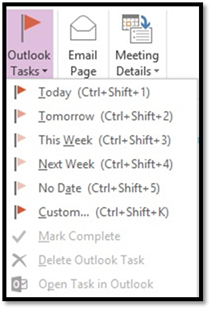
Once you click the date, it is automatically added to your Outlook tasks and a flag appears beside the text in your notebook.
Send Meeting Details
You can also send meeting details from Outlook 2013 to OneNote 2013. Let's show you how to do it.
First, launch Outlook 2013 and click on Calendar from the sidebar.
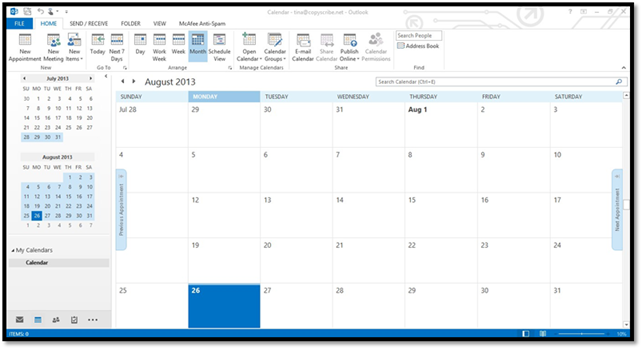
Now, add an appointment or meeting to your calendar, then click Save & Close.
You can now close Outlook 2013.
Go back to OneNote and go to the page where you want to add meeting details. Click where you want the details to appear on the page.
Now go to the Home tab and click Meeting Details in the Outlook group. You will see a dropdown menu listing your meetings.
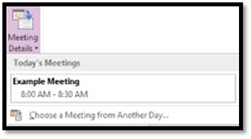
Select the meeting details that you want to include on your notebook page.