Elements is a neat software program because it has different interfaces (or environments) for all of its features.
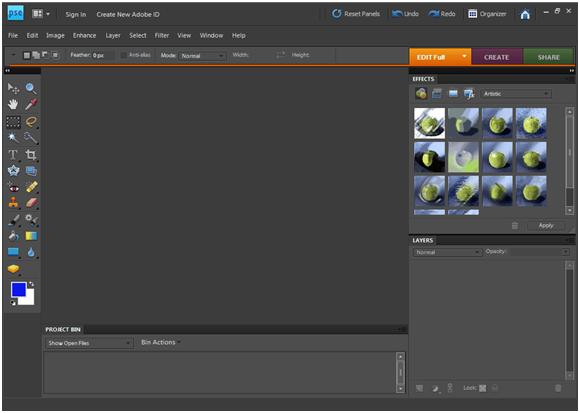
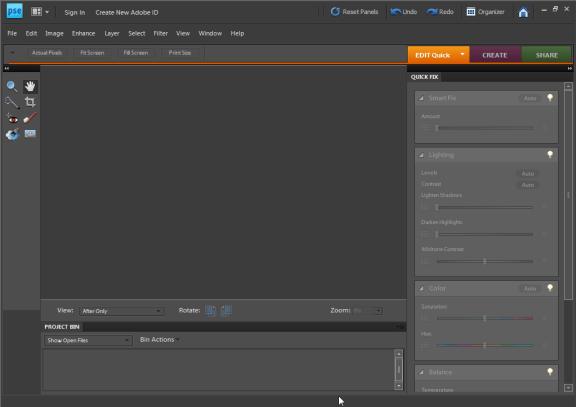
 icon to get to the Welcome Screen, then click Edit. When you open the Edit environment, you will see the Edit environment that looks like the one pictured below:
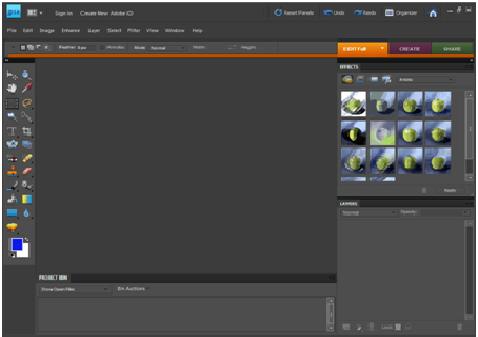
You will use this environment anytime that you want to change or edit images. This includes resizing, adding text, and image manipulation.
Full Edit Versus Quick Fix Mode
Elements offers you two ways to edit and make changes to your images. You have the option of using Full Edit or the Quick Fix Mode.
Here are the differences.
Quick fix is more for the novice image editor. Its ease-of-use and features caters to those who want to edit personal photos and just make basic edits. All the major "fixes" you would need to make to a photo are located in one place and easy to do.
The Full Edit mode puts you more in the mind of the Photoshop software. Although you certainly don't have to be an expert to use it, it offers the palettes and more complicated features that are similar or the same as Photoshop. Which one you use will depend on your preference as well as what task you need to complete.
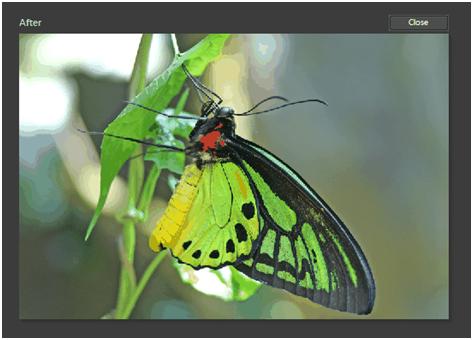
You can get an idea of the differences between Quick Fix and Full Edit by looking at the screen shots below.
Quick Fix
To switch between Full and Quick, click on the orange edit tab and select either Full or Quick.
Guided Edit
There is also the Guided Edit. Guided Edit makes editing your images even simpler because Elements does just as it suggests: it guides you through the edit.
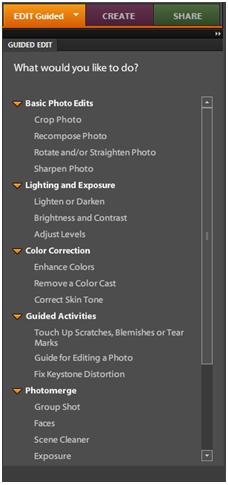
All you do is select the editing option that you want and let Elements guide you through.
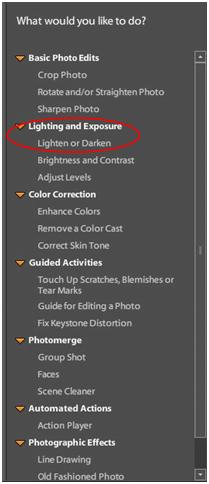
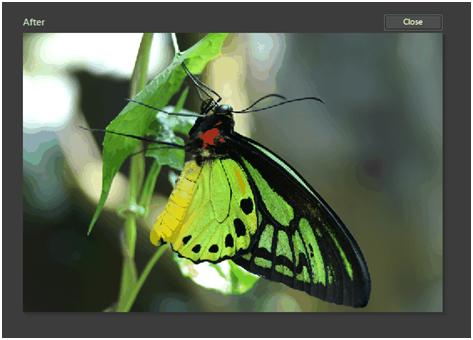
Let's do an example together. For this example, we're going to choose the menu item Lighting and Exposure, then Lighten or Darken.
Now, lets' get back to a guided edit.
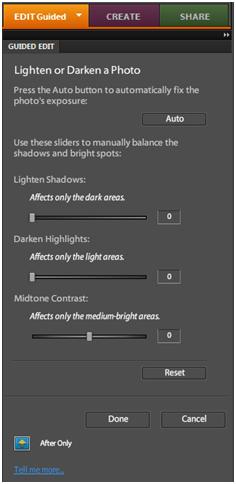
As you can see, it makes editing very easy.
Let's lighten the shadows on the picture.
We moved the slider under Lighten Shadows from 0 to 50. It took two seconds.

The Full Edit Mode
To enter the Full Edit mode, simply click full edit located in the orange edit tab on the right side of the window.
The Full Edit mode is very versatile and option-rich. It offers a lot of the same features as Photoshop.
You can correct exposure, color, and select certain parts of an image. You can also cut out parts of images and add layers.

You can arrange the Full Edit workspace to suit you and your needs by showing, hiding, and moving palettes. You can also zoom in and out of images, and you can set up different windows and views.
Opening Images
To open images in the Edit environment, go to File>Open, then find the images that you want to open. You can also use the Project Bin that we showed you earlier.
You can also use File>Open As to open files in different formats, or File>Open Recently Edited File to open files that you've recently had open. Elements provides you with a list of the file names. Just select one to open it.
The Palette Bin
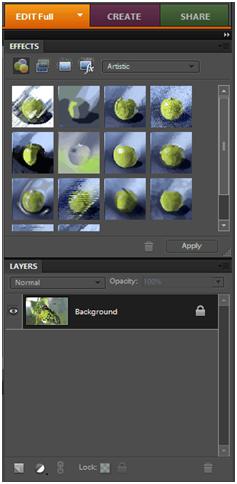
Only the Effects and Layers palettes show in Elements by default. To open other Palettes, go to Windows on the menu bar, as illustrated below.
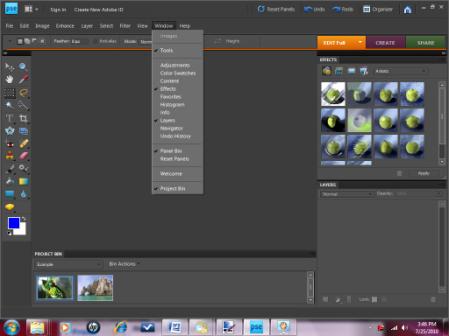
To add palettes, just select the palettes you want displayed from the Windows dropdown menu. The palette that you select will then be displayed. In the example below, we've chosen the Favorites palette.
You can see how now appears in the Palette Bin.
Project Bin
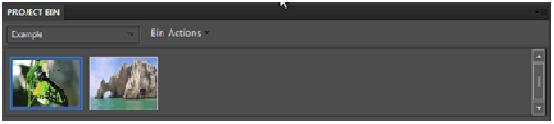
The Project Bin, as we've already learned, is located directly below the workspace, or the area where your images are displayed when you open them.

The Project Bin displays thumbnails of all the photos that you have open in the workspace. You can use it to easily switch between photos as you work. The Project Bin can also be used to open, close or hide images; navigate through images; make one image the top image in the workspace; duplicate or rotate an image; or view information about the image.
If you have a multiple paged project, it is shown in the Project Bin with a gray frame around it. Click the right edge to switch between images.
Here's how to do different tasks in the Project Bin:
- To open any image, you can drag it into the Project Bin. You can drag files from your computer into the project bin.
- Double click a thumbnail to bring an image to the front.
- Drag thumbnails to rearrange the order of the images. This does not affect the Organizer.
- If you want to close an image, right click on the thumbnail and select Close.
- If you want to hide an image, right click on the thumbnail and select Minimize.
- To view the information about a file, right click on the thumbnail and select File Info.
- Right click on the image, select Duplicate, then name the file to duplicate an image.
- If you want to rotate an image, right click the thumbnail, then select either Rotate 90 degrees left or 90 degrees right from the menu.
- To open or close the Project Bin, go to Window>Project Bin.
The Undo Command and Undo History Palette
The Undo History Palette lets you restore your images to undo previous changes. Each time you change or edit an image, a copy of the new image is saved in the Undo History Palette. You do not need to save your file for Elements to save a copy in the Undo History Palette. However, please remember that you must save the file if you want the version to remain after you exit out of Elements.
To open the History Palette, go to Windows>Undo History.
For example, if you rotate, crop, and lighten an image, each of these changes is saved and displayed in the Undo History Palette.
Below is an image we just lightened. In the snapshot below, you can see that the change was saved in the Undo History Palette.
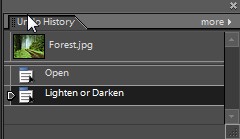
The oldest state (or the oldest version of the image) is always shown at the top of the list. All new changes are listed in chronological order below it.
The tool or command that you used to make changes to the image is also listed with the state.
You can revert to an older state simply by clicking on it. You can use this feature to compare versions to decide which one you like best or what other changes you might want to make.
WARNING: If you select a previous state, then make changes to it, it eliminates all the states that came after it. Also, deleting a state deletes all states that came after the one that you deleted.
To delete a state, right click on the state and select Delete. Just remember that all states that came after it will also be deleted.
Undo History automatically saves the past 50 states. If you want to change the amount of states that it saves, go to Edit>Preferences>Performance. The maximum amount of states that you can save is 1000.
Undo All Changes to an Image
Whenever you're editing an image in either Full Edit or Quick Fix, you can undo the changes and revert to the last saved version by going to Edit>Revert.
Undo or Redo a Command
Let's say that you brighten an image only to decide that you liked it better before you lightened it. You can undo the Lighten command easily enough by clicking Undo at the top right of the Edit environment.

If you change your mind again and decide that you do want to lighten the image, you don't have to worry about going through the steps to lighten it again. You can just click Redo at the top of the Edit window.
Image Magnification
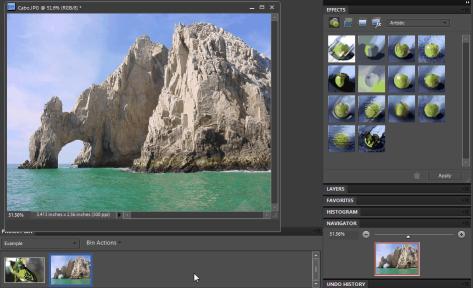
The Navigator palette (pictured below) allows you to magnify or reduce the magnification on images open in the workspace. This is a really neat tool to use and more beneficial to use than just a regular zoom in or zoom out.
Look at the snapshot of the Navigator palette below.
Notice that the magnification is set to 50%.
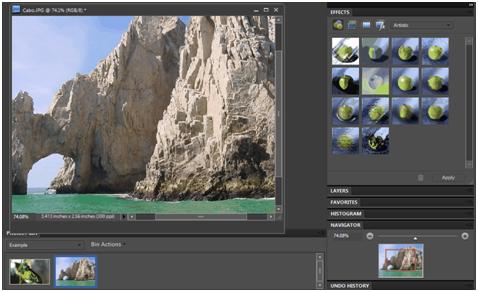
The snapshot below is of the Navigator palette with the image in the workspace.
Now, we're going to increase the magnification to around 75%. We can do this by either using the + sign in the Navigator palette window or by typing the actual number into the box on the left side of the palette.
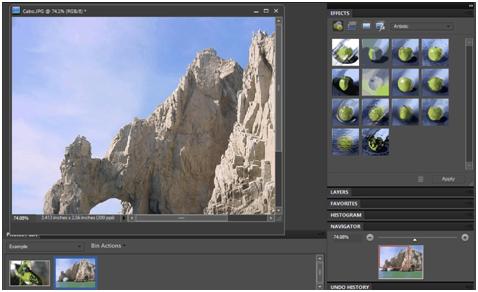
You can see how we've zoomed in on the picture in the workspace. But if you look at the Navigator palette, you can tell what portion of the photo we're viewing. The area within the red box currently appears in the workspace.
Setting Preferences
You can set your preferences in Elements' editor mode to determine everything from your cursor, to how files are saved, performance, and plug ins. However, we're only going to discuss General, Saving Files, and Performance preferences.
Whenever you want to change or reset your preferences, go to Edit>Preferences. You can choose to set your preferences for any of the items in the side menu, but for this lesson, we want to start by just selecting General. This will open the Preferences dialogue box. All the selections listed in the side menu are also listed in this dialogue box.
The General preferences dialogue box looks like this:
You can now set preferences for:
- Color picker. Default is Adobe. You can also choose Windows.
- The shortcut key for step backward/forward. Default is Ctrl+Z/Ctrl+Y. You can use these commands for undo and redo.
Then, you can choose which options you want in effect by placing a checkmark beside the items.
You can also set your preferences for saving files by selecting Saving Files on the left of the dialogue box or going to Edit>Preferences>Saving Files.
Click OK to save your new preferences.
You can also reset your preferences to the default setting or go to the previous or next preference dialogue box. (Type or Saving Files)
Saving Files
On First Save allows you to control how files are saved.
- Ask if Original is the default selection. Selecting this opens the Save As dialogue box the first time you save the original file. All saves after the first save replace the previous version. (The Save As dialogue box won't appear again after the first time.)
- Always Ask means that the Save As dialogue box will open with the first save every time you edit the image.
- Save Over Current File overwrites the previous saved version. The Save As dialogue box does not open.
Performance
Performance (pictured below) lets you adjust the memory that Elements uses. You can also reduce or increase the number of history states that Elements saves.
The Quick Fix Environment
So far in this article, we've worked in the Full Edit mode. At this point in time, we're going to change gears for a minute and give you a tour of the Quick Fix environment.
To switch to Quick Fix, go to the orange Edit tab on the Palette Bin and choose Quick Fix from the dropdown menu.

The Quick Fix palette opens up, as shown above.
The Quick Fix Palette contains General Fixes, Lighting, Color, Sharpen, and Touch Up.
Smart Fix
Smart Fix analyzes your image and corrects problems that may be caused by overexposure, color balance, color saturation, and contrast. You can click the Auto button and Elements will correct any problems itself, or you can do it yourself by moving the slider.
Lighting
You can quickly adjust the lighting levels and contrast in your photos automatically.
You can also use the sliders to darken shadows, lighten highlights, or adjust the midtone contrast.
Color
You can choose to either automatically adjust the color or adjust it yourself.
Balance
You can make the colors warmer or cooler, or adjust the tint.
Details
This Quick Fix palette allows you to sharpen your photos on your own or let Elements do it for you.
Touch Up Toolbar
The Touch Up toolbar is located on the left side of your Elements window ( pictured below) gives you some neat tools that allow you to (in order) remove red eye, whiten teeth, brighten blue skies, and convert to high contrast black and white.
When you use these tools, click the appropriate icon, then go to your image in the workspace. Click and drag over the areas in your photo where you want the changes made.