
If You're Using an Exchange Account
Native out-of-office messages using Outlook are only available to Microsoft Exchange users, but you can work with a non-Exchange account using rules. We'll set up a non-Exchange message in the next section, but this section covers Exchange users.
Microsoft Exchange is an email server application available in network environments that use mainly the Microsoft operating system. You can set up an Exchange server if you use Microsoft services such as Azure. If you're an employee at an office that hosts its own email server and the organization uses Microsoft software, you might have an Exchange server as your email service.
You can find out if you have an Exchange account by clicking the "File" tab and then clicking "Info" in the left side panel.
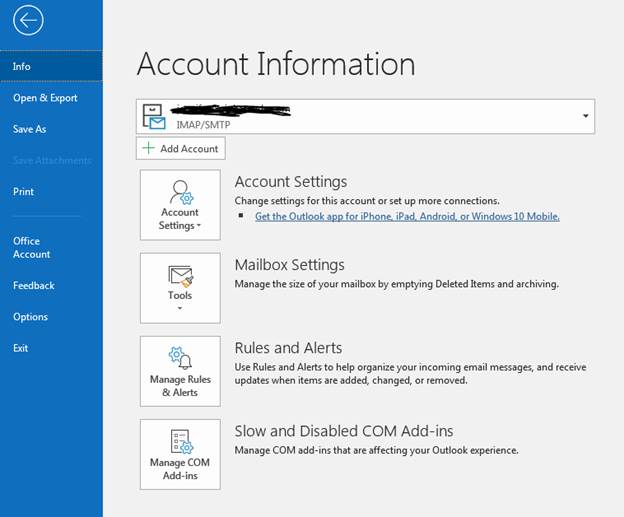
(Account information window)
In the image above, you can see that the account type is IMAP/SMTP because a Gmail email server has been configured with Outlook. If you have an Exchange server configured, then this dropdown would show "Exchange" below your email address. If you're using an employer email account, then you might not be able to change settings for the Exchange server account. This is because configurations are set on the server, but you can still send an out-of-office message.
If you have Exchange configured for an account, you'll find an "Automatic Replies" button that lets you configure an out-of-office message.

(Button to set out-of-office message)
Click the button and a configuration window displays.
In the first window displayed, click "Send Automatic Replies." Specify a date and time for the messages to start being sent, and then a date and time for them to stop. Notice that you can specify a message for people within the organization, and then you can set a different message for emails received from outside of your organization. Click "OK" and your out-of-office message is set.
Creating a Template
Before you can use an out-of-office message with Outlook rules, you must create a template. An Outlook template is just a saved file from Outlook. Click "New Email" in the "Home" tab. In the window that opens, type your message as if you're just typing a new email message for a recipient.
Click the "File" tab, and you open the "Account Information" page. Click "Save As" in the left panel, and a new dialog box opens. At the bottom of this dialog box is the "Save as type" dropdown. Choose "Outlook Template (*.oft)" option and type a name for your template such as "Out of Office."
Remember the location of where you save the template file, because you'll need this file when you set up your out-of-message rule. You can create an OFT file for any message template, which will save you time when you must send the same message frequently to different recipients.
After this template is created, you can now set up an out-of-office message rule.
Creating an Out-of-Office Message for Other Email Services
Although there isn't a native feature in Outlook for out-of-office messages using other email services than Exchange, you can use Outlook's "Rules" feature to create them. We'll cover more rule features in chapter 13, but this section focuses on one rule option that sends a message each time you receive a message. This out-of-office message will be sent for any email senders (outside or inside the organization), so the message you choose should cover any sender including coworkers, customers or vendors.
The "Rules" feature is in the "Home" tab. In the "Move" category, you'll see a button named "Rules."
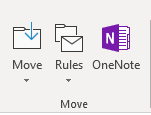
(Move category in the "Home" tab)
Click the button and you see several options.
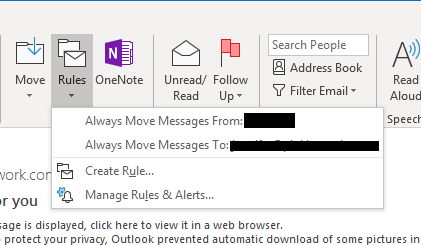
(Rules dropdown options)
If you have an email selected, the first two options let you quickly set rules to move messages sent by the sender to a folder or move messages sent to the email account to another folder. These two rules help you manage messages when you have two separate accounts configured in Outlook.
The "Create Rule" option creates a new rule in Outlook based on the current email selected. If you want to view currently configured rules or edit them, click the "Manage Rules & Alerts." Since we're creating a new rule unrelated to the selected email, click "Manage Rules & Alerts" and a new window opens.
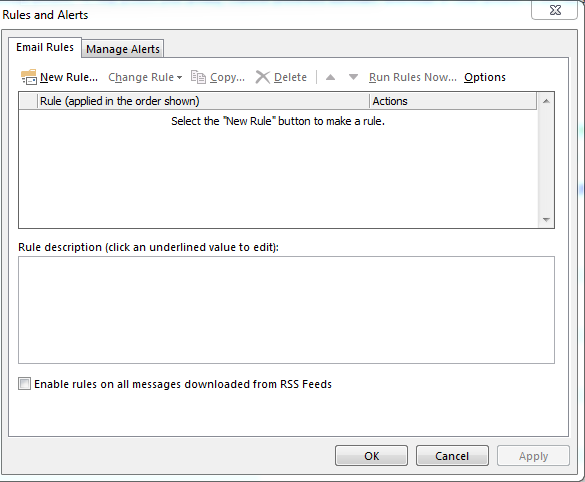
(Manage rules and alerts window)
Click the "New Rule" button and a configuration manager steps you through creating a new rule. The first window asks you on what objects should the rule be performed.
(Select an object to set a rule)
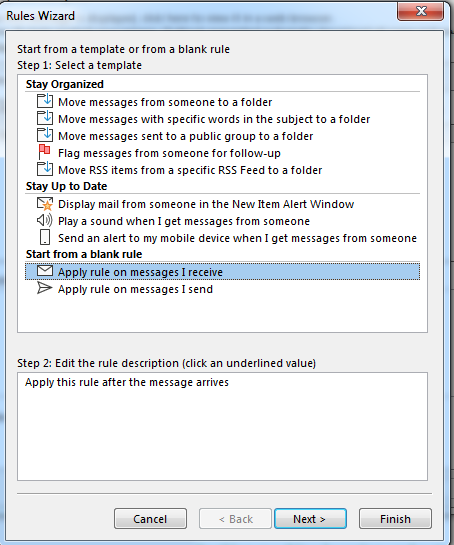
The last section contains the option to "Apply rule on messages I receive." Choose this option and click "Next."
(Select a date range condition)
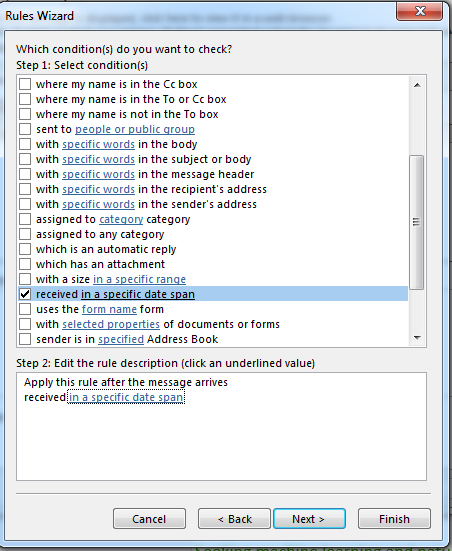
The next widow shows several conditions to choose from. Out-of-office messages are set when you know when you'll be away from the office during a specific date range. Scroll to the "received in a specific date span" option and click the check box. Click the linked text (labeled "in a specific date range") and a window opens where you choose your date range. Once you've chosen a range, click "Next."
(Reply using a specific template)
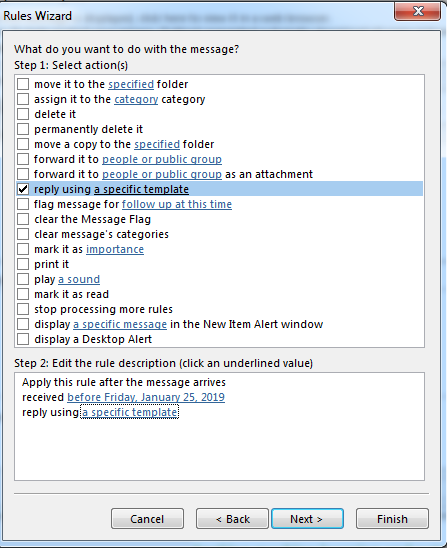
Choose the "reply using a specific template" option, and then click the "a specific template" link to open a window where you choose a message template. The template contains the message that will be sent to any recipient that sends a message, so it should be clear that you are out of the office and the message is automated. With Exchange, an out-of-office message is labeled but with these rules, only the subject and message are shown. When sending messages to senders using rules, always ensure that it's clear that the message is automated so that your recipients don't think it's a message that you physically sent.
When you click "a specific template," a window opens asking you to point Outlook to a file that contains a message template. You created an OFT file earlier, and this is the template file that you need. Choose the file location and click "Next."
The final Outlook window confirms your settings and asks you to create a name for the new rule. This rule name will show in your "Manage Rules & Alerts" window the next time you create a new rule or want to change a current one.
Before you finalize your rule, click "Turn on this rule" to activate it. If you don't choose this option, you'll have to activate it later for it to take effect and out-of-office messages to be sent. After you complete the rule configuration, click "Finish" to store it. If you activate it, the rule takes effect with the next message that you receive.