Creating Mail Folders
If you save a lot of your email in Outlook rather than deleting it after reading, you may want to arrange them into folders. By creating folders, you could save all emails from Tom, for example, to a folder named "Tom." You could also save all emails from Jane to a folder entitled "Jane," and so on.
To create a mail folder:
Go to the Mail module.
Select the email address for which you want to create a new folder. Click on it to select it, then right click, as we've done in the snapshot below.
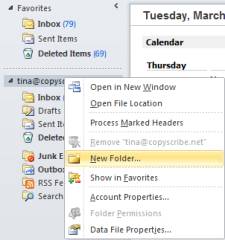
Select New Folder.

Enter a name for the folder and make sure you're placing the folder where you want it, then click OK.
Move Mail
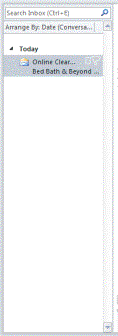
To move an email message from your inbox to another location, click on the email that you want to move to select it. (In your inbox as shown below).
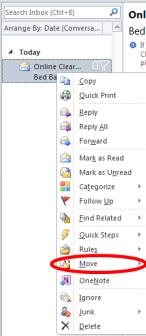
Now, right click on it and select Move from the dropdown list, as shown below.
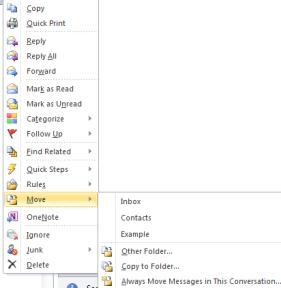
When you click on move, a menu will appear to the right. You can then choose to move it to an email folder or another folder in Outlook. You can also choose to have all messages in the conversation moved.
Deleting Emails
Deleting emails in Outlook 2010 is easy. You can empty a whole folder of emails, delete every email in your inbox, or delete individual emails.
To delete all the emails in an email folder or your inbox:
1. Click on the email folder. Right click, then select Delete All.
To delete a single email:
1. Click on message in your inbox to select it.
2. Click on the message in your inbox to select it.
3. Right click on the message and select Delete from the dropdown menu.
To delete an opened email message:
1. Click the Message tab, then click Delete.

Sort and Find Messages
If you have a lot of emails in Outlook 2010, it can get hard to find an email that you need. If you know who sent the email or the subject line, you can use the search box at the top of the inbox.

But if you're not sure of any of this, it can make it almost impossible to find the email you are looking for. However, don't despair. You can use the sort feature of Outlook 2010 to find the email you need using parameters that you specify.
To sort emails, first select the folder that you want to sort.
Then, click the View tab.
In the Arrangement group, there are different options that you can select to sort your emails.
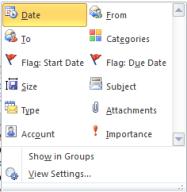
Choose an option to sort the emails. You can then click Reverse Sort in the Arrangment category to view emails in alphabetical order. You can click Columns to add more columns to add more information about the emails that you've sorted.
Instant Search
We mentioned Instant Search briefly in the last section when we showed you how to type in information about an email into the search bar. Now, let's learn more about it.
To start, select a folder in Outlook that you want to search. Now, enter keywords to start searching in the box above your inbox. Keywords could be the sender, the date, the subject, etc. These keywords can be as vague or as exact as you want. We're going to learn to refine the results too.
You'll then see all the search results that contain the keywords you entered.
After doing that, click on the Search tab in the ribbon.

Now, you can further filter your search results using the options in this ribbon. For example, if you want to search for attachments, click Has Attachments in the Refine group.
You can also choose other options in the Refine group to further refine your search. Click From in the Refine group to search for emails from a particular person.
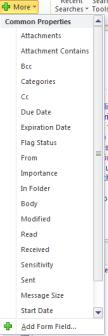
Click More to see even more options to refine your search.
Advanced Find
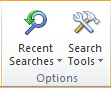
Go to the Search Ribbon again, this time click Search Tools in the Options group.
Select Advanced Find from the drop down list.
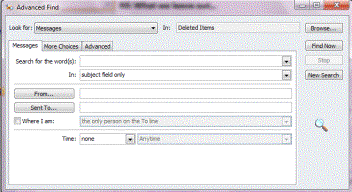
You can use this to enter in all sorts of search options. You can also easily navigate through the tabs in this window and enter different criteria. Everything in this window is self-explanatory and simple to use. All you do is enter the information that you know regarding the email you're looking for. Outlook 2010 does the rest.
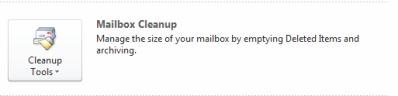
Clean Up Mailbox
Outlook 2010 also gives you options to clean up your mailbox to get rid of deleted emails and maximize the space in your Outlook program.
The best way to learn what cleaning up your mailbox does is by actually learning to do it. That said, to the File tab.
Under Mailbox Cleanup, click the Cleanup Tools button.
You can then select if you want to manage your mailbox size, empty the Deleted Items folder or archive old items to Archive Folders in the folders list.
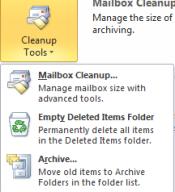
Select Mailbox Cleanup.
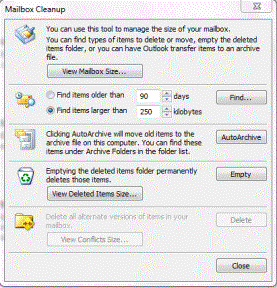
You can use the window to find old items you want to delete, large items you want to delete, archive old items, or empty the Deleted Items Folder. When you're finished, click Close.
Using Out of Office Assistant
The Out of Office Assistant gives you a way to arrange for Outlook to automatically respond to emails when you are away, or "out of the office."
What's more, the assistant can be set to respond to emails only during certain periods of the day (like at lunchtime) and can send a separate message to the people inside your organization or outside of it.
Let's take a look at how it works.
In order to activate the Out of Office Assistant, go to the File tab. The Info tab should already be selected, but if not, go ahead and click on it. Now select the Automatic Replies (out of office) button.
The Out of Office Assistant dialogue box will open. To enable the feature, simply select Send Automatic Replies. You can also set a time and date range from here as well. To do so, simply make sure the Only send during this time range check box is selected and then set the start and end times.
If you'd like to create one message for the people inside your organization or company and another message for those outside your organization, you can do so on this screen as well. To do so, simply select the appropriate tab, then enter the message you'd like to send.
Don't forget to click the Apply button in order to activate your changes.
Defining Rules
You can also establish "rules" that tell Outlook how to deal with an email. For instance, you may have a colleague with whom you share an informal correspondence and you may not want Outlook to send an automatic reply to him or her.
Let's look at how to do that.
Launch the Out of Office Assistant and select Rules, then click Add Rules. In the box that says, "When a message arrives that meets the following conditions" enter a condition. Using our example of a friendly correspondence with a colleague, we might type the colleague's email as a condition. It might say something like, "Sender:colleaguesemail@work.com"
You will now want to check the box beside "Do not process subsequent rules." This means that Outlook will only apply the rule above, even if something about your colleague's email matches another rule that specifies a different response from Outlook.
If you'd like to add more conditions, you can do so by clicking the Advanced button and entering those options.
Now you will want to tell Outlook what you want to do with your colleague's email. You can do this by clicking the "Perform these actions" box and selecting the options you want.
Categories
Categories are a new feature in Outlook 2010. It's basically like flagging an email, but in a way that is meaningful to you. For instance, let's say you get an email from a client seeking a certain kind of information, but before you can release that information, you have to discuss it with your boss. So instead of just flagging the email for follow-up (which certainly doesn't give you any information other than you have to answer the email) you can categorize it with a special tag. So the next time you open Outlook, you'll see the tag and be reminded that you must discuss it with your boss.
The Categorize button can be found on the Home tab of the ribbon in the Tags group. It looks like this:
To Categorize an email, you must select it, then click the Categorize button. You'll see a dropdown menu that looks like this:
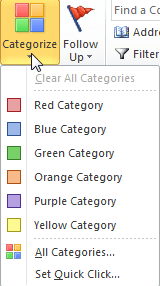
Select a color. If it's the first time you've applied this particular category, you'll see a window that looks like this:
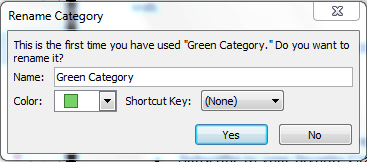
From this window, you can customize the name of the category. For instance, you may want to call it "Check with Boss". You can also select another color and even create a shortcut key. When you're finished, click Yes.
As you can see in this next example, any email that is categorized will have a box next to it indicating which category it is in.
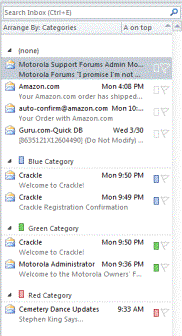
Another thing you might notice in the above example, is that when the Arrange By box is set to Categories, Outlook 2010 sorts the emails into their respective categories.
You can change the names and colors of these categories at any time by clicking the Categorize button and selecting All Categories.
A new dialogue will open that looks like this:
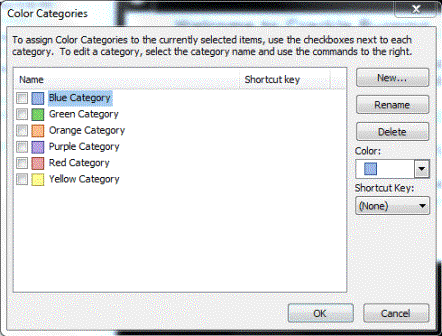
From within this window, you can rename the categories, delete them, add a custom shortcut key, or change their colors.
Filters
Using filters is just another tool Outlook 2010 gives you to help you sort through your email. To find the Filter Email command, navigate to the Home tab, and locate the Filter Email button in the Find group. When you click on it, a dropdown menu appears. It looks like this:
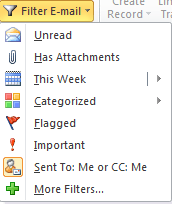
As you can see, you can filter your email by those that are unread, or have attachments, or were received this week, and more. Let's try "This week" and see how it works.
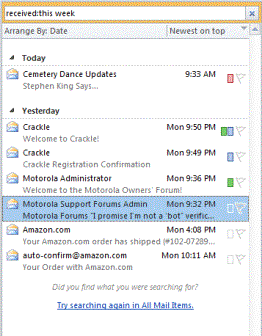
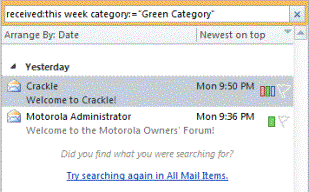
You may notice in the above example, that when we clicked on this week, what we did, essentially was had Outlook automatically enter that filter into the search bar at the top of the email list. If we were to click more filters, they'd also appear in this search bar. For instance, if I went back to the Filter Email button, and clicked "Green Category" it'd look something like this:
Using the Calendar
You can use the calendar in Outlook 2010 to enter appointments and meetings, as well as keep track of other things you need to remember.
Entering Appointments
Appointments are activities that you enter into your calendar that do not involve inviting other people (meetings) or reserving resources.
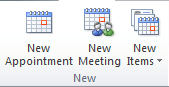
Entering appointments in your calendar is really easy to do. You'll be amazed. First, click on the Calendar button in the Navigation Pane to go to the Calendar module. Once you're there, click on the Home tab, then click New Appointment in the New group.
The New Appointment window will then open.
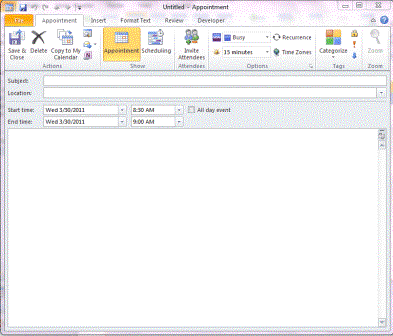
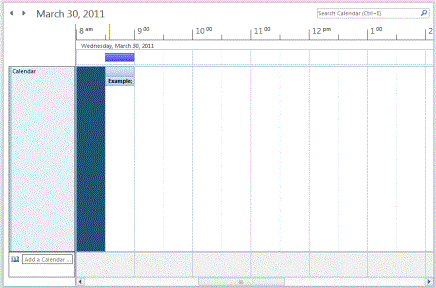
In the Subject line, name the appointment or the subject of the appointment. For example: "Get teeth cleaned." Enter the location for the appointment in the Location line.
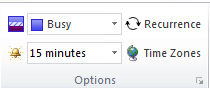
If you want to show others your availability during this time, click on the Appointment tab in the ribbon. In the Options group, click on the Show As box. Then, click Free, Tentative, Busy, or Out of Office.
Then, enter the start time and end time for the appointment. If it lasts all day, check the All Day Event box.
In the space below the date, you can write down any helpful notes that you'll need for the appointment.
When you're finished, click Save & Close in the ribbon.
Recurring Appointments
To make an appointment recurring (meaning it happens regularly and not just once), click on the Appointment tab, then go to the Options group.
Click Recurrence.
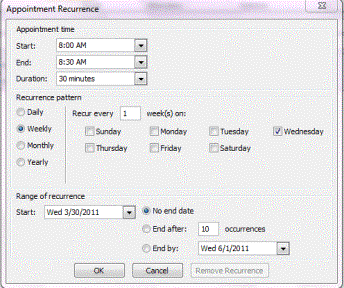
In the dialogue box pictured above, you can set the recurrence pattern. Specify if the appointment occurs daily, weekly, or monthly, then specify the days.
In the Range of Recurrence section, specify how long the recurrence will last. You can specify no end date, or you can say that after 10 appointments, it won't occur anymore.
When you're finished, click OK.
Appointment Formatting
Once you've entered in your appointment information, you can then format the text. Just note, that in order to be able to format the text, you must type in appointment notes.
To format the text:
Click Format Text on the ribbon in the Appointment window.

You'll then have the same formatting options that you have with emails. You can:
1. Change the font
2. Change the font size
3. Use boldface, italics, and underline
4. Change the font color
5. Highlight and use bullet points
6. Indent text
7. Right align, left align, center and justify
8. Add borders to text
9. Add styles
10. And more
We already covered these options, but if you are unfamiliar with these formatting options, take the time to familiarize yourself with them. It will improve your experience with Outlook 2010 and any other MS Office 2010 program.
View and Navigate Within the Calendar
The easiest way to navigate within the calendar to see or find what you need is to view the calendar in the manner that works best for you. In this section, we're going to discuss the various ways that you can view the calendar for easier navigation. We'll also teach you how to navigate to be able to find certain dates, etc.
The first thing we need you to do is go to your Calendar module. Click on the Home tab and look at the Arrange group, as shown below. This will arrange your view of your calendar to make it easier to navigate.
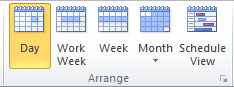
In the Arrange group, you have the Day, Work Week, Week, Month, and Schedule View commands. These allow you to change how many days are displayed in your calendar.
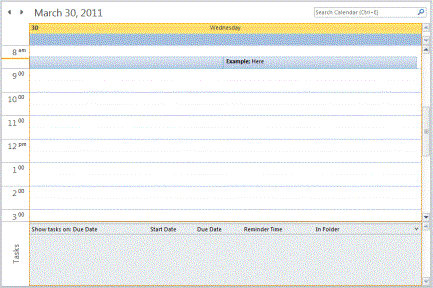
Day View
The Day view shows one day at a time. Use the Back and Forward buttons to go to the next day or to the previous day.
Work Week View
The Work Week button allows you to display your work week.
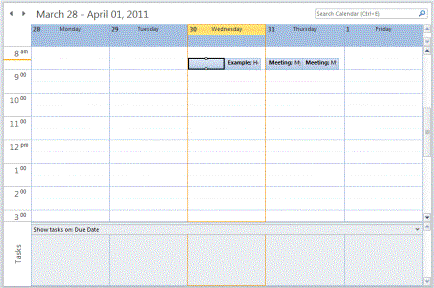
These days are selected in the Backstage view in Calendar options. We'll cover these in just a few minutes.
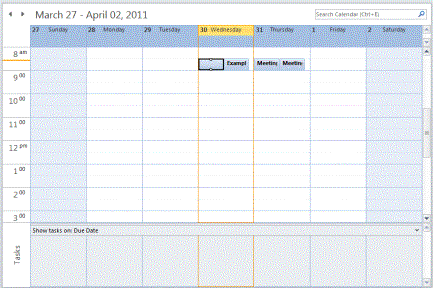
Week View
The Week view shows a seven day week. Again, set your calendar options to specify the day you want the week to start.
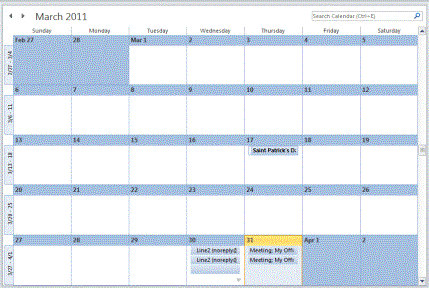
Month View
The Month view shows the current month. This view also gives you three options that allow you to specify the amount of detail you want to show on your calendar. Click the downward arrow below the Month button on the ribbon and you can select if you want to:
1. Show Low Detail. Only events will be displayed in the calendar. Events are items that last all day. They do not have a start or end time.
2. Show Medium Detail. This shows events and appointments. Appointments are shown as a solid bar within the calendar.
3. Show High Detail. This displays events and appointments, but appointments are listed with the start time, subject, and location.
Schedule View
Schedule view shows your schedule for the day. It looks a lot like an appointment book.
Jump to a Date on the Calendar
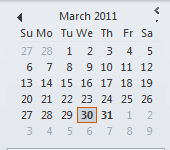
Let's say you want to view your calendar for a day that's still two weeks away. To do that, click on a date on the little calendar in the Navigation Pane. It's that simple! You can use the backward and forward arrows to navigate through months to find the date you want to view.
 '
'
Customize Calendar Options
Outlook 2010 also allows you to customize the way you view your calendar. You can alter and edit your calendar to tailor it to your needs. You can even change the colors of the calendar to better suit your taste or perhaps match your company's colors.
To do this, go to the File tab, then click Options. Click Calendar on the left.
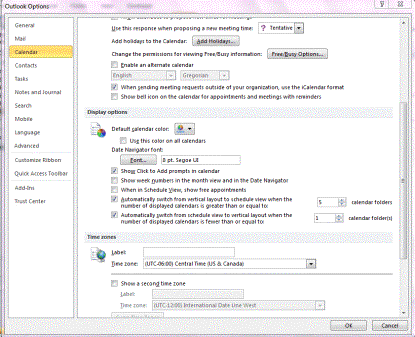
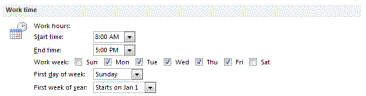
In the Work Time section, specify your work week. You can also set the first day of the week, the year, and your work hours. This section can be used when you're setting your Calendar view (Day, Week, Work Week, Month, and Schedule).
Enter Events
An event is an activity that lasts all day. It does not have a start time or an end time.
To enter an event, go to the Calendar module. Click on the Home tab and look at the New group.
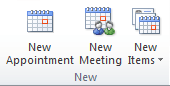
Click the downward arrow beside New Items, then select All Day Event.
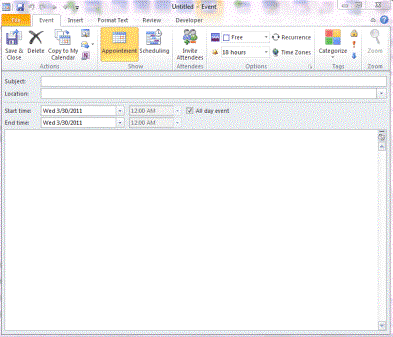
Fill out the information just as you did with appointments. You can also click the Invite Attendees button in the ribbon to invite people to your event, as well as display your status during the event as with appointments. When you're finished, click Save & Close.
Adding Holidays to the Calendar
Outlook 2010 also lets you add your region's holidays to your calendar. It's also really quick and simple to do.
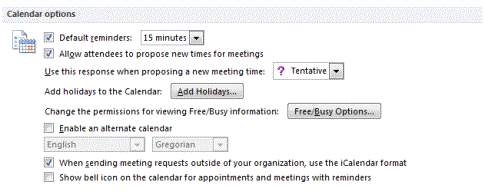
Click on the File tab, then click Options. Click Calendar to go to Calendar Options, then scroll down in the window to the Calendar Options section, as pictured below.
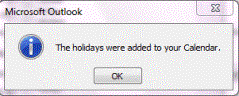
Click the Add Holidays button.
Select your country. You can select more than one if you want.
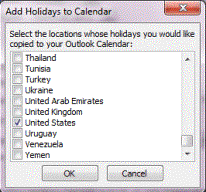
Click OK. Outlook 2010 will then add holidays to your calendar. You'll see this message when it's finished.
Schedule a Meeting
In Outlook 2010, a meeting is an appointment that includes other people. It can also include resources (such as meeting rooms). When an invited attendee to your meeting responds to your invitation, you'll get a message in your inbox.
To schedule a meeting, click the Home tab in the ribbon (Calendar module).
Click New Meeting in the New group.
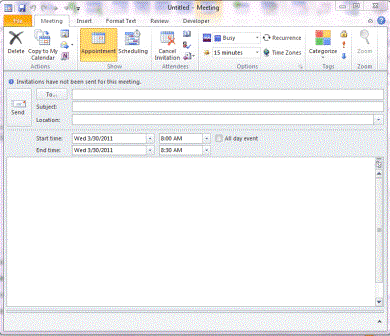
Type a description of the meeting in the subject line, the location in the location line.
Enter the start and end times. If it's an all-day meeting, make sure you check the All Day Event box.
Type any information regarding the meeting in the body (note area). You can also attach files if you want.
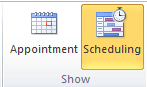
Now, go to the Meeting tab and click it. In the Show group, click Scheduling Assistant. We're going to make sure the time we've picked for the meeting is the best time for our attendees. You don't want someone who needs to be at the meeting to not be available.
Click Scheduling in the Show group.
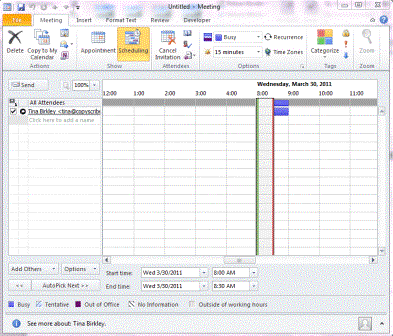
Click Add Others. We've chosen From Address Book from the dropdown menu.
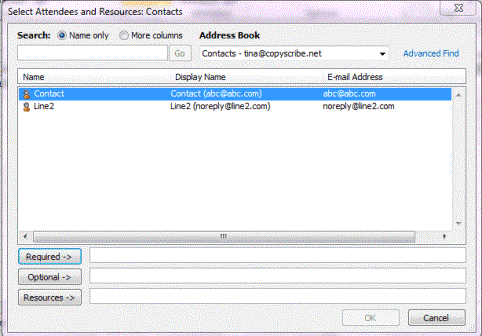
Now you can select attendees. If someone is required to attend, click the Required button. If it's optional, click Optional. Also, click the Resources button for resources.
Required and Optional attendees will appear in the To box on the Meeting tab. Resources appear in the location box.
Now, when you're finished, click OK.
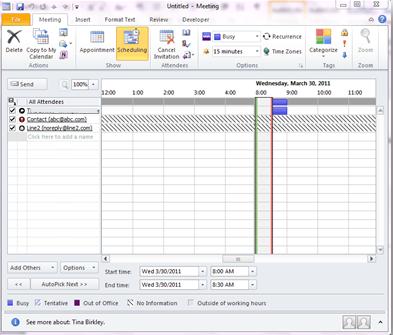
Now you can see which attendees are available. Use the legend at the bottom of the window to be able to tell if they're out of the office, busy, etc.
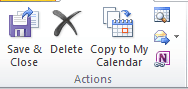
When you have the meeting scheduled click Copy to My Calendar.
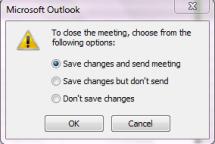
Check Save Changes and send meeting to set up the meeting and email attendees. Click OK.
Printing the Calendar
To print your calendar, click on the File tab and then click Print.
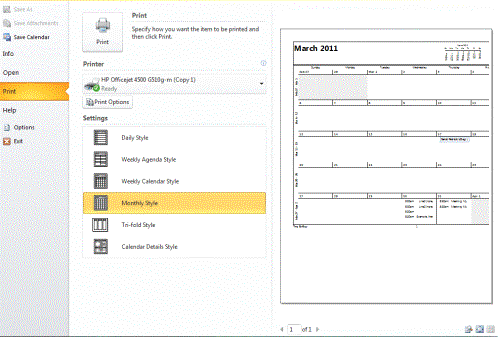
Select the printer you want to use to print your calendar, then select the view that you want to print. You'll see a preview of what it will look like on the right hand side of the window.
When you're ready to print, click the Print button at the top of the center column.