When you enter any sort of data into Excel, you'll enter it into a spreadsheet. Of course, starting to enter information is as simple as clicking on a cell in the spreadsheet and typing, but there are some things that are helpful to know – and that you can do – before you ever type that first letter or number.
The first thing you want to do before you type anything is to spend a little time planning the spreadsheet. Beginning to type in Excel is perhaps not as easy as it might be in, let's say, a word processing program because you're going to enter all information into rows and columns. A little more organization is required to save you the time of having to create and then recreate the spreadsheet to get it as you want it.
To organize your spreadsheet, you'll need to determine:
- What is the point of the spreadsheet?
- What information do you need to include?
- What headings are you going to need to explain the information in the spreadsheet?
- Do you want to use columns, rows, or both?
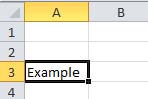
Once it's highlighted with border, you can type inside of it. When you're finished entering information into one cell, you can click the mouse in another cell to type more information.
However, moving and clicking your mouse each time you want to change cells becomes time consuming. Most people who use Excel want to move a little faster and save as much time as possible. That said, you can also use the following keys to navigate the spreadsheet as you enter information.
Enter. Enters the data into the current cell, then moves the cursor to the next cell in the same column. In other words, using the example above, if we pressed 'Enter' it would move the cursor down to cell A4. We could then type in A4.
Tab. Tab enters the data into the current cell, then moves one cell over in the same row. In this example, it would move to B3.
Arrows. You can navigate through columns or rows in the spreadsheet using the arrows.
Labels are used for things such as titles, headings, names, and for identifying columns that contain data.
Values contain numbers. They can be used in calculations.
A logical value is a mathematical equation that is either true or false. There are six logical operators: = or equal to, < less than, >greater than, >= greater than or equal to, <= less than or equal to, and <>not equal to.
Formulas are groups of symbols that create a mathematical statement.
Unless you format a cell to enter either a value or a formula, Excel will automatically consider it a label and align it to the left side of the cell. All labels are aligned to the left side of the cell by default.
If you are creating a large spreadsheet and will be using the same label for several cells, you can use the AutoComplete function. The AutoComplete function will recognize words that you have typed before and finish them for you. This saves you time in typing.
Another method that you can use to quickly enter repeated labels is to use the Pick List feature. All you have to do is right click on any cell, then select 'Pick from List.' It will provide a menu of all other entries in cells from that same column. See the snapshot below.


In MS Excel 2010, all numbers are assumed to be positive numbers. If you need to use negative numbers, use either the minus sign "-", or put the number in parentheses.
All dates in Excel are stored as MM/DD/YYYY. However, you do not have to enter it that way. For example, you can enter in July 4. Excel will recognize it and format it correctly, using the current year. If you're referring to a past year, then you'll have to enter the four-digit year as well. You could enter July 4, 2005. Excel will then format it to read 7/4/2005. If you wish to enter the current date, just press Control and semi colon key or ; at the same time.
To enter a time into Excel, use "a" or "p" to indicate am and pm respectively. You can enter in 8 (space) a. Excel will automatically convert it to 8:00 AM. If you want to enter the current time, press Control and shift and colon or : at the same time.
All entries that are values are aligned to the right side of the cell. To reformat, you have to format the data.
- First, select or highlight the range of cells that you want to enter the same data.
- In the active cell, type the data, then press Control and Enter at the same time.
- This will fill in all the cells for you.
Before copying any cells, rows, or columns, you first have to select – or highlight – the cells, rows, or columns that you want to copy. Selecting data in Excel is different from selecting text in a word processing program because you must select cells.
|
To Select: |
Action |
|
A cell |
Click on the cell. |
|
A range of continuous, adjacent cells |
Click on the first cell then drag the mouse over the cells to be copied so that they are all highlighted. 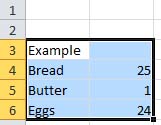 |
|
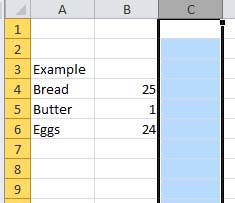
A column |
Click on the column heading. 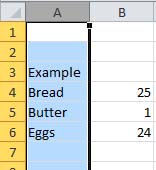 |
|
A row |
Click on the row number. 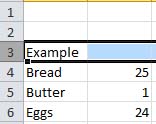 |
|
Non-adjacent cells |
Select the first cell or range of cells, then hold down Control while you select the other cells or range from cells. 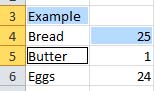 |
|
Non-adjacent rows or columns |
Select the first row or column that you want to copy, then hold down the Control key while you select other rows or columns. This is also known as making multiple selections. 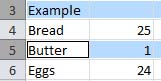 |
After you've selected the cells or range of cells that you want to copy, you can do one of two things.
- Right click and select Copy.
- Go to Home, then select Copy from the Clipboard group.

Pasting Cells, Rows, and Columns
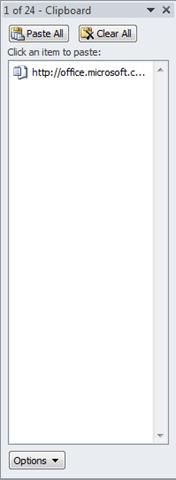
When you copy cells, you first paste them to the clipboard. Pasting to the clipboard is automatic whenever you select copy, or even cut. The clipboard will hold up to twenty-four different selections so that you do not have to paste right away.

If you have more than one selection on the clipboard (if you've copied more than one selection from the worksheet) a dialogue box will open to the right of your spreadsheet that shows you all the selections you have on the clipboard. See the snapshot below.
If you only want to paste your most recent selection, all you have to do is go to the place in the spreadsheet where you want to place the copied data. Select the first cell where you want the data to appear, then take one of two actions.
You can either:
- Right click, then select Paste.
- Go to the Home tab, then the Clipboard group, then select Paste.

To Paste an Item from the Clipboard
-
Select the cell where you want the item to appear.
- Click on the item from the clipboard.
Inserting and Deleting Rows and Columns
Next, you can either:
- Right click and select Insert.
- Go to the Home tab. In the Cells group, click the downward arrow beside Insert.

Next:
- Right click and select Insert.
- Go to the Home tab. In the Cells group, click the downward arrow beside Insert. Select Insert Sheet Rows.
To Insert Cells
You can shift cells either down or to the right when you insert a new cell. Select a cell in your worksheet, right click, and select Insert. This dialogue box will appear:
Note: You can also add an entire row or column from this dialogue box.
Alternative Method: You can also go to the Home tab, the Cells group, then Insert. Select Insert Cells.