If you click on the View tab, you will see the Page Setup Group, as shown below.
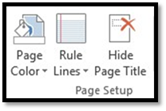
Here you can set page color, add ruler lines to your pages, hide the page title, and choose the paper size.
We're going to go over each of these things one by one in this article and show you how to use each tool to create and edit page features in your notebook.
Page Set Up
Add Page Color
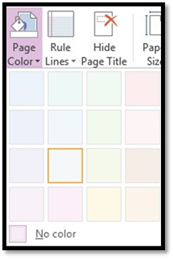
To add page color, click the Page Color button and move your mouse cursor to the color that you want. It is then applied to your page.
Add Ruler Lines
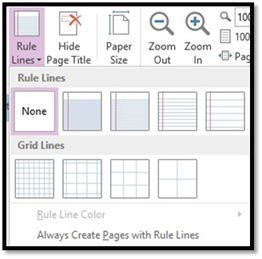
To add rule lines, click the downward arrow beside the Rule Lines button and select the type of lines you want to add to your page.
Hide Page Titles
Click the Hide Page Title button if you don't want page titles to appear on your pages.

Change Paper Size
Click Paper Size to select the size of the paper. The Paper Size Pane will open up on the right side of your window.
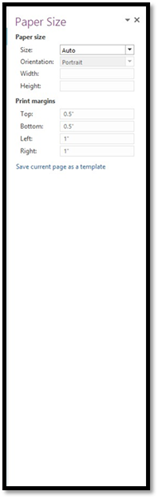
In this pane, you will specify everything that has to do with measurements of your page. This includes paper size and margins.
To make it easy for you, you can click the downward arrow in the Size field and select one of the several standard paper sizes OneNote 2013 offers. For example, you can select Letter as your paper size.
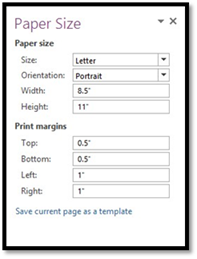
When you do that, as you can see in the snapshot above, all the information is inputted into the other fields for you. However, that doesn't mean you can't enter the information for yourself.
You can specify portrait or landscape, and you can also enter the height and width of the paper yourself � without using the sizes OneNote lists in the dropdown menu.
Also, you can specify margins.
After you enter all this information, you can also save the page with the new settings as a template if you want. Just click Save Current Page as a Template.
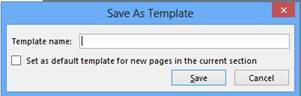
Enter a name for your template and click Save.
Move a Note Container
Part of setting up your pages is moving those containers around to make the page look the way you want.
Simply hover your mouse around the borders of the note container. You will then see this:
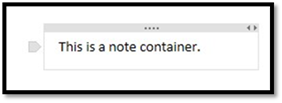
Holding your left mouse button down, you can now drag it to its new location.
Undo and Redo
Undo and Redo are located in the Quick Access Toolbar. This is Undo:  . This is Redo:
  . If you don't see Redo on the toolbar, click the downward arrow and put a checkmark by it so it appears.
Undo undoes your last action. For example, if you change the color of your page and decide you don't like it, you can click Undo, and it will restore your page to the previous color.
Redo restore an action that you undo.
Add Extra Writing Space
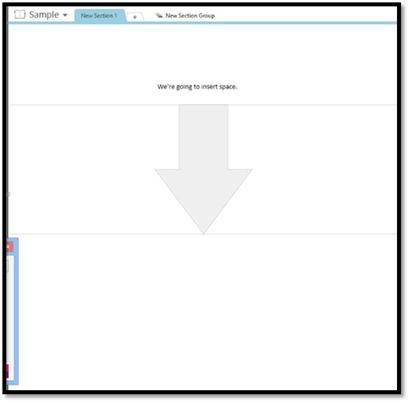
If you want extra space to add even more notes, then you can insert space to make that happen.
Go to the Insert group under the Insert tab.
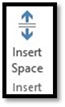
Now, click the place on your page where you want to add more space. Hold your left mouse button down and drag until you have as much space as you want or need, as shown below.
Inserting Images, Audio, and Video
OneNote 2013 provides many ways for you to insert images and clipart into your notebooks. Unlike with other Office 2013 programs, OneNote keeps it simple and makes it easy to do.
Insert a Picture
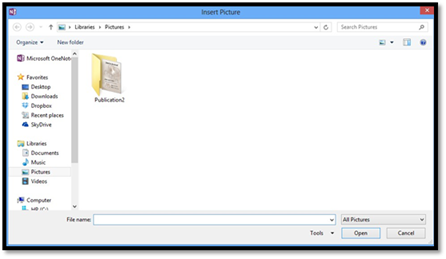
To insert a picture onto a page, go to the Insert tab then the Images group. Click Pictures.

Locate the picture on your computer, then click open.
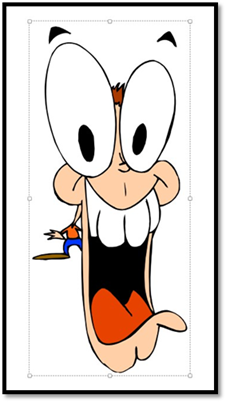
The picture will then be inserted on your page. If you look at the snapshot below, you will see the dotted line around our picture with circles and squares. The circles and squares are drag handles. Drag out to enlarge the picture, or inward to reduce the size. You will see a four way arrow appear when you move your cursor over the handles. When you see it, you can click to drag and drop the picture and move it to a different location.
Online Pictures and Clipart
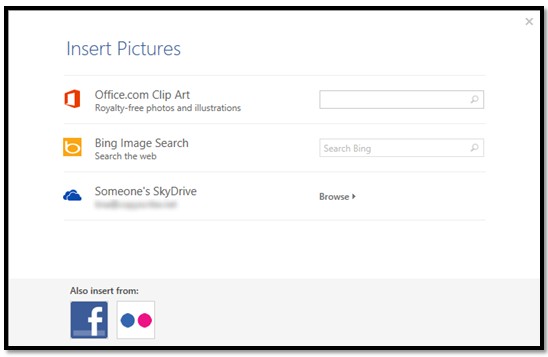
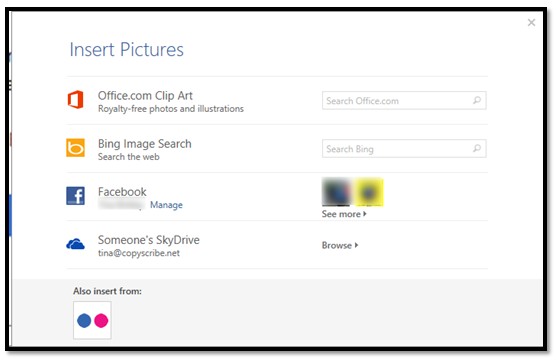
You can also insert MS Office clipart, images you find using Bing search, and images from your SkyDrive into a notebook. To do this, click the Online Pictures button  .
.
When you click the button, this window will appear:
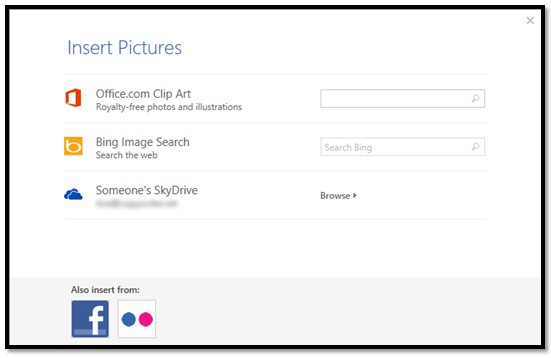
If you want to search for ClipArt, type in a description of what you're looking for. Use keywords, such as coffee, woman, shopping, etc.
We're going to type in coffee.
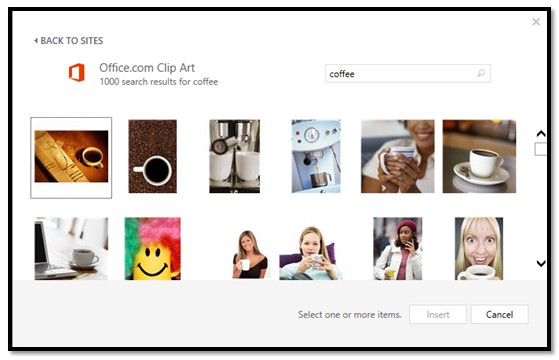
Select the picture you want by clicking on it, then click Insert.
To search for a picture on Bing, then insert it into your notebook, type in a keyword just as you did above.
We'll do coffee again.
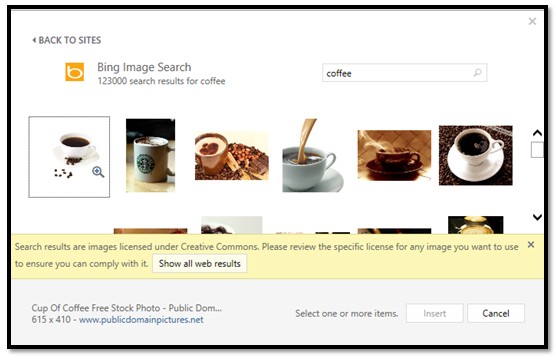
As you can see above, Microsoft lets you know that the images shown are licensed under Creative Commons.
As defined by Webopedia:

Make sure you check the copyright to be sure you can use the image. To avoid copyright issues, either use your own images, images that are in the public domain (no copyright), or purchase images from stock photo sites where you will receive a license with the image.
In addition to inserting pictures from Bing search, you can also insert pictures stored on your SkyDrive.
Click Browse.
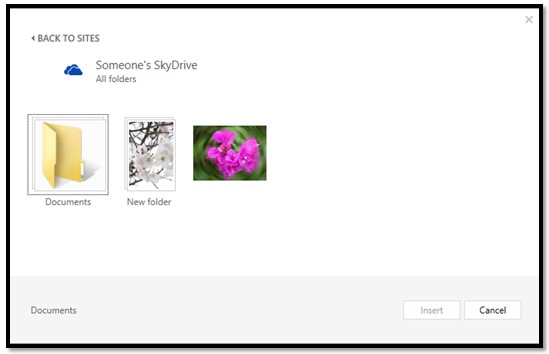
Find the image you want, then click the Insert button.
Insert Images from Facebook and Flickr
To insert images from Facebook or Flickr, click the Online Pictures button again.
For Facebook, click the Facebook icon at the bottom of the window.
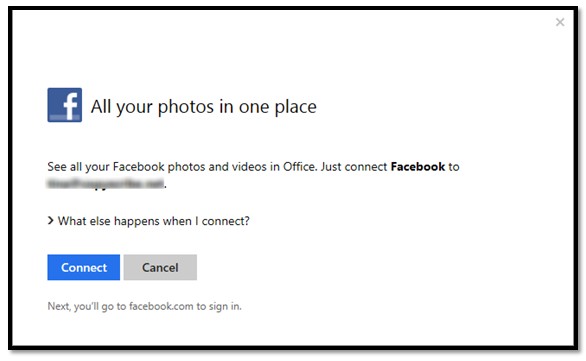
Click Connect.
You'll then be prompted to sign in to your Facebook account:
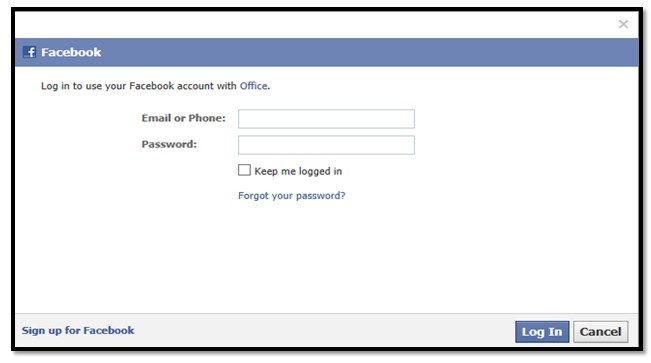
Click Log in. Once you're logged in, you'll see this screen:
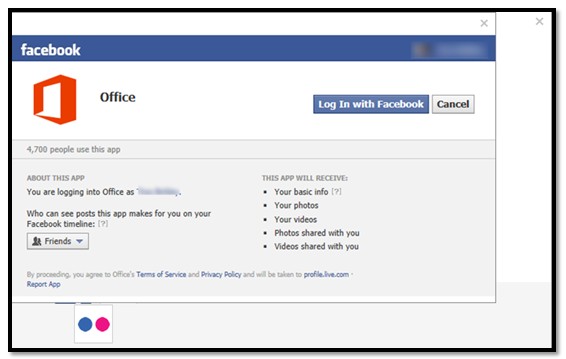
Click Log In with Facebook.
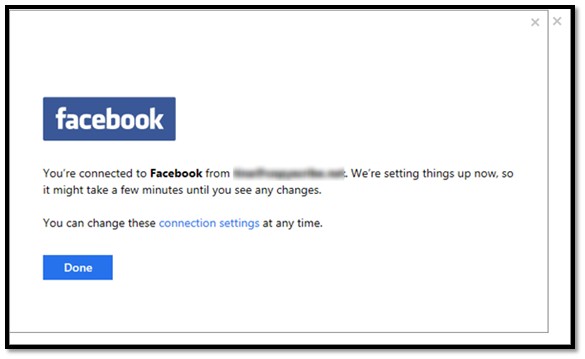
Click Done.
You'll then see Facebook listed with all the other locations where you can search for pictures:
If you want to add pictures from Flickr, click the Flickr button at the bottom to connect to your Flickr account.
Insert Screen Clippings
A screen clipping is, by definition, a digital image of any portion of your computer screen.
To insert screen clippings in OneNote, click on the place in a page where you want to add a screen clipping.
Next go to the Insert tab, then click Screen Clipping in the Images group.
Your screen will change to the open window directly beneath OneNote. It will look like there's a film over this window. We've taken a screen clipping of our browser. As you can see, there's a film over it.
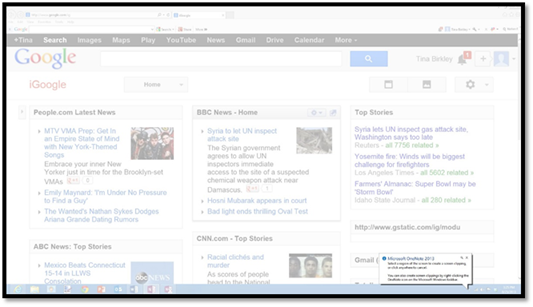
The cursor will turn into a black plus sign.
Drag the black plus sign over the portion of the screen you want to clip. The black plus sign creates a square or rectangle shape.
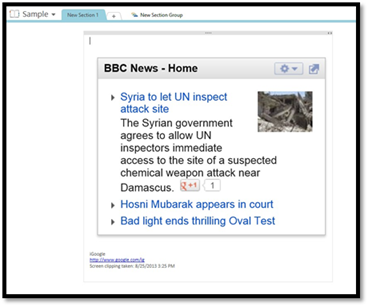
Let go of the mouse button when you are finished, and your clipping will be automatically inserted into your page. Note that since we clipped a web page, the source was listed along with the time and date of the screen clipping.
Insert Scanned Images
There may be times when you use OneNote that you'll want to insert a scanned image into your notes. This can be especially helpful if you want to reference a document that you've scanned into your computer in your notebook.
Inserting scanned images into your OneNote notebook is easy.
Click the Scanned Images button under the Insert tab in the Images group. It looks like this:

You must have a scanner or camera hooked up to your computer to be able to use this feature.
Insert Audio
You can also insert audio into your notebook by placing it on a page. However, we don't mean that you can insert songs or pre-recorded audio clippings. Instead, you can record audio directly to OneNote 2013 to insert into your notebook. You will need a microphone to record audio.
To insert audio, go to the Insert tab, then click Record Audio in the Recording Group.
Click anywhere on the page to start recording.
A recording tab will appear so that you may pause or stop the audio.
When you are done recording, you will see the Recording tab change to a Playback tab.
You will also see an icon on your page that represents the recording. OneNote also documents on the page when the audio was recorded.
Inserting Video
To record and insert video onto a notebook page, go to the Home tab then click Record Video. You will need a webcam and microphone to record video (that has audio with it).
Now click on the place in your page where you want to add the video.
Follow the same steps that you used with audio.
Inserting Shapes
If you've used MS Word before, then you already know about shapes and how easy it is to draw them. OneNote 2013 also allows you to draw all sorts of shapes and easily place them onto your notebook pages. This section is going to be fun because we're going to learn all about shapes.
Draw Shapes
When we can "draw shapes," it sounds more complicated than it is. A lot of people have a hard time drawing a straight line, so before you think that you're going to actually have to draw freehand, let us tell you that's not true. OneNote 2013 actually does the drawing for you. Let's show you what we mean.
Go to the Draw tab, then to the Shapes group.
Select the shape that you want to draw.
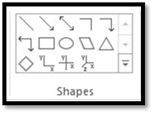
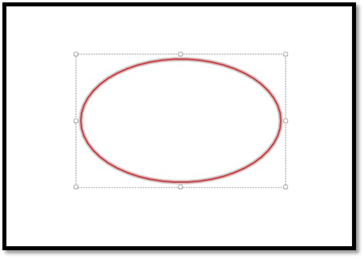
We're going to choose the circle.
Simply click on the place on your page where you want to put the shape. Keep the left mouse button held down and drag the shape onto your page, as shown below.
Do the same thing for any other shapes that you want to add.
Select Shapes
When a shape is selected, it has a dotted line, square border around. When you first draw a shape, it's automatically selected. Your shape has to be selected in order for you to move or edit it.
That said, to select a shape, move your mouse pointer over a line or border of the shape.
Now, click your mouse, and your shape will be selected.
Format Shapes
Now that you have your shape on the page, we can format it. Select your shape, then right click.
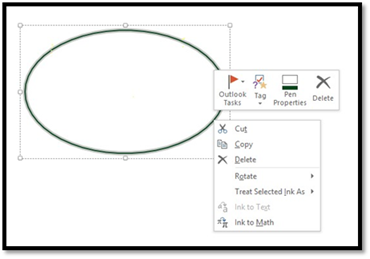
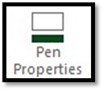
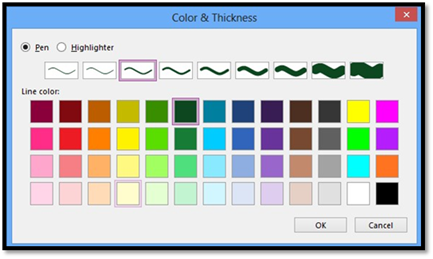
Select Pen Properties from the toolbar. It looks like this:
Here you can select the thickness of the line around the shape as well as the color of the line.
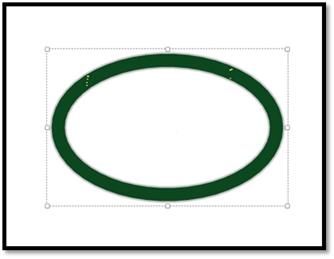
Look at how we've changed our shape by formatting it:
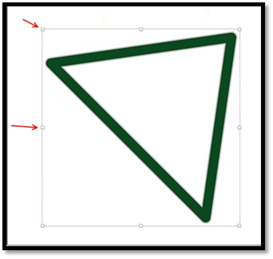
Rotate Shapes
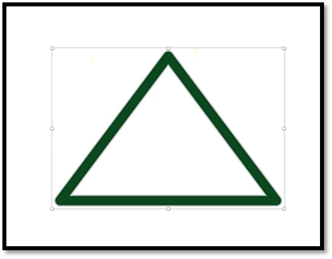
Let's say you draw a triangle, but want to rotate it. Look at the example below:
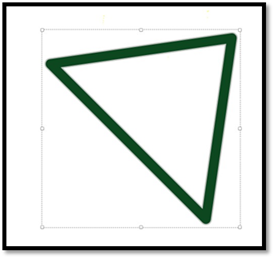
To rotate the shape, go to the Draw tab, then click Rotate in the Edit group.

Select how you want to rotate the shape from the dropdown menu. We've selected Rotate Right 45 degrees.
Resize Shapes
Use the handles around the shape to drag it out to make it larger and push it inward to make it smaller. Remember to keep your left mouse button held down while dragging.
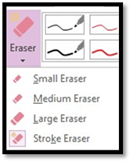
The Eraser
The eraser lets you erase part or all of a shape. To access the eraser, go to the Draw tab and click Eraser in the Tools group.
As you can see in the snapshot below, you can pick what size eraser you want to use.
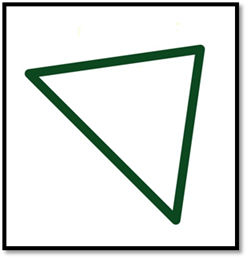
Choose the size eraser that you want, then go to the shape on the page. Below is the shape that we've drawn.
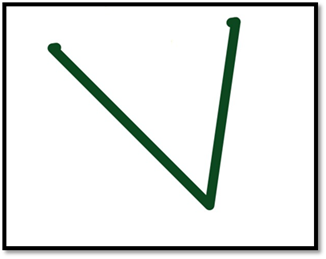
On your page, the eraser appears as a square. Just move it over the parts of the shape you want to erase. For our shape, we've erased a portion of it using the medium eraser.
Remember to keep your left mouse button held down as you use the eraser. When you're finished, simply release the mouse button.
NOTE: Whenever you work with shapes and want to switch back to typing text, be sure to click the Type button in the Draw tab.