
If you use Microsoft OneNote for the first time, the one thing you may notice is that it reminds you a lot of the older versions of MS Word, such as 2003 and prior. And that's kind of what it is too. OneNote 2010 is a very basic word processor that you can use like a notebook to take notes and enter text. You can also create tables and enter pictures. However, unlike a word processing program, you can write anywhere on a document by just clicking where you want to type. Also, there's no need to save your work because OneNote saves your data as you enter it.
Universal access to Your Notebooks and Information
- The good news is that now you can access your notebooks from anywhere that you can access a computer using Sync to Cloud (Windows Live). You can also sync your files to file shares, USB drives, SharePoint, etc.
- You can also access or edit a notebook from a Web browser, even if the computer you are using doesn't have OneNote 2010 installed on it.
- If you have a Windows Phone 7, use Microsoft Office Mobile 2010 to access your notes from anywhere. You can view, edit, and create notes.
Improved Sharing and Collaboration
- Multi users can now edit notebooks. This is great if you want to work on a notebook from both a desktop as well as a laptop or for teams who use and share a notebook for brainstorming or collaboration.
- New content in a notebook is automatically highlighted so you can view what someone else has added.
- As in MS Word, if another user adds content, the content is indicated by a small, color coded bar with that author's initials so that you can tell who added what to a notebook.
- There's also versioning support so you can show previous versions of a page. This includes who wrote it and when. Changes that are related to a previous version of a page are also automatically highlighted.

Improved Ways to Find and Organize Your Notes
- OneNote 2010 has section and page tab improvements to make it easier to create new sections. There is also a better visualization of the tab hierarchy. You can also collapse groups of subpages and insert new pages anywhere in your page tabs.
- Fast Search gives you a quick way to find information in your notebooks. The search results will appear as you type. You can search based on notebook names, section labels, and page titles. If you are the author of a page, you can also search by when content was added. For example, last week, last month, etc.
- You can also create links to other existing pages in a notebook simply by typing the Wiki link syntax. For example: [[This is My Page]]. You can also do this by going to the Insert Hyperlink dialogue box.
- Importing information into OneNote 2010 has been made even easier as well. You can use Send to OneNote from Outlook and Internet Explorer. In addition, you can print any document or file directly to OneNote 2010. The Quick Filing popup allows you to choose where in your notebook you want to import something. You can also search your Quick Filing locations to find a specific section or page.
Linked Note Taking and Easier Research
- By docking OneNote to the side of your Windows desktop, you can have it appear alongside other windows such as a web browser or Outlook.
- If you are in docked mode, OneNote 2010 automatically links the notes you take to whatever it is you are looking at in the other window.
- OneNote 2010 wraps text outlines to fit the window size when there is online one outline on the page.
Improvements to Make Editing Easier
- One Note 2010 has a gallery of styles, such as Headings. There are only basic styles, not the wide variety you see in programs such as MS Word.
- Another change is to bullet lists. Now the indentation of the first-level of bullet items in a list exactly matches the indentation of previous text.
- OneNote 2010 now gives you the ability to add mathematical equations. This is helpful if you want to add math as part of your notes.
- A mini translator in OneNote 2010 lets you point your mouse to a foreign word or phrase and get the translation in a small window.
Touch Support for Tablet PC Users
- If you have a compatible computer running Windows 7, you can scroll and pan the pages in OneNote 2010. You can also use pinch zooming. By making a pinching gesture with your fingers, you can zoom in and out on a page.
- Navigational enhancements have also been made in OneNote 2010 to improve the experience for touch-compatible PCs and operating systems.
Improvements to the Interface
- OneNote 2010 uses a ribbon to provide access to the toolbars and features you need to use, just the same as other Microsoft programs. If you are not used to the ribbon, once you acquaint yourself with it, you will see it makes it quicker and easier to find what you need. You can also customize the ribbon so it shows the tools and commands that you use the most.
- As with other Microsoft 2010 Office products, you also have the Backstage View. This is where you manage your files, as well as set your program and notebook options.
Starting OneNote 2010

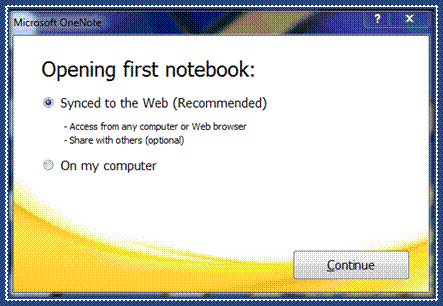
The first time you open OneNote 2010, you will see this window:
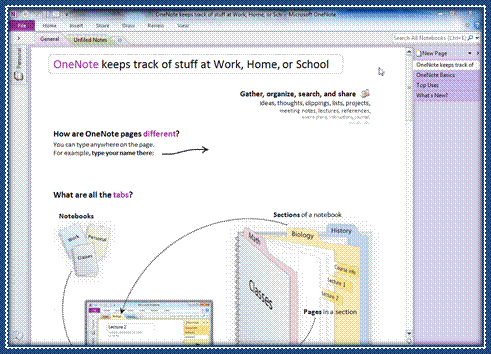
At the top of your OneNote window, you will see File, Home, etc. These are called ribbon tabs. Each tab represents the general commands and tools that you will find under it.


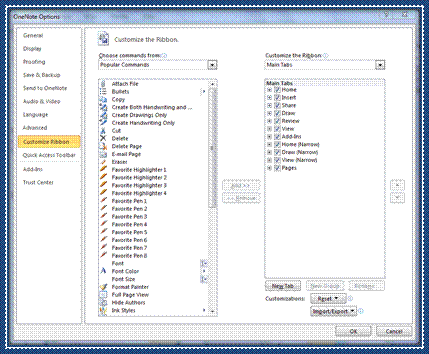
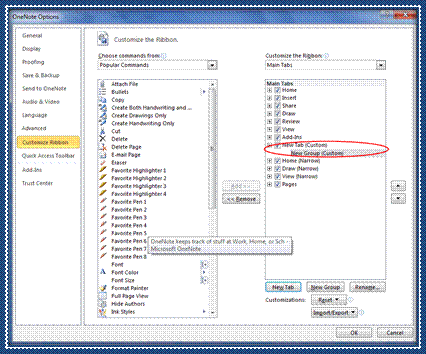
Now, to make it easy to find the tools and commands you need in the ribbon, the tools and commands are organized into groups. If you look at the snapshot above, the groups are Clipboard, Basic Text, Styles, Tags, and Outlook. The Basic Text group has tools and commands that allow you to format basic text. The Styles group allows you to apply a style to your text. You get the idea. OneNote 2010 also allows you to customize the ribbon by creating your own tabs, then adding groups to them so that you can access the tools and commands that you personally use most often.

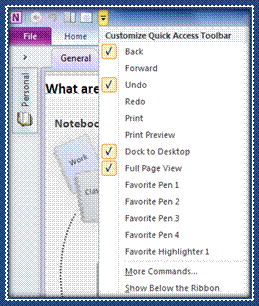
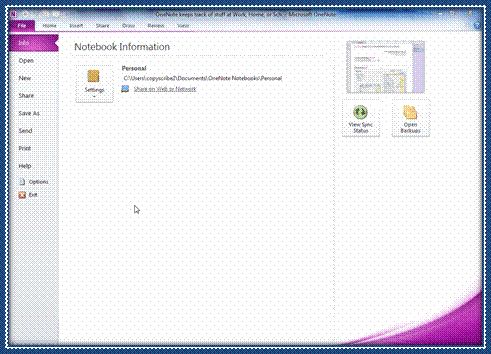
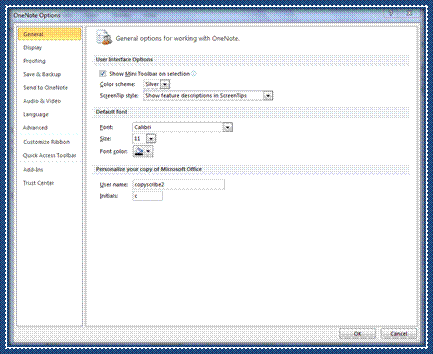
Click the File tab to go to Backstage View. Click Options on the left hand side.
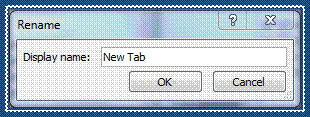
We named ours Course. Click OK.
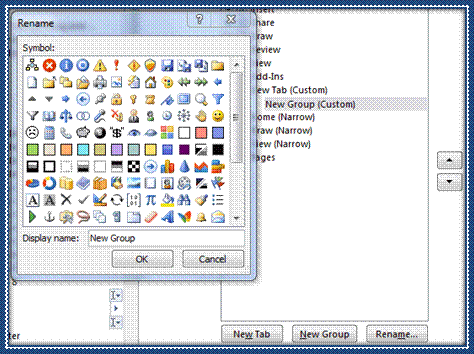
We renamed ours Editing. Click OK.
Now, select groups from the left side column and add them to your group by clicking the Add button.

Finally, click OK to close the Options window. Below you can see a snapshot of our new tab and group.

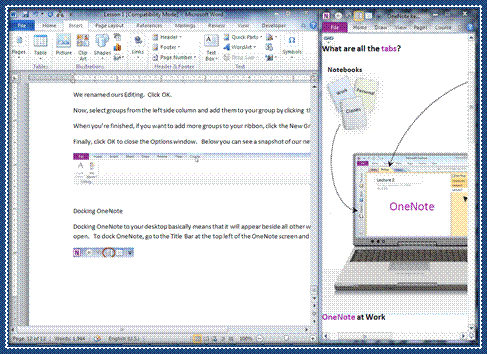
To undock, click the icon again.
To close OneNote 2010, go to the File tab which will take you to the Backstage View. Click Exit on the left hand side of the screen.
Creating Notebooks
Understanding Notebooks
Here's how it works:
Groups of pages are made up of pages and subpages.
Analogy: Think of these as multiple, individual pages of notes that you took over a week's time in Biology class.
Groups of pages are stored in sections.
Analogy: Using the Biology class example, you use your three ring binder and organize your biology notes in one place. This is the section for Biology.
Sections are stored in folders.
Analogy: Perhaps you put your Biology notes into a folder, then into a three ring binder. Or perhaps you used page dividers.
Folders make up your notebook.
Analogy: In your notebook, you had notes for Biology, Math, English class, etc.
Creating a New Notebook
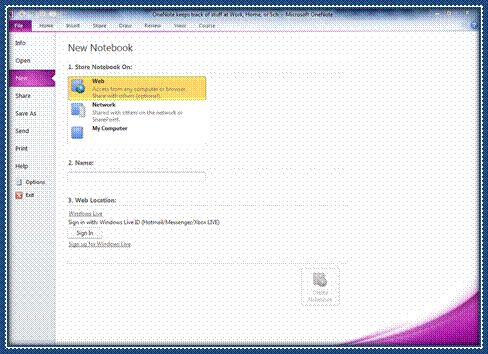
The first thing you need to do is select where you want to store the notebook. You can store it to the web, a SharePoint network, or your computer. If you want to save to the web, you must have a Windows Live ID.
We're going to show you how to save to the web and to your computer.
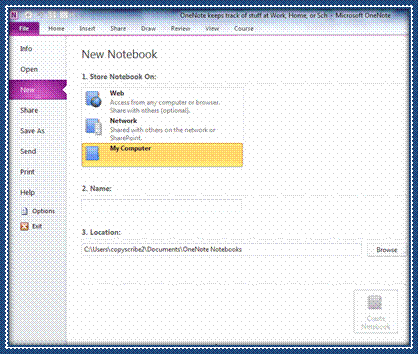
Type a name for your notebook under Name.
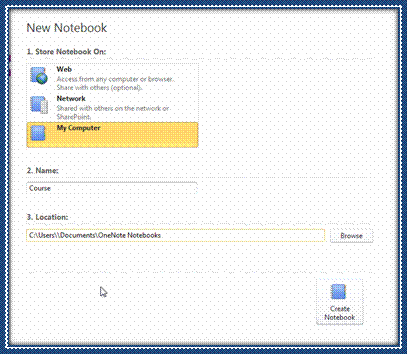
Click the Create Notebook button.
It is that easy!
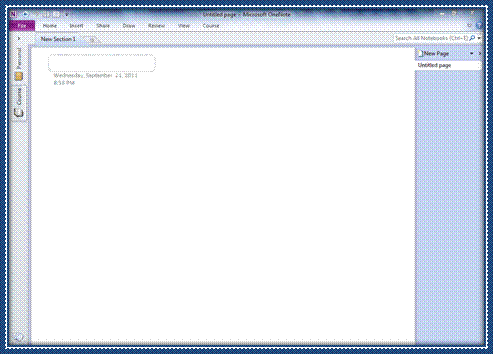
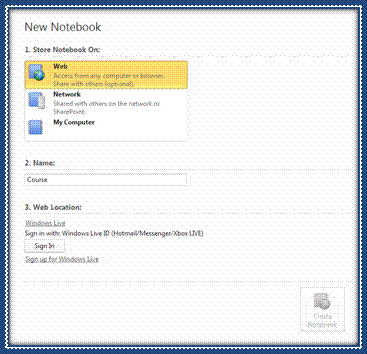
Name your notebook just as we did before.
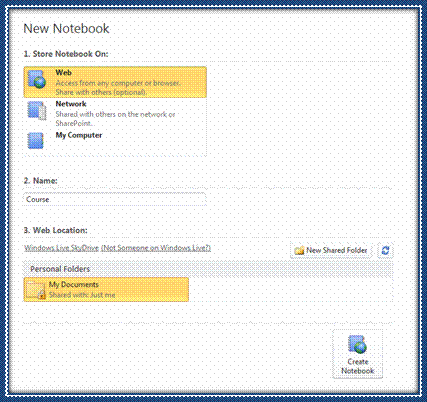
Now your notebook is on your Windows Live SkyDrive, and your notebook is saved to the cloud. This means you're notebook is on the Internet. Nobody can access it if you don't want them to. Just think of it as your virtual hard drive that will never crash. Even if your computer crashes, you can access your notebook from any computer.
Saving a Notebook
If you want to save your notebook, a section of your notes, or a page of your notes to a different location or in a different format, you can save them yourself by completing the following tasks:
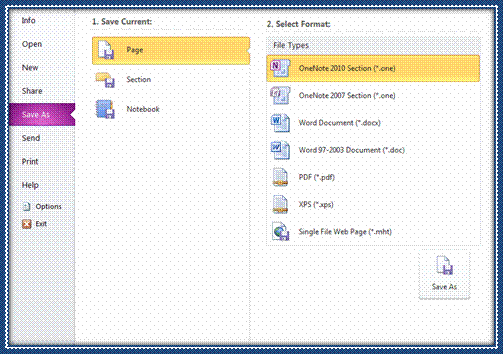
Choose if you want to save a page, section, or an entire notebook. Then, select the format you want to save it in.
Click Save As.
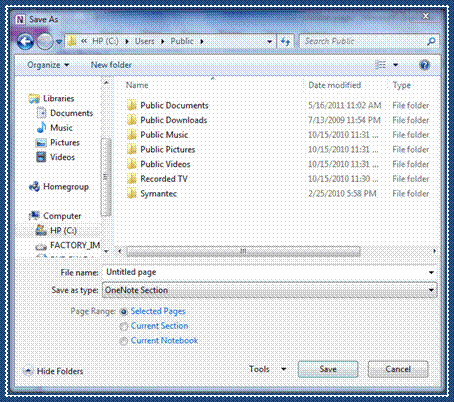
Click Save. Your page, section, or notebook (whichever you selected to save) is now saved to the location that you've chosen.
Searching Notebooks
To search, go to the search box at the top right of your OneNote window:

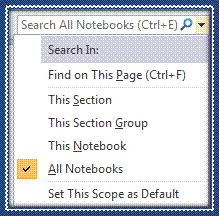
Type keywords in the search field and OneNote will find what you are looking for.
Closing a Notebook
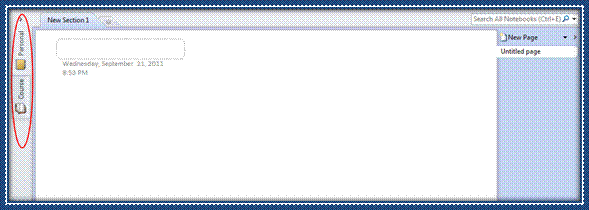
Select Close Notebook.
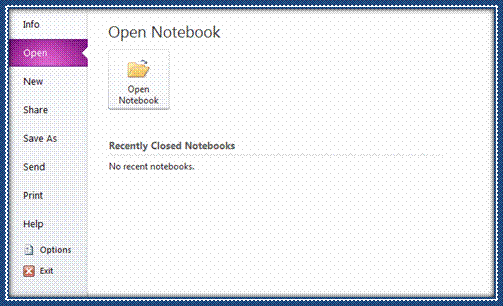
If you've recently closed a notebook and want to open it again, select the name of the notebook from the Recently Closed Notebooks list.
Otherwise, click the Open Notebook button.
Find the notebook that you want to open and click Open.


