It's important to recognize that Outlook 2013 is downloaded and installed on your computer; therefore, it's a program you can open and use just like Microsoft Word or Excel. You do not need to be on the Internet to use Outlook 2013, nor do you need an Internet browser open to launch it. The only thing you need is an Internet connection if you want to send or receive emails.
Downloading Outlook 2013
With the launch of Office 2013, Microsoft made changes in how it sells its most popular software package. You can download a free trial by simply going to the Microsoft Office page, picking out what version you want to try, then downloading the software. You don't need a credit card to try the software.
If you want to purchase the software, Microsoft now gives you two choices. As always, you can buy the software, either online, or from most office supply and computer stores. The prices to buy the software vary depending on what version you wish to purchase. There are three versions: Home and Student, Home and Business, and Professional. As with other versions of Office, it's a one-time charge and the software is yours to use as long as you wish.
However, Office 2013 also comes Office 365, which is another method you can use to buy the Office suite of software. With Office 365, you subscribe to the software instead of purchasing it as you've done in the past. You can pay for your subscription by the month, or yearly, on the Microsoft Office website. The price of your subscription will be determined by the version you want: Home, Small Business, or Mid-size Business.
Once you purchase a subscription, you'll be able to download Office 2013 on your computer just as you would if you had bought the software in a store. As part of Office 365, the subscription also includes multiple licenses, which will give you the ability to install the software on other computers as well. This is a perk that doesn't come with buying the software in a store. For the Home version, you get up to five licenses (five devices). The Small Business version comes with licenses for up to 25 users. The Mid-size Business provides for up to 300 users. There's also an Enterprise version for larger companies that offers unlimited users.
Once you subscribe to Office 365, you'll never have to worry about purchasing a new version of Office ever again. When a new version comes out, your software will be updated for you.
What's New in Outlook 2013
Outlook 2013 is arguably the best version of Outlook yet. It contains the same great features you loved in past versions that have been fine tuned and improved for better usability. In addition, it contains some great new features that make Outlook even more useful and functional than ever before.
Here are the improvements and changes you can look forward to seeing:
-
The attachment reminder lets you know if an attachment was omitted from the email. How many times have you sent an email and forgot to attach something? Outlook 2013 helps to remind you.
-
The People Hub is now where you will view your contacts. It includes the profiles of your contacts � and can even include contacts from social networks. Best yet, it now combines the information from one person that's listed multiple times as a contact onto one contact card. For example, if John Doe is an Outlook contact, but also is linked to you by Facebook and LinkedIn, he will now only have one contact card instead of three.
-
The weather forecast is now displayed in Outlook. You can see the weather forecast for the next 3 days in the Calendar module.
-
Preview messages in the messages list.
-
Now you can reply to emails right in the reading pane. You can also start a Lync IM conversation and enjoy a real-time chat.
-
Take a look at your calendar to see your schedule or look at a contact's details without having to switch from the Email module to the calendar, etc.
-
And more!
About Outlook.com
There's been some amount of confusion since the release of Outlook 2013 and the creation of Outlook.com. Are the two related? Do they work together, automatically syncing messages from Outlook 2013 to Outlook?
Before we go any further, let's answer these questions and clear up this confusion.
Outlook.com is a free web-based email service. If you've ever used Gmail, then you already pretty much know what Outlook.com is. You can get an email address and use Outlook.com to send/receive emails through its browser-based program. However, Outlook.com will have a link to your Outlook 2013 data if you use Microsoft Exchange. There is support added in for your Outlook 2013 contacts and calendar.
This is what Outlook.com is � and what it isn't:
-
Outlook.com is NOT Outlook 2013. Outlook 2013 is a software program that you must download to your computer.
-
Outlook.com is a free web-based email solution that actually replaced Hotmail.
-
You can use Outlook.com to check email for nearly any email account you have. You can even create Outlook.com email addresses.
-
You can sync your Outlook 2013 information to Outlook.com, but only if you use Microsoft Exchange.
-
You can access Outlook.com from any web browser as long as you have an Internet connection.
To set up an Outlook.com account, go to www.outlook.com. Click the Sign Up Now link at the bottom of the page. If you have a Microsoft Live, Windows Phone, or Xbox Live account, you can simply log in without creating an account.
Getting Started
If this is the first time starting Outlook 2013, the first thing you're going to see when you open the program is the wizard. This wizard will guide you through all the information you need to configure Outlook to send and receive your emails.
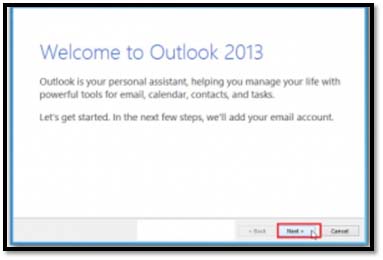
Above is the first window you'll see. Simply click Next, and the window below will appear.
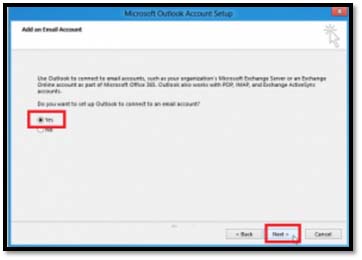
In the window above, Outlook asks you if you want to connect to an email account. Select Yes if you want to be able to use Outlook to send and receive email, then click Next.
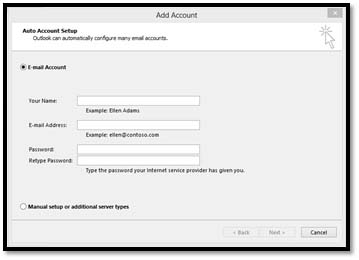
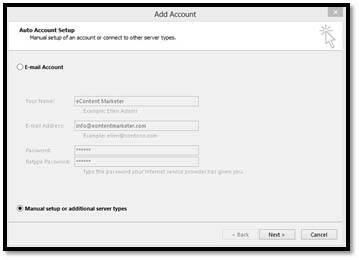
In the snapshot above, you'll see the next thing Outlook is going to want is your name (as you want it to appear in the subject line of an email), your email address, and the password that has been given to you by your ISP for your email.
You can also choose if you want to manually configure the set-up, or add additional server types. Leave the box unchecked to let Outlook configure your account for you, then click Next.
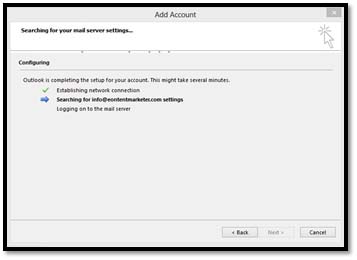
Outlook 2013 configures your account for you, as shown above.
NOTE: If you are not using a Microsoft Live account to login to Outlook, you may need to manually configure your settings using the settings your ISP or email provider gave you.
If this is the case, check the box to manually configure settings, as shown earlier in this section. If you're still on the window shown directly above, you can click the Back button.
Click Next.
Now, choose a service you want to connect to in order to check email:
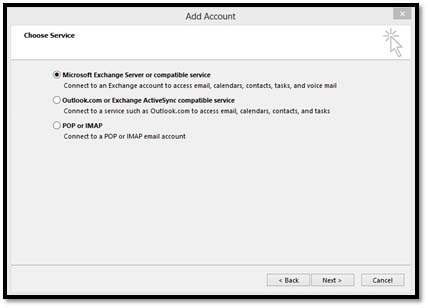
We are going to choose POP or IMAP.
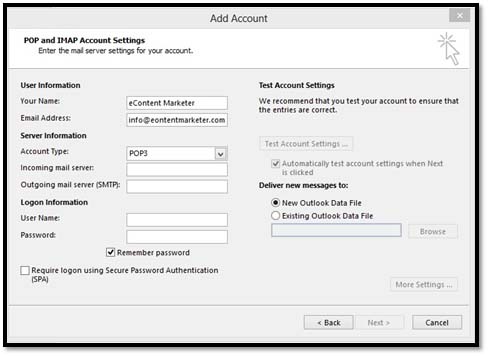
Now enter the information given to you by your ISP or email provider.
If you want to test the account settings to make sure they work, you can do that on the right by clicking the Test Account Settings button. Click Next when you're finished.
The test window will appear as Outlook attempts to send and receive emails, using the configurations you entered in the previous window.
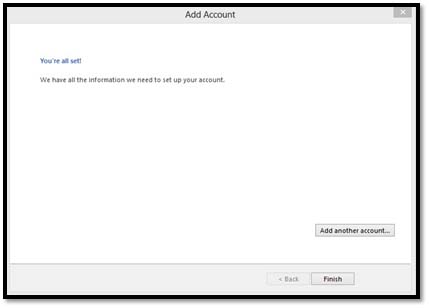
Once everything is okay, the next window you see will be to let you know that your account was set up successfully. Congratulations! You're now ready to begin using Outlook 2013.
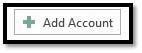
NOTE: If you already have accounts set up in prior versions of Outlook, those accounts will transfer to Outlook 2013 and you will not see the wizard when starting Outlook 2013 for the first time. If this is the case and you want to add new accounts, click the File tab, then click the Add Account button.
Navigating Outlook 2013
Learning to navigate through Outlook is the difference between struggling to find the tools and features you need � and being able to go to them quickly -- therefore, saving time and aggravation.
If you've used prior versions of Outlook, we'll familiarize you with the new look.
The Outlook 2013 Interface
Outlook 2013 is organized differently than any other Microsoft Office program. All the work you can do in Outlook is separated into modules � or sections. Outlook 2013 has four modules:
 Mail. By clicking the mail button and going to this module, you will be taken to your inbox, where you can send/receive mail, as well as compose new emails.
 Calendar. This shows your schedule and all your appointments.
 People. Shows you all of the names and addresses you've saved, as well as new ones you might add.
 Tasks. This is simply your To-Do list.

In addition to these main modules, you can click the three dots to the right of Tasks. There, you will see Notes (where you can keep notes), and Folders.

The Folder Pane
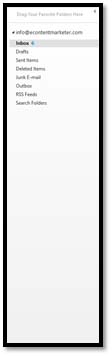
In the Mail module, you can use the Folder Pane to view the folders for different email accounts that you have configured in Outlook. We only have one. However, as you can see, you can navigate between different folders in that account.
The Folder Pane is also referred to as the Navigation Pane in some instances, as well as in prior versions of Outlook, since it lets you navigate around the different modules.
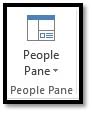
The People Pane

Click the upward arrow on the right side to view the People Pane:
You can also find it at the bottom of a contact's record in the People module.
In addition, you can go to the ribbon. Click the View tab, then go to the People Pane group.
The People Pane shows you personal information that someone has shared through Windows Live, LinkedIn, or Microsoft SharePoint. Plus, whenever you receive an email from someone, you will see the information you've stored about them in the People Pane. This includes a picture of the person, if one is available through your contacts, or a sharing site, such as LinkedIn.
The Information Viewer
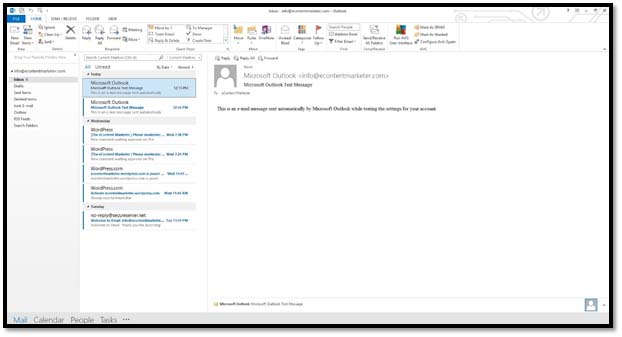
Next to the Folder Pane in the Mail module is where you will see all your emails.
Let's say we want to view messages in our inbox.
We would click on Inbox in the Folder Pane. All of our messages are now displayed in the Information Viewer:
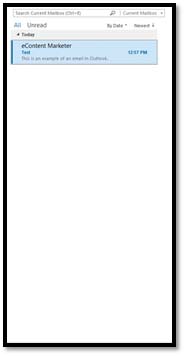
As you can see above, our emails are listed. We can also see a preview of the message in the Information Pane.
To the right of the Information Pane, you have the Reading Pane. This is on the right side of the Outlook window and takes up the majority of space. If you click on a message in your inbox, it will be displayed in the Reading Pane for you.

The Reading Pane displays your message for you. You can also reply to the email, or forward the email in the Reading Pane. This is a feature that's new to Outlook 2013.
The Ribbon
At the top of your Outlook 2013 window, you'll see the ribbon.The ribbon contains toolbars and commands that you'll use in Outlook.
We've highlighted the ribbon in red below:
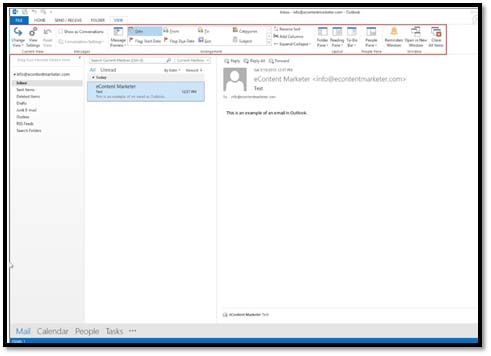
The ribbon is divided into tabs. These tabs are also menus. The tabs are File, Home, Send/Receive, Folder, and View. Tabs divide tools and commands into groups, so they're easier for you to find.
Below each tab are commands (or tools) that you can use. The commands (or tools) located beneath each tab relate to the tab. For example, under the Send/Receive tab in the Mail module, you would find tools to send and/or receive emails.
The tools under each tab are broken down into groups, so you can easily find what you need. In the snapshot above, we're looking at Home. The groups within the Home tab are New, Delete, Respond, Quick Steps, Move, Tags, Find, Send/Receive.
The tabs stay the same for each module. However, the groups and commands change depending on which module you're in. The reason is simple: The groups contain commands and tools. You'll need different commands and tools for the Mail module than you will the Calendar module, for example.
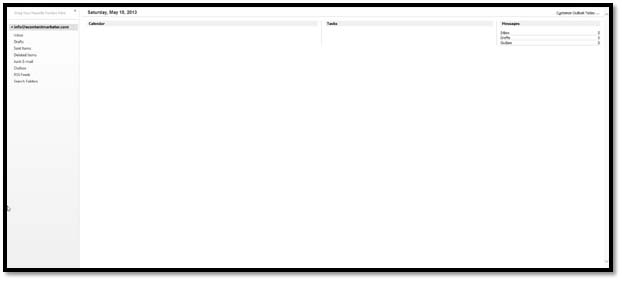
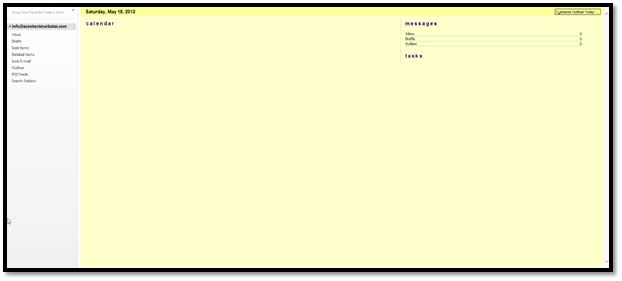
Outlook Today
You can choose how you want Outlook to open. For example, you can have it open to your inbox or to a certain folder. You can also have it open to what's called Outlook Today.
Outlook Today shows you all the appointments you have set on your calendar, your tasks, and your messages.
We've taken a snapshot of Outlook Today below:
To set Outlook 2013 so it opens to Outlook Today, click the File tab, then click Options on the left.
Click the Advanced tab on the left:
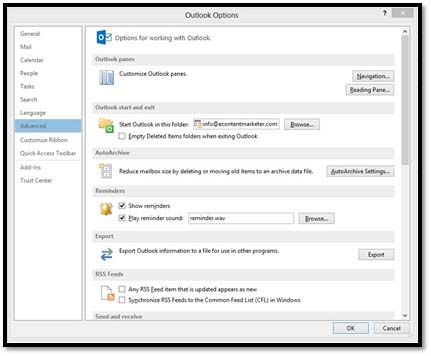
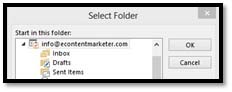
In the section Outlook Start and Exit, click the Browse button. To make it so Outlook 2013 opens showing Outlook Today, select the account you want to use. We've selected our account. Next, click OK.
NOTE: If you want Outlook to open to your inbox, select Inbox in the folder list below, then click OK.
Let's look at Outlook Today again:
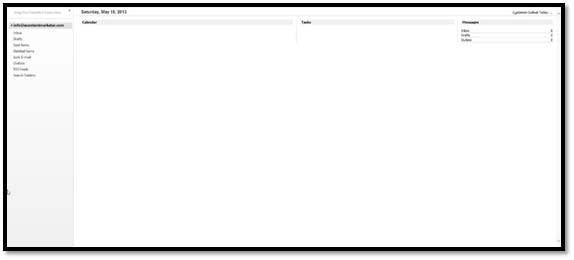
As you can see, our email account and folders are on the left, in the Folders Pane. Next, we have our calendar showing, followed by our tasks for the day. On the far right, we can see how many messages are in our inbox, drafts folder, and outbox folder.
To customize Outlook Today, click Customize Outlook Today at the top right (below the ribbon).
You'll then see this:
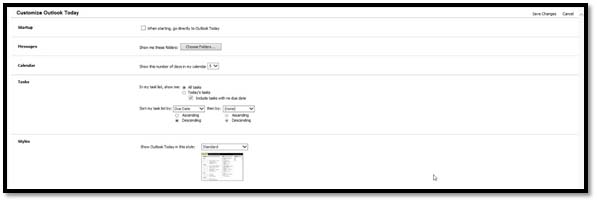
Now, choose your options.
Startup . Check this box if you want Outlook 2013 to display Outlook Today when it opens.
Messages . Select the folders you want to show on the far right side of the screen.
Tasks . Choose if you want all tasks displayed, or just the current day's task. Also, choose how you want the tasks sorted in Outlook Today.
Style . Choose a style for Outlook Today. Below you can see a thumbnail of the Summer style.

Click Save Changes at the top right side of the screen when you're finished.
Here's our Outlook Today in Summer style.
The Folder List
Go to the bottom left of your Outlook screen where you see the modules. Click on the three dots, then select Folders from the menu.
By doing this, can see all your Outlook folders. This includes any folders you've created as you use Outlook for emails or tasks.
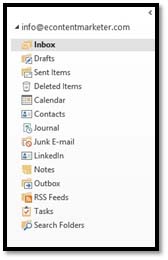
You can see all the folders in the snapshot above. You'll see all your folders for mail, but you'll also see folders that represent other modules, such as Task list, Calendar, etc. The only time you must use the Folder list is when you want to create a new folder.
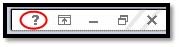
Accessing Help
Microsoft Outlook 2013 has extensive help files if you ever have a question while using this program. To access Help, click on the question mark. It's located in the upper right corner of the window:
The Quick Access Toolbar
The Quick Access Toolbar is common to all Office programs. It allows you to quickly access the tools and features you use the most often. It's located in the upper left hand side of the Outlook 2013 window, as shown below.
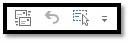
By default, the Send/Receive button, the Undo button, and the Select All button are shown on the toolbar. You can simply click any of these buttons to use these commands.
To add commands to the Quick Access Toolbar, click the downward arrow on the right.

Put a check mark beside a command to add it to the Quick Access Toolbar. You can also click More Commands to select other commands to add.