Getting Started and Learning How to Create in OneNote 2016
Now that we've learned the basics of OneNote 2016 as well as the improved features, it is time to jump into learning how to actually use the program. Don't worry if you've never used it before. We go slow and explain everything in depth to make it simple.
The first time you open OneNote 2016, you will see this window:

This window gives you a virtual tour of how you can use OneNote 2016, including videos that show you how to use the most basic of features in OneNote. These tips will only appear if you've never used any version of OneNote before. You can take a few minutes to browse these tips if you're new to OneNote.
The OneNote 2016 Interface
The OneNote 2016 interface is pictured below.

OneNote 2016 is a relatively simple program to use, and the simple look of the interface reflects that.
Let's take a tour of the interface so that you know where to find everything in OneNote 2016.
The Title Bar
The Title Bar appears at the top of the OneNote window. It's pictured below.

The Title Bar shows you the name of the page you have open.
The Quick Access Toolbar is located to the left of the Title Bar. It looks like this:

You can use the Quick Access toolbar to have quick access to the commands and tools you use the most.
To add commands or tools to the Quick Access Toolbar, click the downward arrow button on the far right.

You will then see this dropdown menu that contains tools and commands that you can add to the toolbar.
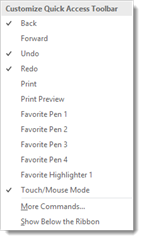
Simply click on the commands or tools you want to add to put a checkmark beside them and add them to the Quick Access Toolbar. You can also click on and tool or command that appears with a checkmark beside it, and remove it from the Quick Access Toolbar.
If you want to add a shortcut for a tool that doesn't appear in the dropdown list, go to the Ribbon, then follow the following steps.
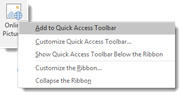
- Find the tool that you want to add. Right click on the tool. In this example, we're going to add the command that allows you to insert online pictures into your pages. This button if found under the Insert tab on the Ribbon. Click on the Insert tab, then right click on the Online Pictures button.
- Select Add to Quick Access Toolbar.
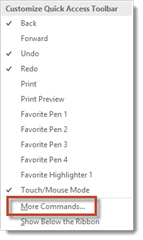
If you want to move a command button in the toolbar to a different location or group it with other buttons on the toolbar, click the dropdown menu on the right side of the Quick Access Toolbar. Select More Commands, as highlighted below.
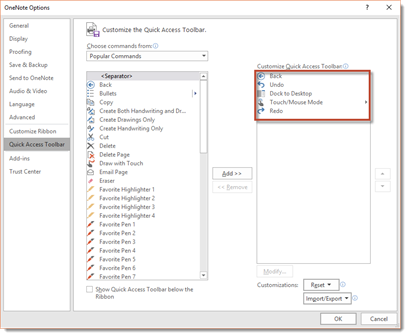
You will then see this dialogue box:
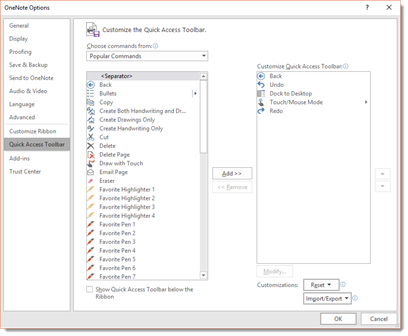
In the right column, you can see everything that already appears on the Quick Access toolbar - and in the order that the shortcuts appear.
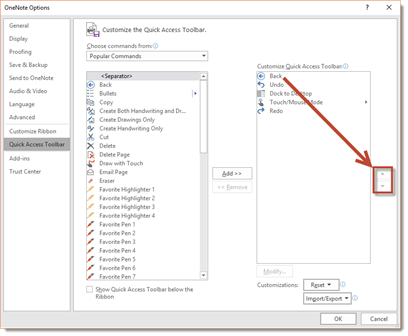
If you want to reorder the tools, click on a tool, then use the arrows to move it up or down.
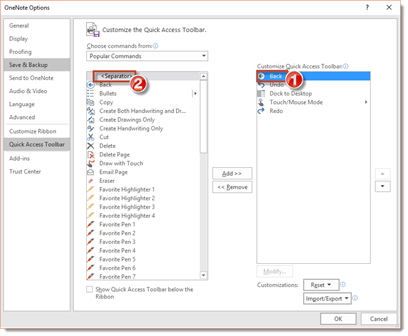
If you want to group buttons together on the Quick Access toolbar, you can add vertical separators.
To do this, select the tool for which you want to appear above the separator. We've selected Back.
Now, click <Separator> from the list on the left.
Click the Add button.
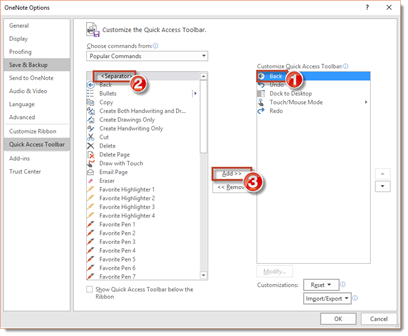
In addition to a separator, you can also add any of the tools that appear in the column on the left to the Quick Access Toolbar. Simply click on the tool to select it, then click the Add button.
To remove shortcuts from the Quick Access toolbar, select the shortcut in the right column, then click the Remove button.
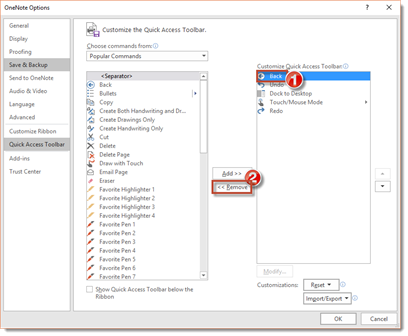
Click the OK button when you are finished.
OneNote 2016 features Microsoft's Ribbon just as you see with other Office programs such as MS Word and MS Excel. The Ribbon, which was new in Office 2007, contains all the tools and commands you will use in OneNote.
At the top of your OneNote window, you will see File, Home, etc. These are called Ribbon tabs. Each tab represents the general commands and tools that you will find under it.
You can see the tabs pictured below.

Click on the Home tab. You'll see the tools and commands associated with the Home tab.

Now, to make it easy to find the tools and commands you need in the Ribbon, the tools and commands are organized into groups. If you look at the snapshot above, the groups are Clipboard, Basic Text, Styles, Tags, Email, and Meetings.
The Basic Text group has tools and commands that allow you to format basic text.
The Styles group allows you to apply a style to your text.
If you have access to OneNote 2016, go ahead and click on the various tabs and become familiar with some of the tools and commands located under each tab.
When you customize the Ribbon in OneNote, you can create your own tab, then add tools and commands to that tab.
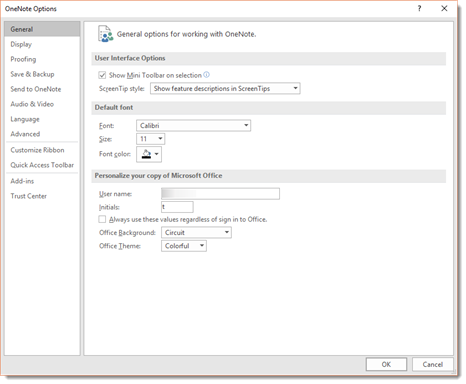
To customize the Ribbon, click the File tab, then click Options on the left.
You will then see the OneNote Options dialogue box.
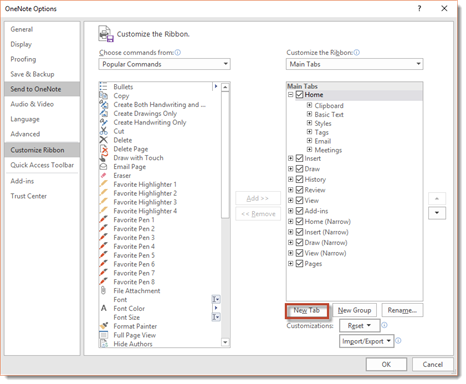
Now click Customize Ribbon on the left hand side of the dialogue box.
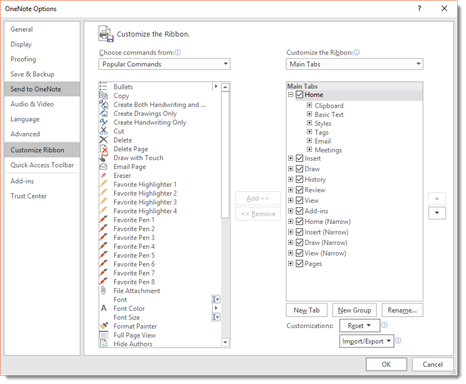
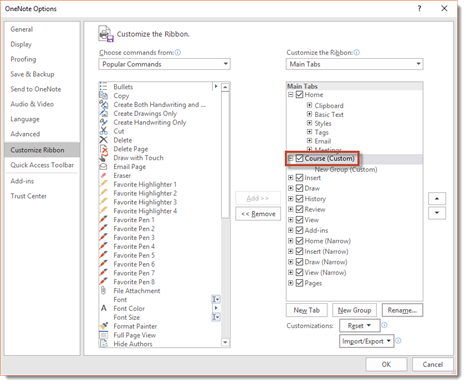
Let's say you want to add a new tab to the Ribbon. Click the New Tab button of the right side of the screen under the Main Tabs column.
You'll see it added to the Main Tabs column, as shown below.
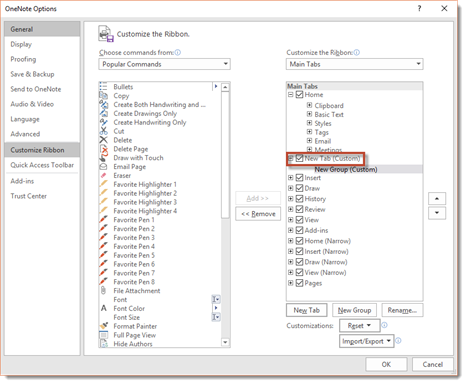
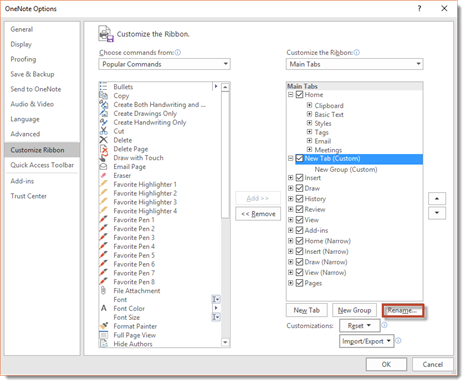
To rename it, click "New Tab (Custom)" to select it. Then click the Rename button (highlighted below).
Enter a name for the new tab.
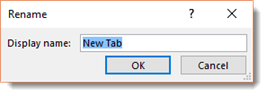
We named ours Course. Click OK.
Now that you've created the new tab, you can add groups to it. Click New Group (Custom) below your custom tab to select it.
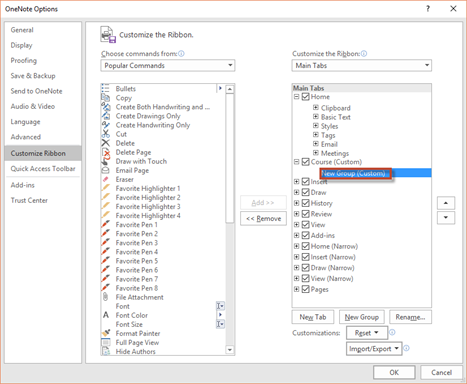
Click the Rename button.
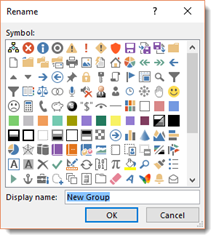
Enter a name for the group. We are going to name ours Tools.
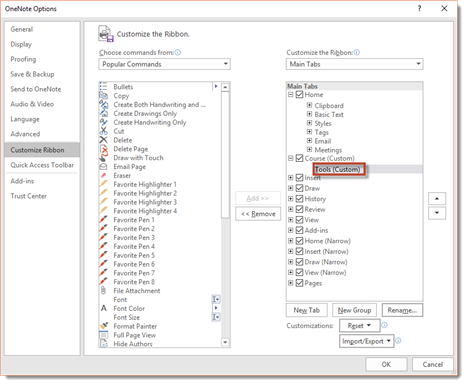
Click OK once you've named the group.
You can see our new group in the snapshot below.
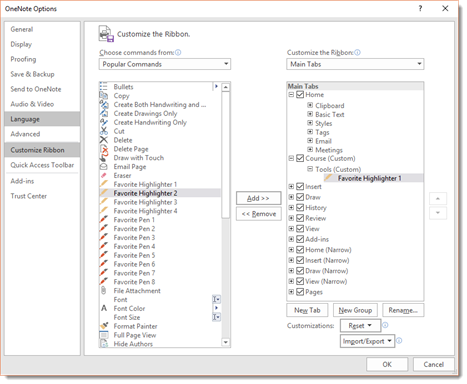
To add tools and commands to the group, select tools and commands from the left side column and add them to your group by clicking the Add button. We are going to add the Favorite Highlighter 1 command to our group.
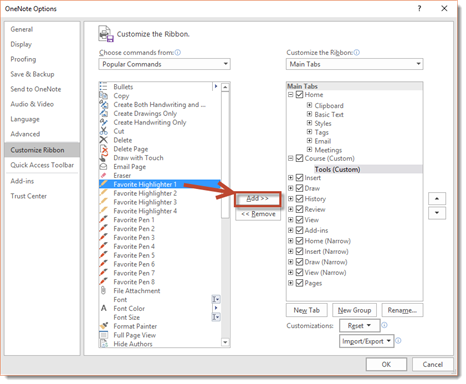
You can see that the command was added to our custom group.
Click OK when you're finished adding groups, tools, and commands to your new tab.
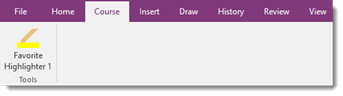
In the snapshot below, you can see our new tab on the Ribbon.

If we click on the tab, we can see our new group.
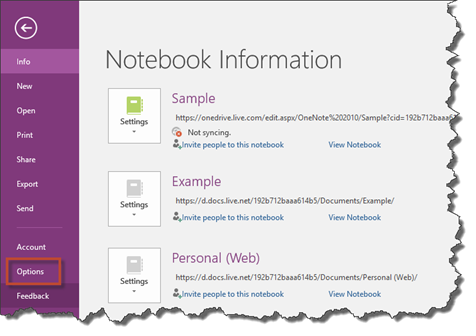
Click the File tab to go to the Backstage View. Whereas the other tabs in OneNote 2016 give you tools and commands to work within aspects of your notebook, the Backstage View gives you tools and commands to work with your notebook as a whole.
The Backstage View is shown below.
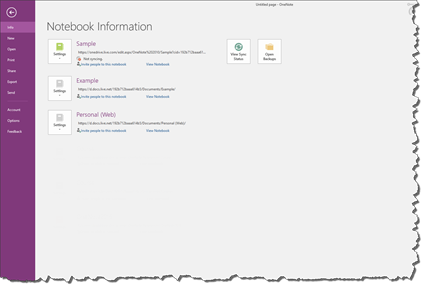
When you go to the Backstage View, you can print notes, share, open notebooks, create new notebooks, and also customize OneNote 2016 by clicking Options.
Docking OneNote to your desktop basically means that it will appear beside all other windows that you open. Let's show you what we mean.
To dock OneNote, go to the Quick Access Toolbar and click the button. It appears there by default.

OneNote will then be docked.
To undock, click the ellipse at the top of the OneNote screen (or the three dots), as shown below.
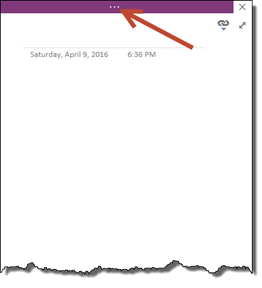
You'll then see the Ribbon. Click the Dock button in the Quick Access toolbar again.
Using OneNote 2016 with a Touch Screen Device
Touch screen devices are becoming more and more common. Smart phones, tablets, and even touch screen monitors are changing the face of computing.
For the first time, the 2016 Office suite of programs offers options to its touch screen users.
If you're using OneNote on a tablet, you can adjust the spacing between buttons on the Ribbon to make it easier to use on a touch screen device.
You do this by activating Touch mode.
To activate Touch mode, click or touch the Quick Access Toolbar button: 
Select Touch/Mouse Mode from the dropdown menu if it doesn't already have a checkmark beside it.
You can now see the button in the Quick Access Toolbar, as shown below:

Now, touch or click the button and choose Touch.
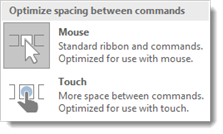
There is now more space between commands on the Ribbon.
As we've mentioned already, OneNote 2016 is an electronic notebook that you can use to take, organize and store notes much in the same way that you would in a three ring binder or spiral notebook back when you were in school. While you might use section dividers and tabs in a three ring binder to divide notebook paper pages, as well as organize notes and such things, OneNote 2016 also offers organizational features to help you sort and organize your notes and information. These features are called folders, sections, and pages. They all come together to make up your notebook.
Here's how it works:
Groups of pages are made up of pages and subpages. Subpages are defined as additional pages with smaller tabs than the primary pages. Analogy: Think of these as multiple, individual pages of notes that you took over a week's time in Biology class.
Groups of pages are stored in sections. Analogy: Using the Biology class example, you used your three ring binder for all classes, but organize your biology notes in one place - or section.
Sections are stored in folders. Analogy: Perhaps you put your Biology notes into a folder with pockets, then put that folder into a three ring binder. Or perhaps you used page dividers.
Folders make up your notebook. Analogy: In your notebook, you had notes for all your classes, such as Biology, Math, English class, etc.
So, if we break it down by how these things make up your notebook, it would go like this:
Pages>Sections>Folders>Notebook
To create a new notebook, click the File tab to go to the Backstage View. Click New.
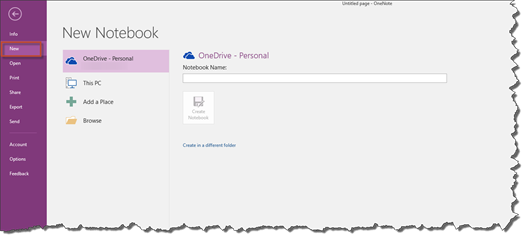
The first thing you need to do is select where you want to store the notebook.
You can store it on OneDrive, your computer, or you can add a place such as a Microsoft Exchange or SharePoint account.
We're going to show you how to store it to OneDrive and your computer.
This PC
To store it on your computer, select This PC.
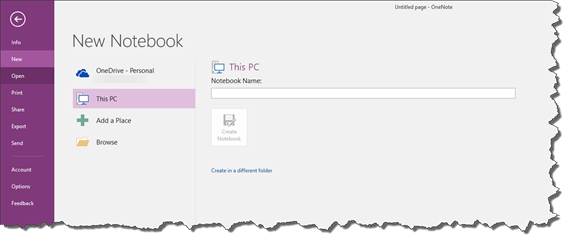
Type a name for your notebook under Notebook Name.
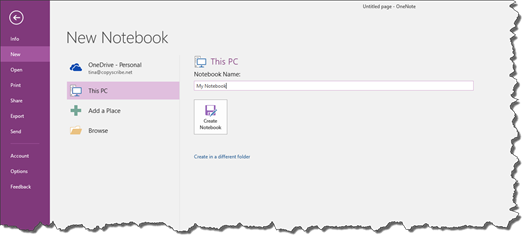
When you enter a name, the Create Notebook button becomes active. Click the Create Notebook button.
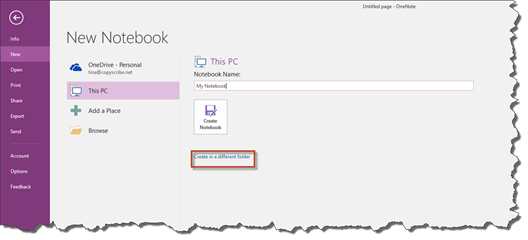
If you want to choose the location on your computer where the notebook will be stored, click the link that says Create in a Different Folder - instead of the Create Notebook button.
Navigate to the location where you want to store the notebook.
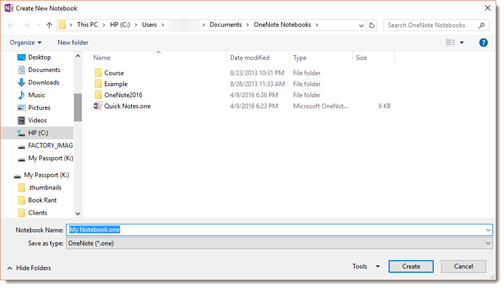
Click Create.
Your new notebook opens in OneNote with a blank page showing.

OneDrive
Now, let's create a new notebook and store it on OneDrive.
To do this, go to the Backstage View again, and click New.
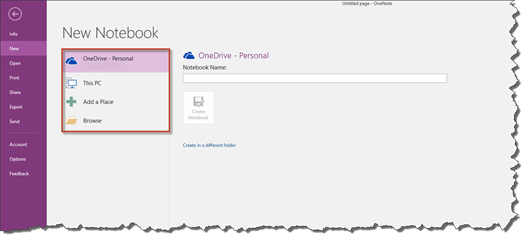
Select OneDrive for the location where you want to store the new notebook.
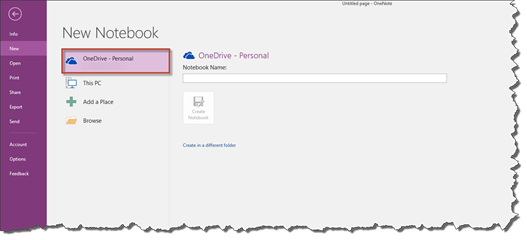
Type a name for your notebook in the Notebook name field.
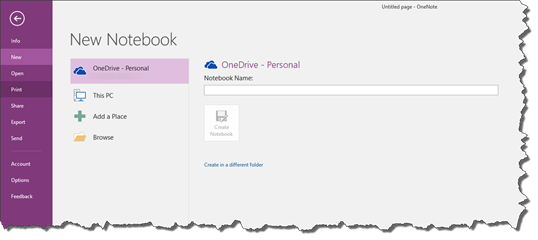
After you've entered a name for the notebook, click the Create Notebook button.
OneNote will then ask you if you'd like to share your notebook with other people.
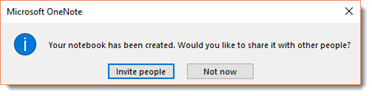
If you want to share it, click the Invite People button to specify the people with whom you want to share. If you don't want to share it, click the Not Now button. You can always share it later if you want.
We've chosen Not Now.
Once you choose whether or not to share it, the new notebook opens for you in OneNote.
OneNote 2016 automatically saves your information as you take notes, if you switch to another page or section (we'll learn more about these later), or if you close sections or notebooks. OneNote refers to this as syncing. However, it saves your notebook in the default OneNote format (.one).
If you want to save your notebook, a section of your notes, or a page of your notes to a different location or in a different format, you can save them yourself. Just be forewarned that you won't see a Save or Save As option in the backstage area as you would with other Office programs such as Microsoft Word or Microsoft Excel.
To save your files in a different location or format, click the File tab to go to the Backstage View.
Select Export on the left.
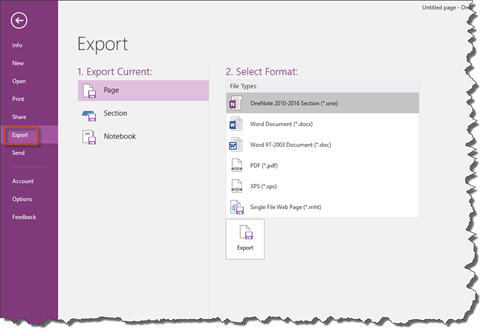
As you can see in the snapshot above, you can export the current page, section, or notebook.
We are going to select Notebook.
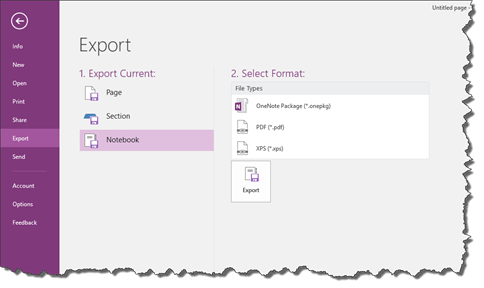
Next, select the format.
We're going to choose PDF (*.pdf).
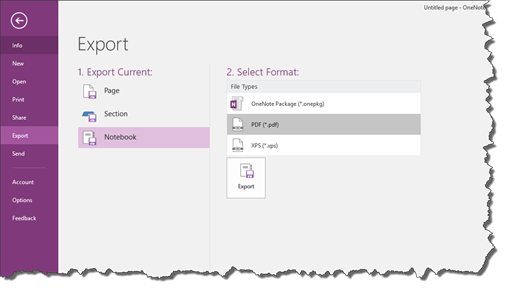
Click the Export button.
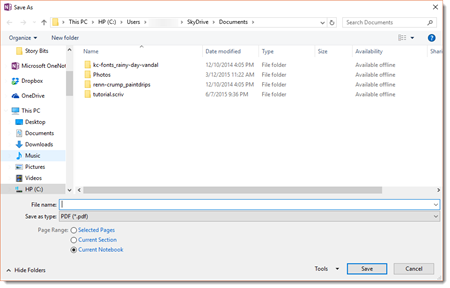
Choose where you want to save the page, section, or notebook, then click the Save button.
OneNote automatically syncs (or saves) your notebooks to the location where you've chosen to store them. However, you can manually sync your notebooks too.
To do this, go to the Backstage View by clicking the File tab.
Click Info on the left, then click the View Sync Status button.
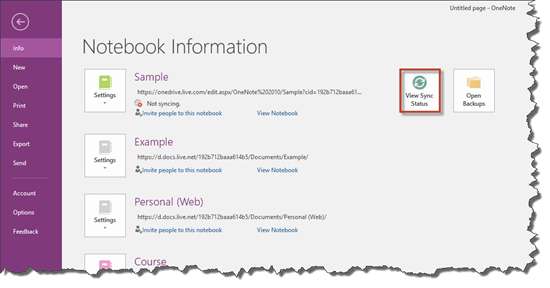
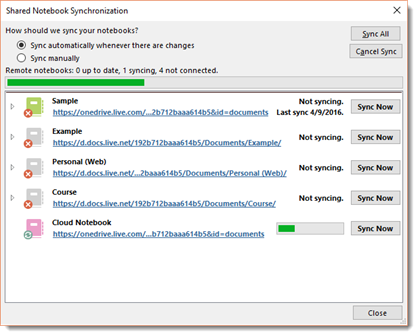
You'll then see the Shared Notebook Synchronization dialogue box, as shown below.
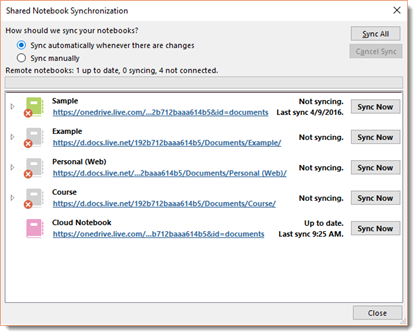
Choose the notebook you want to sync, then click the Sync Now button to the right of it. You can also choose to click the Sync All button at the top right of the dialogue box to sync all notebooks.
If you only want to sync the notebook you're currently working in, you can sync that notebook by right clicking on the notebook title, as shown below.
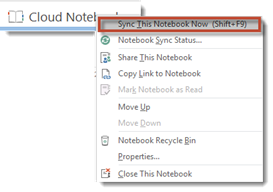
Select Sync This Notebook Now from the list, as shown above.
Remember, OneNote automatically syncs your notes. However, you may not want OneNote to sync your notes until you're finished, especially if your notebook is shared, and you only want to share the finished notebook.
To configure manual sync, right click on the notebook name, as we did above and select Notebook Sync Status.
Select Sync Manually.

You will return to this window when you're ready to sync the notebook.
You can search OneNote 2016 for a notebook, page, section, or any element such as text, audio, images, videos, embedded files, etc.
To search, go to the search box at the top right of your OneNote window:
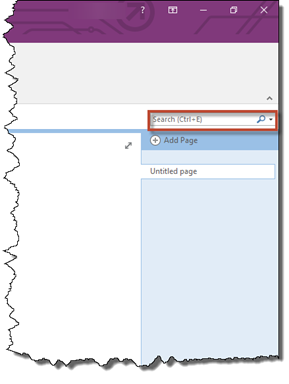
By clicking the downward arrow on the right side of the search box, you can specify where you want to search.
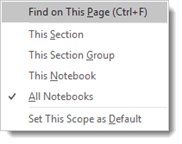
Type keywords in the search field and OneNote will find what you are looking for.
To close a notebook, right click on the name of the notebook on the left side of the screen (below the File tab).
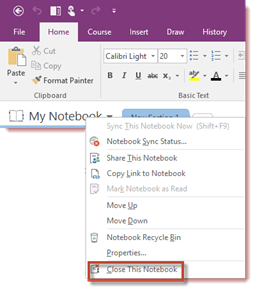
Select Close This Notebook, as shown above.
To open a notebook, go to the Backstage View, then click Open on the left.

If you've recently closed a notebook and want to open it again, select the name of the notebook from Recent, as highlighted below.
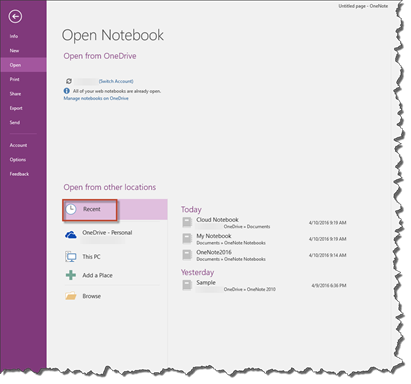
Otherwise, click the location where the notebook is stored, such as OneDrive, This PC, etc.
Find the notebook that you want to open, and click on it.