Being able to navigate a software program is one of the keys to being able to master it. It's important to know where to go to find what you need to do. This includes finding tools that enable you to complete tasks, as well as setting options and saving files.
In this article, you'll learn about:
-
The Ribbon
-
The Quick Access Toolbar
-
Working with Visio 2013 on a Tablet
-
The Backstage view
-
Common Visio terms and definitions
-
The Drawing and Shapes windows
The Ribbon
The ribbon in Visio 2013 is where you'll find all the tools and commands you'll need to use the program. It was first introduced in Visio 2010, although the ribbon appeared in other Office programs starting with 2007. It replaces the toolbars that were found in those earlier versions. If you've never used Visio or an Office program with the ribbon before, don't worry. Although it takes some getting used to, it actually makes using the programs easier because everything is grouped and organized.
The Visio 2013 ribbon is pictured below:

The snapshot above shows you the tools and commands located under the Home tab. The other tabs are File, Insert, Design, Data, Process, Review, and View. You can see all these in the snapshot above.
Whenever you click on a tab, the ribbon displays all the tools and commands available under that tab.
We can see the Home tab above. Let's click on the Insert tab.

As you can see, all the tools and commands under the Insert tab are now displayed in the ribbon.
That said, the tools and commands shown in the ribbon are broken down into groups. Under the Insert tab (pictured above), we have five groups: Pages, Illustrations, Diagram Parts, Links, and Text.
The Illustrations group is pictured below.

The Quick Access Toolbar
The Quick Access Toolbar is where you'll find commands that you use the most often. The Quick Access Toolbar is located at the top left of the screen, as pictured below:

The Save, Undo, and Redo commands are located in the Quick Access Toolbar. However, if you click the downward arrow on the right side, you can add more commands.
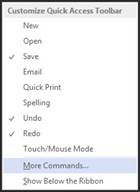
Click More Commands in the context menu pictured above.
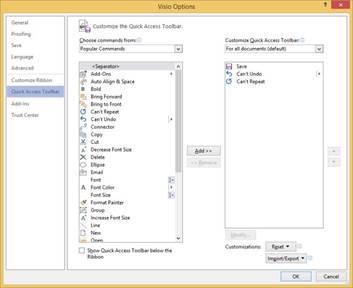
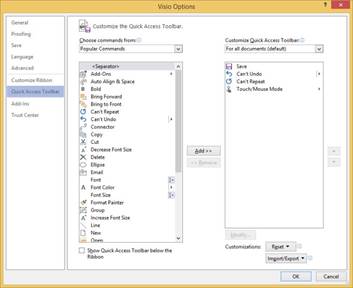
To add commands or tools to the Quick Access Toolbar, select the command or tool in the left hand column, then click the Add button.
Click OK when you're finished.
Working with Visio 2013 on a Tablet
If you're using Visio on a tablet, you can adjust the spacing between buttons on the ribbon to make it easier to use. You do this by activating Touch mode.
To do this, click or touch the Quick Access Toolbar button: 
Select Touch/Mouse Mode.
You can now see the button in the Quick Access Toolbar, as shown below:

Now, touch or click the button and choose Touch.
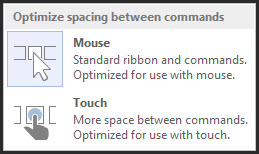
There is now more space between commands on the Ribbon.
The Backstage View
The Backstage view is located under the File tab. It looks different than other tabs that you might click on. That's because the Backstage view is where you'll manage your files and set your options for Visio.
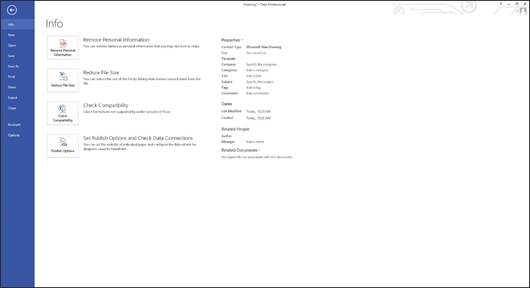
The Backstage view contains different pages. These pages are listed on the left hand side (in the blue column).
Let's talk about each of these pages and how you'll use them when working with Visio 2013.
The Info Page
The Info page is pictured above.
This page has four buttons:
-
Remove Personal Information
-
Reduce File Size
-
Check Compatibility
-
Set Publish Options and Check Data Connections
You'll use the Reduce File Size button if you're worried about the file size.
You'll use the Check Compatibility button to check your diagram for features that won't be compatible with earlier versions of Visio.
On the right side of the Info page, you'll see information about your current document.
The New Page
The New page is where you'll go to create a new document. It is also where you can access all the templates that come with Visio 2013.
The New page is pictured below:
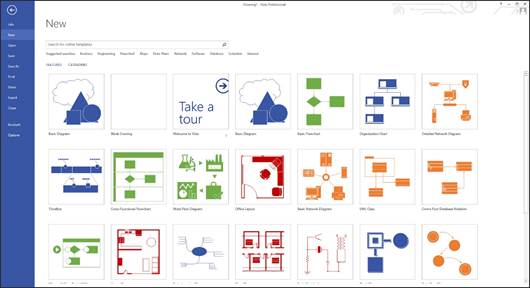
To select a template, click on a thumbnail of the template. You can also use the search box located above the template thumbnails. Enter in search terms to look for a certain type of drawing or diagram.
Whenever you click on a template, even a blank diagram or drawing, you'll see this window:
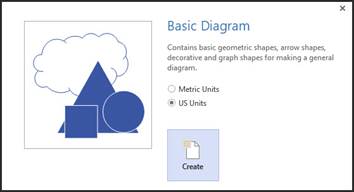
In this window, you'll be asked to set the measurement unit you want to use.
-
Metric drawings are sized using International Standards Organization (ISO) paper sizes. The default size is typically A4.
-
US Units are sized using US Units. The default size is 8.5X11 inches.
The Open Page
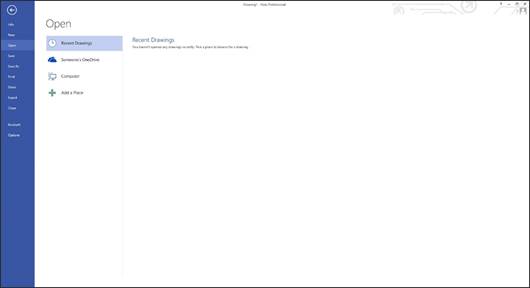
The open page is where you can access Visio files that you have saved on your computer or remote locations, such as OneDrive (formerly SkyDrive).
Any recent Visio documents that you've had open in Visio will display under Recent Drawings.
Simply choose the location where the file is stored under Open, then locate the file in that location to open it.
The Save and Save As Pages
The Save and Save As pages allow you to save your Visio drawings.
If you click the Save page, you will save the file under its current name, file type, and to its current location. You use the Save page when you've edited an existing Visio file and want to save the latest version.
The Save As page allows you to name the file you're going to save, select a file type, and then select the location where you want it stored.
The Save As page looks like this:
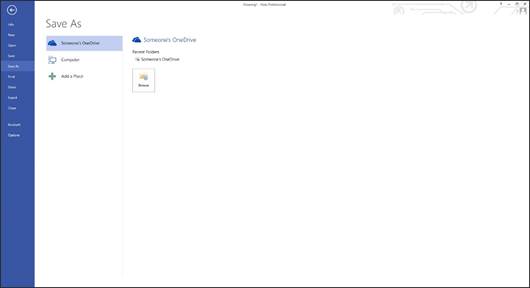
Under Save As (pictured above), choose where you want to save the file. You can choose OneDrive (formerly SkyDrive), your computer, or you can add a place, such as a network location.
In the snapshot above, we've selected OneDrive. Click the Browse button to select a folder or location on the drive.
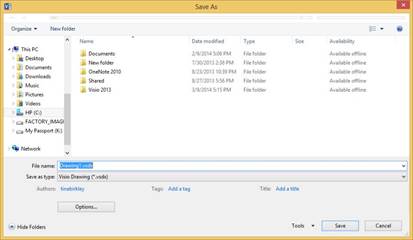
Name your file in the File Name field. The default name is Drawing1.
Select a file format in the Save as Type field.
Click the Save button.
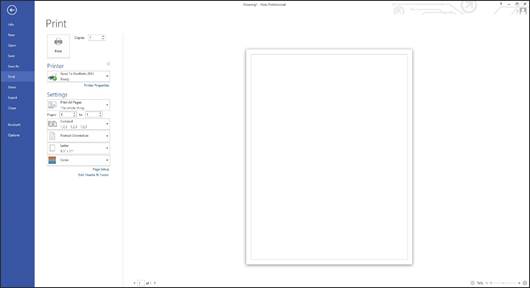
The Print Page
The Print page is pictured below.
The Share Page
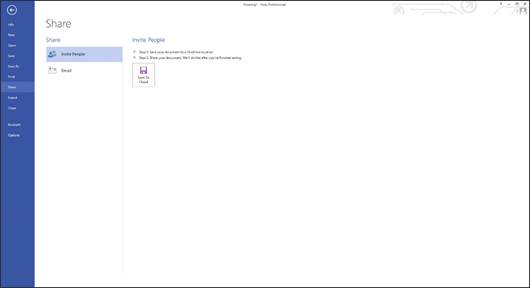
The Share page allows you to share your drawing. You can click Invite People to share your drawing through email or social media. However, you first have to click the Save To Cloud button to save your drawing to either OneDrive or SharePoint.
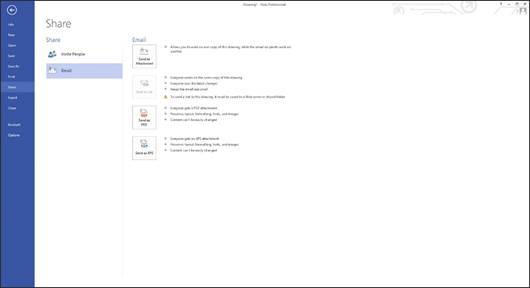
You can also email your drawing using an option shown on the ride side of the page (when you click Email).
The Export Page
The Export page allows you to create a PDF or XPS (Microsoft's version of PDF) version of our drawing, as well as several other formats.
The Close Page
This technically isn't a page. If you click Close, it will simply close your active diagram.
The Account Page
This page contains information about your Microsoft Account (formerly Live ID). There are links that allow you to edit your account details or switch to another account.
Options
If you click Options, you'll see a dialogue box that contains settings for Visio 2013. You may not ever need to change these settings, but it's helpful to explore this dialogue box and see the many options that are open to you when using Visio 2013.
Visio 2013 Terms and Definitions
It's important that you understand the terms we'll use � and what they mean in Visio 2013. Knowing these terms, as well as the definitions, will make learning to use and master the program a lot easier.
These terms with their definitions are listed below.
-
A master is an object in a Visio stencil. You'll choose a master from a stencil. You can use the masters that come with Visio or download some from the Internet.
-
Stencil. A stencil is a collection of masters. Think of it like this. You buy a set of paints. The entire set would be the stencil (in Visio terms). Each individual jar of paint would be a master (again, in Visio terms).
-
A shape is an object on a drawing page. You can create shapes by dragging a master, as well as in other ways. A shape can be a line, a polygon, or an image. It can also change appearance or behavior as the data values change.
-
A template is a Visio document that contains preset dimensions and measurement units. It may also contain stencils, background pages, and designs. It could also contain shapes or text.
-
A workspace is a collection of Visio windows and settings, such as the drawing window and zoom settings. It can include the Size & Position, Pan & Zoom, and Shape Data windows. Visio saves the workspace on your screen when you save the file.
The Drawing and Shapes Window
Whenever you create a new drawing or diagram, you'll see two windows open below the ribbon. These are the Shapes window (which appears on the left) and the Drawing window (which appears on the right). The Shapes window is where you will see your stencils.
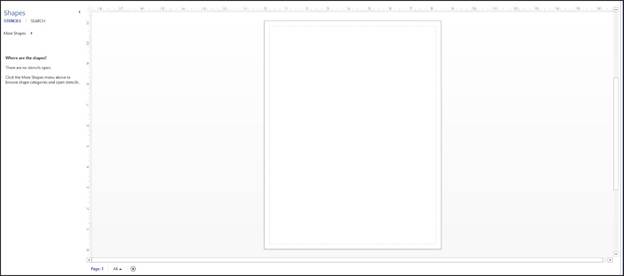
The Drawing window is where your drawing will appear. There are rules at the top and left of the window that show inches, millimeters, or a unit that you specify.
You'll find page controls on the lower left hand side of the Drawing window, as pictured below.

-
In the snapshot above, you can see Page-1. This is your page tab. If you have more than one page, the tabs will display the name of each page. The active page will be in a different color. You can click a tab to go to that page. Right click on a page name to access page management options, including the Duplicate Page feature.
-
To the right of the page name, you'll see "All" with an upward arrow. This will display a list of all the pages. The active page is highlighted.
-
Click the plus sign with a circle around it to insert a new page.
Below both the Shapes and Drawing windows is the status bar.

Adding text to your drawings is really easy in Visio. Visio 2013 offers you all the formatting tools that you're already familiar with from other Office programs, plus it makes inserting text onto shapes or directly on to the page a snap.
In this article, we're going to cover how to:
-
Adding text to existing shapes
-
Creating text boxes
-
Positioning text on shapes
-
Adding ScreenTips or comments
Adding Text to Existing Shapes
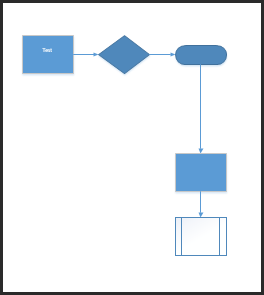
To learn to add text to an existing shape, we're going to use the flowchart.
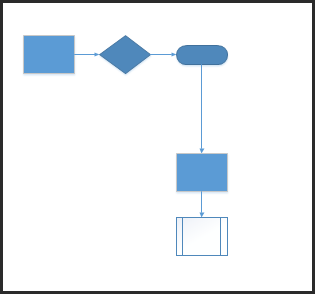
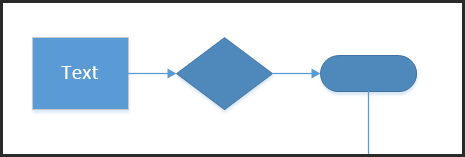
Click on a shape to select it, then type the word Text.
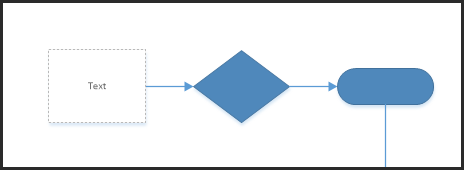
Click outside the shape to add the text to the shape.
. 
To edit the text in the shape, double click on the shape.

You can now go to the Home tab and format the text. We're going to change the text size so it's easier to read.
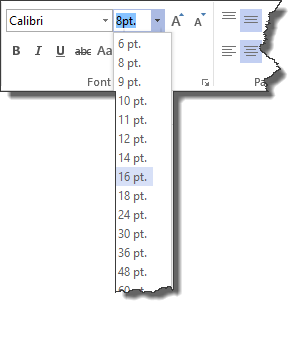
We have chosen 16 pt. font.
Creating Text Boxes
In addition to adding text to shapes, you can also add text to use as page titles and the like by creating text boxes.
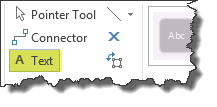
To create a text box, go to Home>Text, as pictured below.
Drag a text box onto your page, as we're doing below:
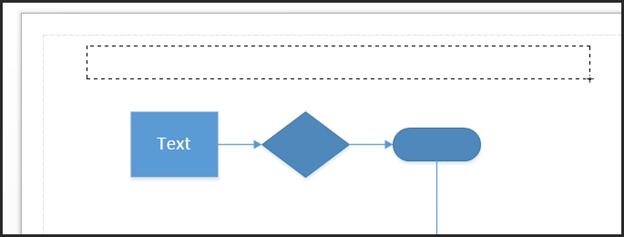
When you release the mouse, you'll see the text box on your page:
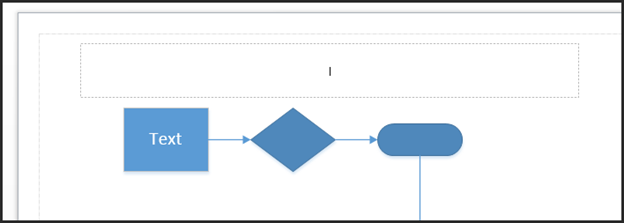
As you can see in the snapshot above, your cursor also appears.
Now you can simply type your text.

Now go to Home>Pointer Tool.
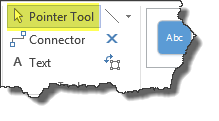
The text box will then be closed, but the text box is still selected.
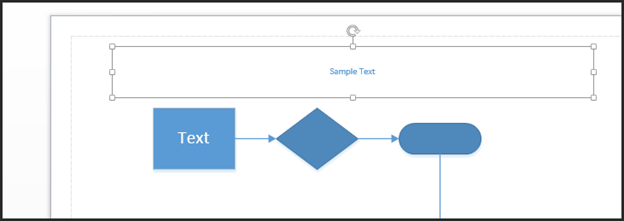
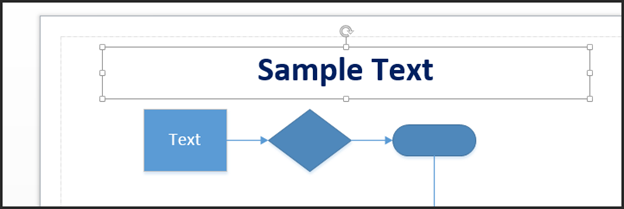
You can then resize the text box using the handles on the sides and corners. You can also rotate the text box using the circular arrow above it.
You can also use the tools in the Font and Paragraph groups under the Home tab to apply different fonts, colors, and styles. You can also create lists or align the text within the text box.
Positioning Text on Shapes
Adding text to a shape is easy, as you already know from thisarticle. However, the problem with adding text to a shape can come when you try to rotate the shape after the text is already on it.
Look at the shape with "Example" written on it:
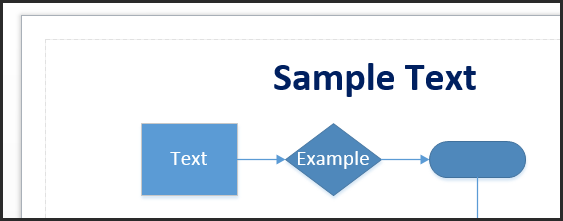
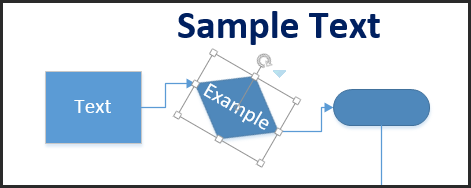
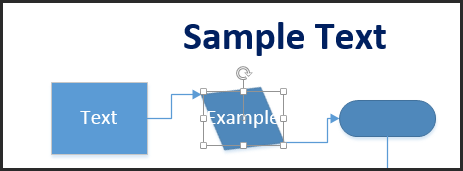
When we rotate the shape, the text is rotated with it, but we want the text to remain horizontal.
To fix this, you can use the Text Block tool under the Home tab, as pictured below.
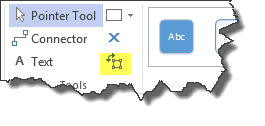
Let's click on the Text Block tool.
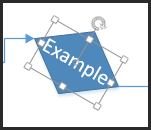
Using the circular arrow, you can now rotate the text.
Adding ScreenTips or Comments
Visio also gives you two methods to provide people who view your drawings with extra information. This information doesn't have to be visible at all times, meaning you don't have to put the information in text boxes are on shapes. Instead, you can add ScreenTips and comments.
If you add a comment to your drawing, there will be an indicator in the drawing to let the viewer know that the comment exists. The comment will include the name of the person who write the comment and the date the comment was made. In Visio 2013, a comment shape can contain multiple comments from different people.
Screen tips, on the other hand, are pop-up text that's only displayed when the mouse points to a shape. You won't know the screen tip is there unless you point at a shape that contains one.
Add a ScreenTip
Before we learn how to add a ScreenTip, let's also explore more templates stencils.
That said, click the File tab. In categories, choose Network, then open Basic Network Diagram.
Next, go to the Shapes window. Click Computers and Monitors.
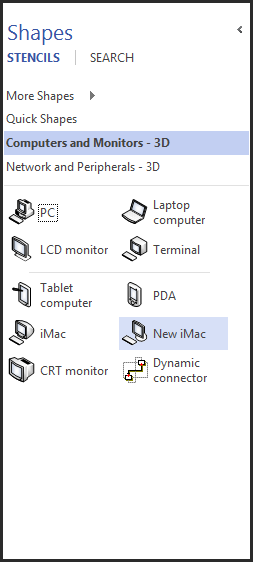
Drag the tablet computer shape onto the page.
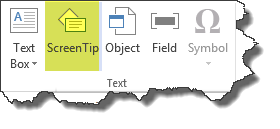
Go to the Insert tab. Click ScreenTip, as pictured below.
You will then see this dialogue box:
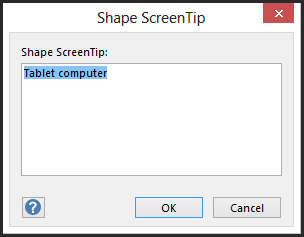
Type in text, then click OK.
When you mouse over the shape, the screen tip will appear.
Add a Comment
To add a comment, select the shape for which you want to add the comment. Then go to the Review tab and click New Comment, as shown below.
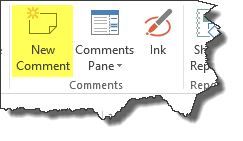
The dialogue box below will appear next to the shape.
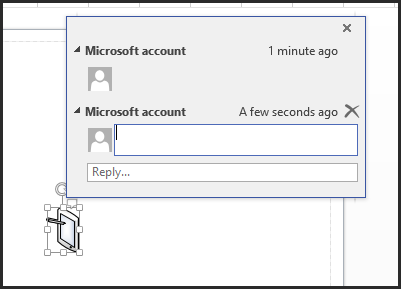
Type in your comment, then push Enter.
When you're finished, click the mouse outside of the dialogue box.
This icon (highlighted in yellow below) will appear near the shape to let you know a comment exists:


