When you apply a fill to an image, you apply a color, pattern, or gradient to part of or all of the image. Of course, you could do the same thing with a brush, but it is quicker and easier to use a fill on larger areas. In this article, we're going to learn how to do fillings as well as the different types of fills that you can apply to your images.
Paint Bucket Fill Tool
The Paint Bucket tool  is a fill tool that you can use to fill an area that has a similar color to the area that you click. You can use foreground color or a pattern when using the Paint Bucket tool.
To use the Paint Bucket tool, select the paint bucket in the tool area.
Next, select the options that you want in the options bar.

Pattern - set a pattern to use as the fill.
Mode - Select the mode you wish to use. Remember, the mode affects how the fill color blends with the base color.
Opacity - Determines the opacity of the fill that you apply.
Tolerance - Determines how similar in color the pixels that you fill must be.
Anti-alias - Smoothes the edges of the filled area.
Contiguous - Fills similar colored pixels that are next to each other.
All Layers - Fills all similar colored pixels in all visible layers.
Then click on the part of the image that you wish to fill. The paint bucket will automatically fill that area.
Let's use snapshots to show you, step by step, how to fill an area of an image.
Below is the image we're going to use.
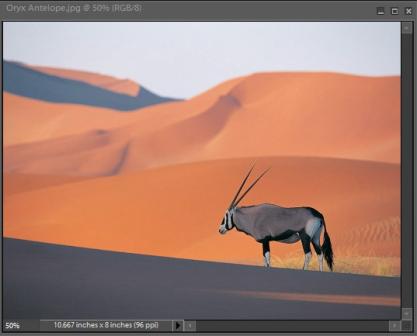
We're going to use a foreground color to apply as a fill.

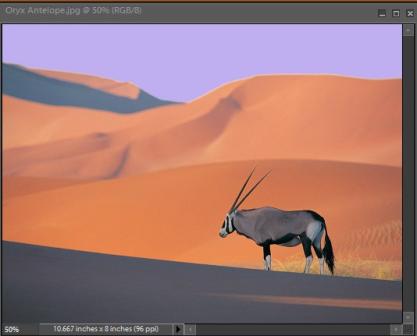
And we're going to apply the foreground color to the sky area of the above picture. Since
we've selected the Contiguous option, all similar colored pixels that are next to each other will be colored.
Here are the results:
The Gradient Tool
You can fill an area with a gradient color by either dragging within the image or using the Gradient tool.
The Gradient tool  is located next to the Paint Bucket in the toolbox.
A gradient is a mix of colors and, by using the Gradient tool, you can create your own mix of colors, then apply those mixes to your images.
Let's learn how.
Click on the Gradient tool, then set your options in the option box, as pictured below.

You can use the following types of gradients (in the order that they appear to the right of the Edit box above):
Linear Gradient has shades from the starting point to the ending point that are in a straight line.
Radial Gradient has shades from the starting point to the ending point in a circular pattern.
Angle Gradient has shades in a counterclockwise sweep around the starting point.
Reflected Gradient has shades that are reflected on each side of the starting point in a horizontal fashion.
Diamond Gradient has shades that go outward from the starting point in a diamond pattern.
Choose your gradient pattern from the options bar.
Now, let's a apply a gradient.
To apply the gradient, we're going to drag a line across the image area. This is our starting point and will affect the look of our gradient fill.
For example, a long line using a Diamond Gradient will create a bigger diamond shape.
Look at the snapshots below. The first was using a very short line. The second was a longer line.


Using the Gradient Editor
You can use the Gradient Editor to create your own gradients. Gradients contain two or more colors, or one or more colors that fade into transparency.
The Gradient Editor  is located on the Gradient tool option bar.
Click on it to open the Gradient Editor.
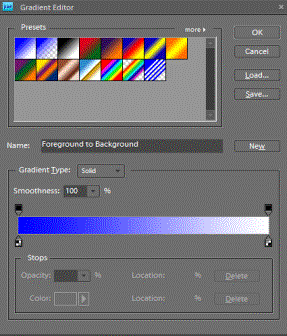
To create or define a gradient:
- Chose a gradient from the presets. This will define the new gradient that you're going to create.
- Select a color by either clicking the Color Stop
 or click the Color Swatch to show the Color Picker. Choose your color and click OK.
- Select Foreground from the pop-up menu to use the foreground color, or Background to use the current background color (as we have done).
- Adjust the color stop location of the color by dragging the Color Stop left or right.
- To add another color, click below the gradient bar to add another Color Stop.
- Set the opacity.
- To delete a Color Stop, click on the Color Stop, then click the Delete button.
- To save your new gradient in the presets, enter a name for the gradient in the Name box, then click New.
Patterns
You can paint patterns on images using the Pattern Stamp tool  in the toolbox (with the Clone Stamp tool) or by filling a selection with a pattern from the Pattern library.
The Pattern Stamp tool uses a pattern from your current image, another image, or from a present pattern. You choose which pattern to use.
To use the Pattern Stamp tool, start by clicking on the tool.
Naturally, next we're going to select our options from the options bar above the toolbox.

First, choose a pattern from the pattern box  .
.
Set your other options as desired, then click and drag within the image to create your pattern.
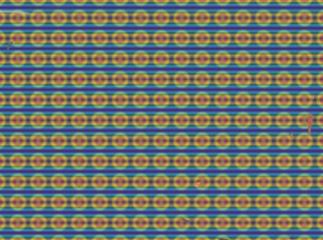
Below is an image with an applied pattern.
To create your own pattern:
- Select a rectangular area of an image that you want to use as a pattern.
- Set the Feather to 0.
- Deselect everything to create a pattern from a whole image.
- Go to Edit>Define Pattern
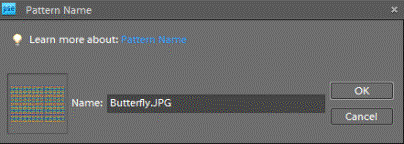
- Enter a name for your new pattern in the box.
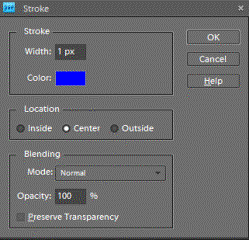
Strokes
Strokes can be used to trace a colored outline around a selection.
To add strokes:
Select the area in the image.
Go to Edit>Stroke (Outline) Selection
In the dialogue box, set your options, then click OK to add the outline.
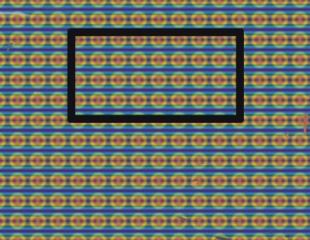
Below is an example of strokes. We selected the area with the Rectangular Marquee tool.
Layers
If you've never worked with any type of a photo editing program before or have very little experience, the subject of layers may just make you cringe. At first glance, to most people, layers seem like something that only experienced graphic artists and editors use. But you need to know right now that it's not.
Using layers is actually quite simple. More than that, it's even fun. Think of layers as sheets of glass. You can paint on all these sheets of glass, then stack them on top of each other to create one image. And, since it's glass, you can see through from the top layer to the bottom.
When working with layers, you can stack images that you've created or photos. You can set the transparency and size of one photo when you stack it on another to create customized images. None of it is hard to do. In this article, we'll cover what you need to know about layers to do all of this and more.
The Layer Palette
The first thing you need when working with layers is the Layer Palette. Go to Windows>Layers. However, the Layers Palette shows by default on the right hand side of your screen.
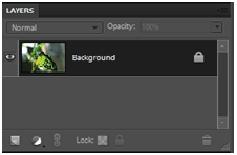
As you can see, the Layer Palette automatically shows the image we have in our workspace as a thumbnail. This is the background layer. You can create up to 8000 layers in an image. Let's learn about creating layers. As we learn about those, we'll also learn how to utilize the options in the Layer Palette.
Creating Layers
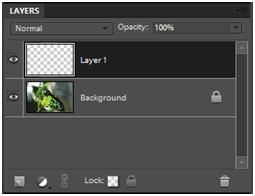
When you create a new layer, you will essentially be creating another image that goes over the existing one.
To create a layer, click on the New Layer button  in the lower left hand corner of the Layer Palette.
To name this new layer, double click it and type in the name.
NOTE: New layers always appear above existing layers.
Creating a Fill Layer
The layer we created above was just a transparent layer. However, there are different types of layers that we can create using Layer on the menu bar.
Let's create a layer from a pattern. To do that, go to Layer>New Fill Layer>Pattern.
This dialogue box will appear:
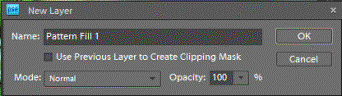
Type in the name of the pattern that you want to use. Click OK.
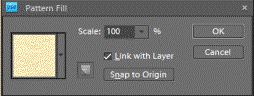
When we click OK again, the new layer completely covers our other two layers.
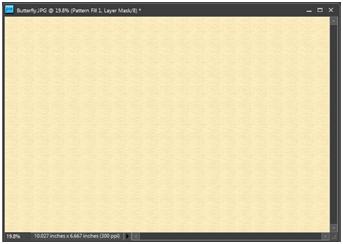
To make it so that we can see our other layers, we can adjust the Opacity in the Layers Palette.
Make sure the layer that you want to adjust is selected, then reduce the Opacity.
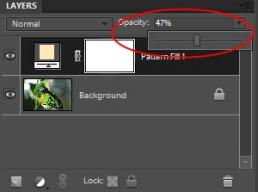
We reduced it to 47%. Now you can see all layers:
Adjustment Layers
You can also create layers to adjust the image. These are called Adjustment Layers and can be found in the Layers menu in the menu bar. With Adjustment Layers, you can edit the brightness, levels, hue, and saturation. You can also posterize, set a threshold, and make several other adjustments to the image using a layer.
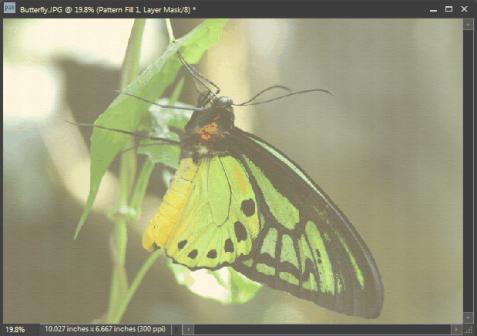
Let's add an Adjustment Layer to the photo above to decrease the brightness.
We'll go to Layer>New Adjustment Layer>Brightness/Contrast.
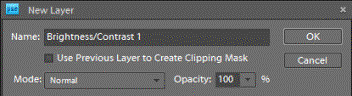
Unless you want to change the mode or reduce the opacity of the Adjustment Layer, click OK.
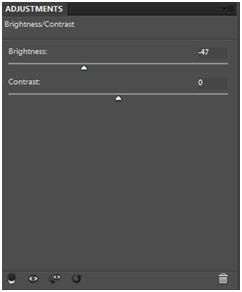
Adjust the brightness and contrast levels, then click OK.
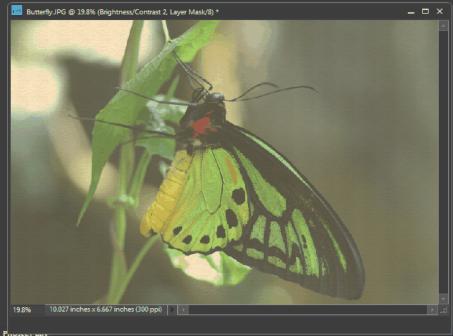
We decreased the brightness in the image above. As you can see, the new layer was added and the brightness was decreased.
Add an Image Layer
As we said at the beginning of this article, you can also combine two images using layers.
To do this, open the two images that you want to combine.
Using the Rectangular Marquee tool, select one of the images, then go to Edit>Copy.
Click on the other image. This image will be your background layer.
Go to Edit>Paste.
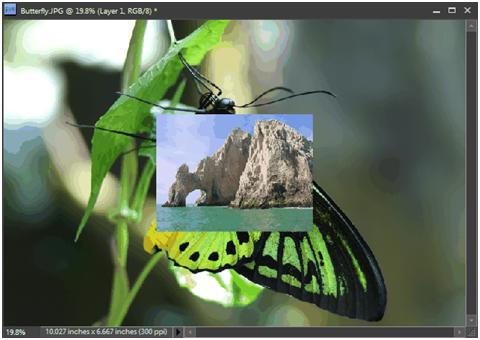
Using the Layer Palette, adjust the Opacity.
Moving Layers
If you look at the snapshot above, the two layers don't look right merged together. Maybe the top picture is where we found the butterfly -- and we want to show that -- but it doesn't look right sitting where it's at.
We can fix this by moving the top layer.
Go to the Move tool  in the toolbox.
Click on it. You can then move the top layer.
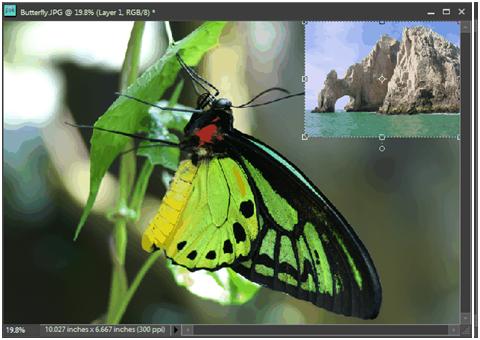
To commit to the move, click on the background layer in the Layers in the Palette Bin.
Create a Layer from a Selection
You can also create a new layer from a selection in an existing layer.
To do this, you'll use the selection tools in the toolbox.
Choose which selection tool you want to use, then select the part of the image that you want to use as a layer.
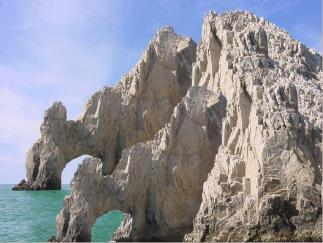
For this example, we're going to use the rock in the image below.
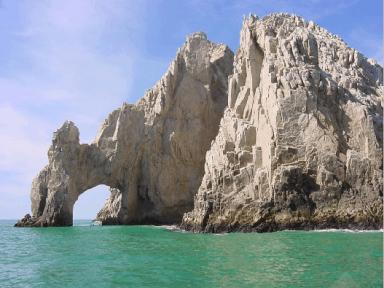
Using the Magnetic Lasso tool, we're going to select the rock.
Go to Edit>Copy.
Then go to Layer>New>Layer Via Copy.
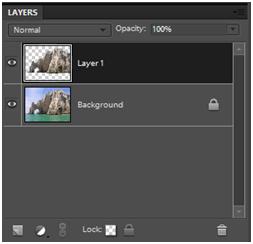
We can now move the new layer and adjust the opacity.
Merge Layers
When you have an image with several layers, it increases the file size. In fact, it can make an image file quite large if you have several layers. For this reason, it's always best to merge the layers once you're finished editing and combining the layers.
To merge the layers:
- Go to the Layer Palette.
- You can merge just some or all of the layers.
- To merge just two layers, go to Layer>Merge Down.
- To merge all layers, go to Layer>Merge Visible.
All your layers make up one image now and will have a smaller file size.
If there's a layer that you don't want to merge, click the eye icon next to that layer.
Flatten Layers and Images
When you flatten an image, Elements merges all visible layers into the background. This reduces file size. Hidden or invisible layers cannot be flattened.