Perhaps you keep a list of things to do either at home or in the office. Outlook 2010 gives you a to-do list, except they call them tasks. In this article, we're going to learn everything about entering tasks and to-do items in Outlook. Just remember, tasks are not appointments, meetings, or events. They are simply things you have to do, such as organize a birthday party for a co-worker.
Create a Task
To create a task, start by going to the Tasks module by clicking on it in the Navigation Pane. Then click on the Home tab and look at the New group in the ribbon.
Click on New Task.
Enter a name for the task in the subject line. Enter a start date and a due date for this task if you need to. Select if you want Outlook to remind you to do this task. If you want to add more detail about this task, enter it in the body (or the white space) of this window.
Click on the Task tab. In the Actions group, click Save & Close to save this task.
The task now appears in your Task list.
When a task is complete, you can right click on it and check Mark Complete from the menu.
Create a Task from an Outlook Item
You can create a task from an email message, contact, calendar item, or a note.
To do this, you can do one of several things.
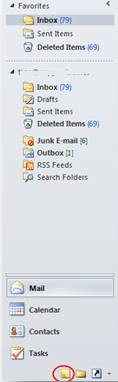
1. You can drag an email message to the To-Do Bar. However, the To-Do Bar must be arranged by Start Date or Due Date to do this. In the snapshot below, we are dragging an email to the To-Do Bar. The To-Do Bar is circled in red.
This is how you do it: Click on the email (we drew a square around ours). Hold the left mouse button down and drag it to the To-Do Bar.
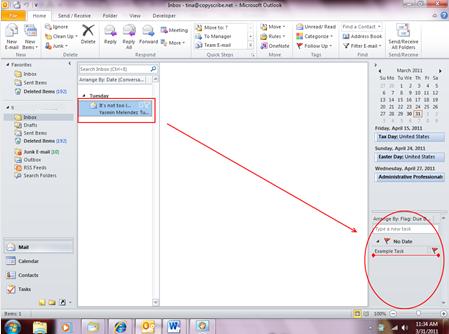
There is now a red line in the To-Do Bar. You can move this red line to put the task where you want it. When you get it there, let go of the mouse button and the red line will disappear. Your task will then be where you put it.

When you drag an item to Tasks (that's not an email), simply drag and drop the item to the Task bar.
Create a Task from the To-Do Bar
The To-Do Bar appears in all views by default. To create a task from the To-Do Bar, click your mouse in the To-Do Bar, then right click. You'll see the following menu:
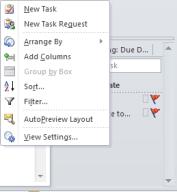
Select New Task.
Enter the new task as we learned to do in the beginning of this article.
Create a Task in Calendar View
If you use the day or week view of your calendar, you'll see a Daily Task List at the bottom of the window. The Week view is shown below.

To add a task, click in the box that is below the day for which you want to assign a task. Let's say it's Monday.

As shown above, a box will appear with the cursor in it. Type a name for this task. Hit enter.

Now, double click on the task you just added to complete the details about the task. The Task window will appear:
To delete a task, right click on the task (in any view) and select Delete from the menu.
Set Recurring Tasks
To set recurring tasks, create a new task as we've learned to do at the beginning of this article.
Click on the Task tab in the ribbon, then click Recurrence.
Set your recurrence pattern and the amount of time for the recurrence, then click OK.
Assign Tasks to Others
Assigning tasks to others is easy. In your new task window, click the Home tab, then Assign Task in the Manage Tasks group.
You'll then see this window:
Select who you want to send the task to and fill out all other information as you did with the new task window. You can also put a checkmark in the boxes to get an updated copy of the task on your task list, and you can also request that a status report is sent to you when the task is complete.
Status Reports
Status reports let you know when tasks have been completed when someone sends them to you. But you can also keep other people in the loop and let them know what you've accomplished by sending status reports to them.
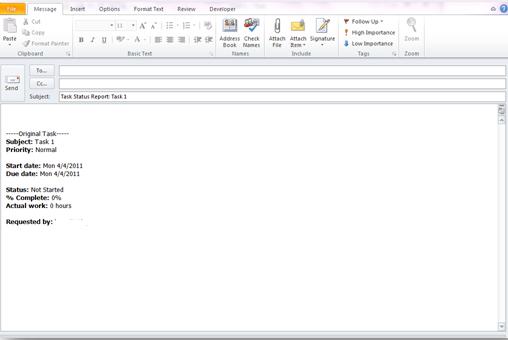
In the task window for which you want to send a status report, click on Send Status Report in the Manage Tasks group under the Task tab.
You'll then see this window:
Notes
In Outlook 2010, notes are just like Post-It notes. You can jot down things that you need to remember to refer to later. You can use notes instead of using scratch paper at your desk and save time and a tree.
Creating and Editing Notes
You can create a note from any Outlook folder that you want. To create one, go to the Navigation Pane, and click on the Note icon, as circled in the snapshot below.
You'll then see this screen:
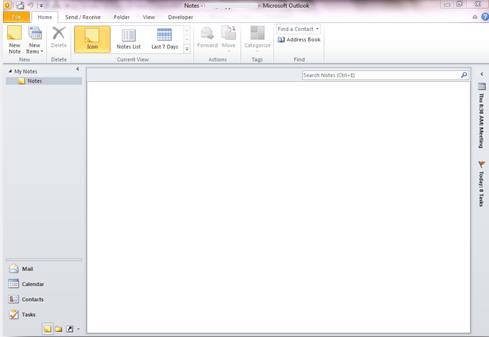
Click the Home tab, then in the New group, click New Note.
A window that looks a lot like a yellow sticky note will appear:
If you see a cursor, you can start typing your note. If you can't see the cursor, click in the yellow box.
Type your text. To save and close the note, click the note icon at the top left of the screen ( ). Choose Save As to name your note or Save and Close.
You can also leave the note open while you're working and drag and drop it anywhere on your screen.
To edit a note, go to the Notes folder, then double click on the note.
NOTE: Remember, to see all your folders, click the folder  at the bottom of the Navigation Pane. This shows you all folders in Outlook 2010.
Changing the Color, Size, and Font of Notes
The default color of the notes feature is yellow. If you want to change that color, click on the File tab, then go to Options on the left and click it.
Click Notes and Journal on the left hand side of the screen.
In the Notes Option section, change the default color for the notes. You can also change the default size and font if you want.
Forwarding Notes to Others
To forward a note to someone else, open the note, then click the Note icon at the top left.

Select Forward from the dropdown list.
A new email message will open up with the note as an attachment.
Save a Note to Your Desktop
Open the note, then click the Note icon.
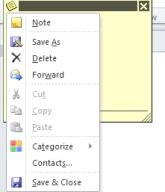
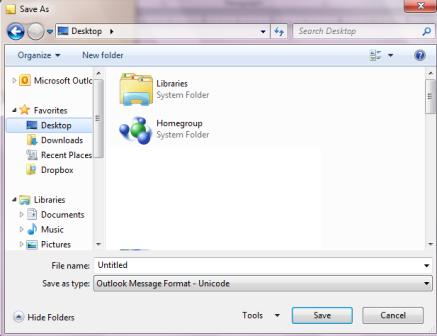
Choose Save As. A window will open that will allow you to save where you want to save the note, as well as what you want to name it. You can then choose to save it to Desktop, as shown below.
Understanding PST Files
PST files are simply data files in Outlook 2010. Whenever you create a file in Outlook to archive items, this is a PST file. It stands for Personal Storage Table.
Here's an example. Let's say you get a lot of emails from Joe Smith, and you want to save them to your Outlook instead of keeping them on the server. You create a data file called Joe Smith to keep those emails in. The folder is a PST file. It is a data file. That said, the best way to show you what a PST is so that you understand it is to create one.
To create a PST file:
Click on the Home Tab and select New Items from the ribbon.

Select More Items from the dropdown menu, then Outlook Date File (as shown below).
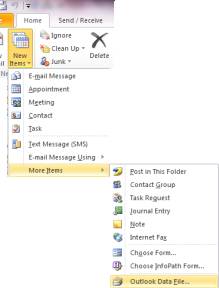
Enter a name for your PST and click OK.
The PST is now created and appears in the Navigation Pane. It looks just like one of your email accounts.
Now, to create storage folders, right click on Sample PST (or your PST name) and select New Folder.
Finding Archived PST Items
Now let's say you want to find an item that you've stored in a PST. To do this, click on the File tab, then click Open on the left.
Select Open Outlook Date File.
Select the name of the PST file, then use the search box to find what you're looking for.
Color Categories
By adding color to your Outlook items (email, etc.), you add visibility and also can group related items together to be able to find what you're looking for easier. For example, you can assign a color category to all messages related to a product you're working on. You can also assign more than one color category to a message.
To assign a color category to a message, simply right click on the message in your inbox and select Categorize from the dropdown menu.
Choose the color you want to assign to it.
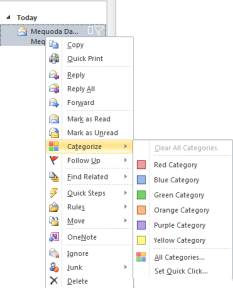
Let's say we choose Red Category.
A red box will now appear to the right of our message.

If you have an open email message, click on the Message tab, then click Categorize.
Previewing Attachments
Outlook 2010 makes it possible for you to preview attachments without actually opening the attachment. You can preview them in the reading pane, right where the body of your email appears.
To preview an attachment in an open email, click the attachment in the open message. The preview will appear in the body of the message. To return to the email message, click the Message below the Subject line.
To preview an attachment in the Reading Pane, select the message in your inbox that has the attachment. Click the attachment in the Reading Pane. To return to the message, click Message.
That said, because of viruses that come embedded in attachments, you may not want to preview attachments at all. Outlook 2010 lets you preview attachments by default, so if you don't want to preview attachments, you must turn it off manually.
To do this, click the File tab, then click Options on the left.
Click Trust Center.
Now click the Trust Center Settings button on the far right, then click Attachment Handling.
Put a check in the box beside Turn Off Attachment Preview.
If you want to turn off a specific previewer, click Attachment and Document Previewers.
Clear the check boxes for the previewers that you want to turn off, then click OK.
Flagging Mail
Flags are a very important feature of Outlook. You can flag important messages to remind yourself to go back to it later. You can also put a flag in an email that you send if you and the other person are both using Microsoft Exchange.
Whenever you look at the messages in your inbox, you can see the outline of the flag that we're talking about. It's in grey until you check it, but you can look at the snapshot below to see that it's there - and where it's located. You can see it to the right of the rectangle (for color categories).
If you want to flag an email, you simply click on the flag. It will then turn to red.
This makes it easy to scroll through your inbox and see which messages need your attention. Also, once you've flagged a message, it appears in the To-Do Bar.
Once you're finished with the flagged message, just click on the flag again to turn it off. It will now be replaced with a check mark .
Set Flags for Different Days
You can also set a due date for the flag. This means if you don't want to take care of a flag today, but you want to take care of it on Tuesday, for example, you can set Outlook to do this.
Right click on the grey flag. You'll then see this dropdown menu:
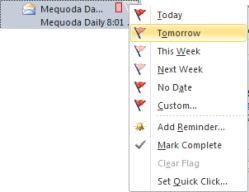
Pick a date for the flag or click Custom to add a custom date. It also shows you what flag colors correspond to what dates.
Electronic Business Cards
You can also create and use electronic business cards in Outlook 2010. You can add this business card to your emails. Twenty years ago, you might have stuck a business card in an envelope with a letter you were sending to someone. Now you can do the same thing with email.
To get started doing this, click Contacts at the bottom of the Navigation Pane.
You'll now see your contacts on the screen. You can create a business card for any of your contacts by clicking on the contact to open it, then clicking the Contact tab, then Business Card.
However, for this section, let's create a business card for a new contact. This may be you.
Click New Contact under the Home tab of your main contacts window.
Enter all the information you want to appear on the business card. As you type it in, it will appear at the top right as it will look on your card.
If you want to change the background or further customize it, click Business Card in the ribbon.
Click Save & Close when you're finished.
Now, to attach a business card to a message, go to the Insert tab in the email window. Select Business Card.

Select the business card you want and click OK. The card will now appear in the email.