
Making Use of Templates to Create Presentations
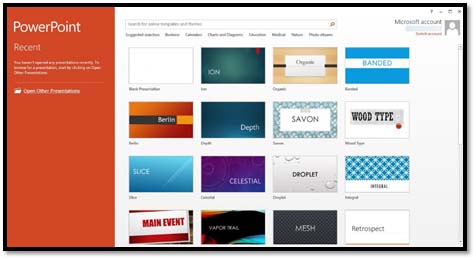
PowerPoint 2013 offers thousands of predesigned presentations that you can use. These are called templates. To access the templates, go to the Backstage View and click Open on the left.
Now, enter in the type of template you want in the search box. As you can see below, we entered "photo album."
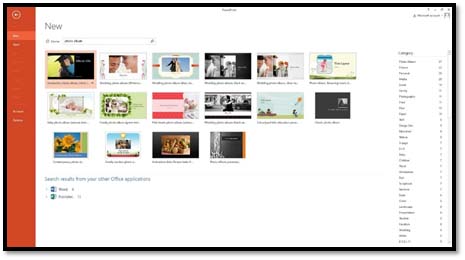
You'll see the photo album templates displayed below the search box. To the right, you'll see different categories to help refine your search.
Click on a template you want to use.
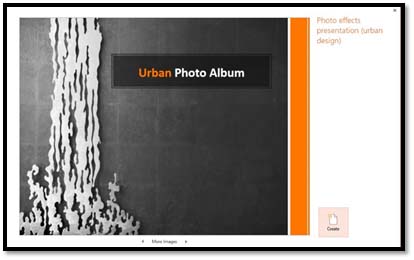
You'll see a window like the one above. Click the Create button.
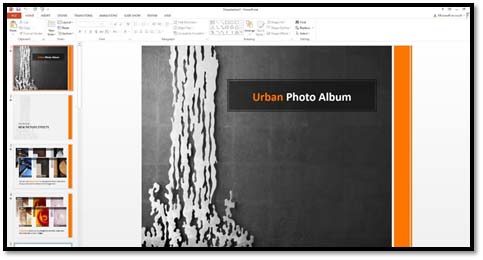
As you can see above, the template presentation is then created for you. You can see all the slides in the Slides Pane. Each slide has a number that corresponds to its place in the slide show. Slide #1 is the first slide you see, and so on.
Now all you have to do is customize the presentation by adding objects and text. We'll learn more about doing this in just a few minutes.
Moving From Slide to Slide
To move from slide to slide, go to the Slides Pane on the left. Select the slide you want to go to by clicking on it. The slide will then open as the current slide in the workspace area.
Below, we've selected slide #6. You can see that it's displayed as the current slide.
NOTE: The current slide will always have a border around it in the Slides Pane so you know which one is active.
Create a New Blank Presentation
The easiest way to create a new presentation is to create it when you first open PowerPoint. You can either open a blank presentation, or use a template. You can even use the search box to search for a template to use.
If you want to create a new, blank presentation, double click on Blank Presentation. You can also double-click on any template you want to use.
However, if you already have PowerPoint open and want to create a new presentation, click the File tab to go to Backstage View.
Click New in the left column.
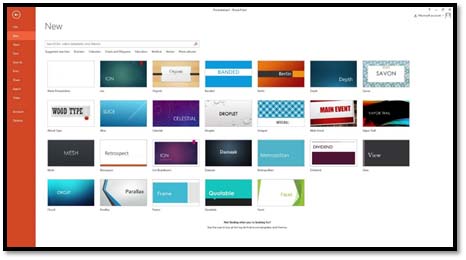
Now you can double-click on Blank Presentation, or choose a template.
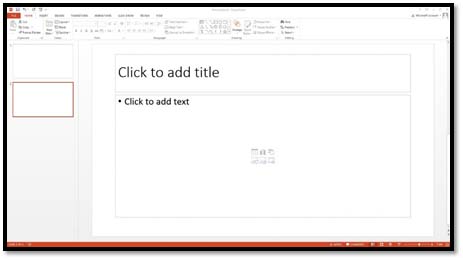
As you can see, when we create a blank presentation, only one slide is created for us. It's also just a plain slide without design, layout, or color added to it.
Creating a New Blank Slide
In our blank presentation that we created above, we only have one slide.
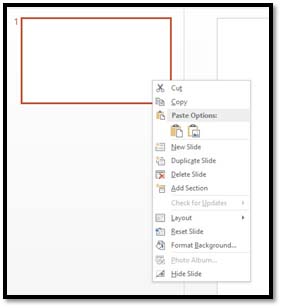
To add a new slide, click on the slide in the slide pane to select it, then right-click. Choose New Slide from the drop-down menu, as shown below.
A new slide is added. That slide becomes the active, current slide.
Inserting a Duplicate Slide
Applying Themes and Layouts to Slides
In most cases, you'll want to create the design and theme for your slides before adding objects or content, such as pictures or text, to them. Most people like to get the "look and feel" established first, because it makes it easier to create the presentation you want.
With your blank presentation open, click on the Design tab. The Design tab is pictured below.

You'll use the Design tab to select a theme, change the color scheme, change the slide size, and format the background of your slides.
Themes
Themes are basically predesigned slides minus text, images, or content that you can apply to your presentations. Themes contain a color scheme, fonts, effects, and backgrounds. Using a theme can make creating a presentation easier, because you can just choose the layout and add content � without having to mess with the pesky design aspects of creating slides.
You will find the PowerPoint 2013 themes in the Theme gallery under the Design tab.
Choose a theme from the Theme gallery by clicking on it.
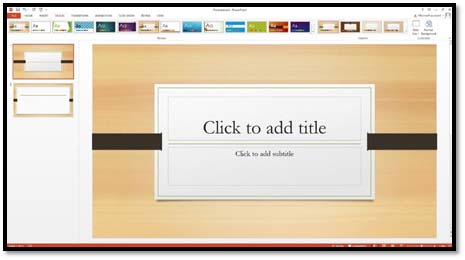
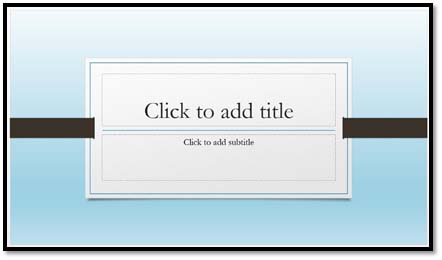
As you can see, that theme is now applied to our blank presentation.
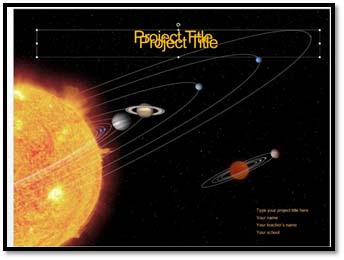
NOTE: The first slide is the Title Slide, as you can see above. It's where you'll add the title of your presentation. We'll learn how to add text later in the course.
Editing a Theme
Now that you have your theme, you can modify the theme by applying variants. In other words, each theme comes with a color scheme, fonts, effects, and background. You can change any one � or all � of these variants. In doing so, you edit the theme.
To edit a theme, go to the Variants group under the Design tab.
Click the downward arrow as we've done below.
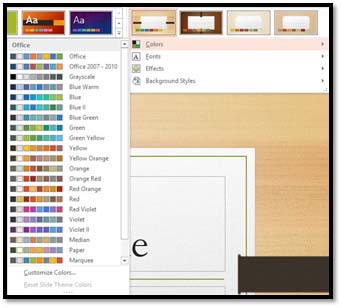
You can now change the color scheme, fonts, effects, or background styles used in the theme.
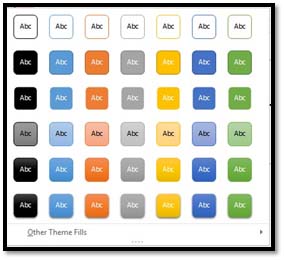
To help you understand how it works, let's choose the Blue Green color scheme.
The border around the slides was green. Now that we changed the color scheme, we can see it is blue:

Next, let's change the font.
Go to the Variants group again and choose Fonts from the drop-down menu.
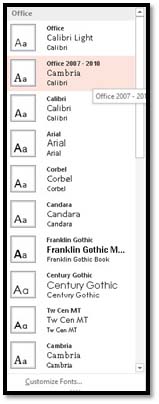
You can mouse-over any of the fonts to see how it will look in your presentation. Click on a font to apply it.
Next, let's choose Effects from the Variants drop-down menu.
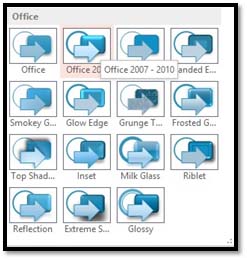
This allows you to add special effects (such as drop shadow) to the theme. Mouse-over the different effects to see how they will affect your slide. Click on an effect to select it and apply it to your slides.
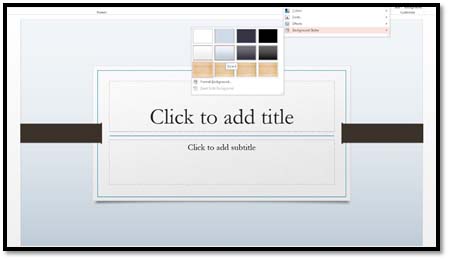
Now let's select Background Styles from the Variants drop-down menu.
Here you can change the slide background. Below we've moused over a background to see how it will look on our slides. Each theme offers 12 background styles.
Changing the Slide Size
Go to the Customize group under the Design tab to change the size of your slides.
Click the downward arrow on the Slide Size button:  .
.
Choose a slide size. You can either choose the standard slide size, or the new wide screen slide size.
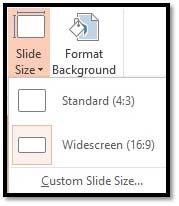
You can also choose Custom Slide Size.
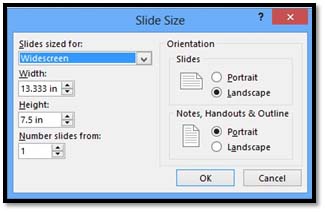
Set your options, then click OK.
Format Background
The Format Background button is located to the right of the Slide Size button. It looks like this:

When you click the Format Background button, a pane will open on the right side of your screen:
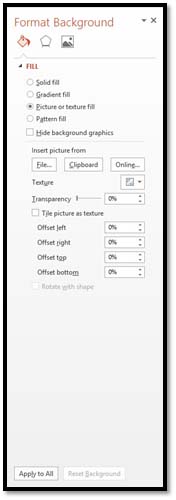
These are the tools you'll need to format the background of your slides.
Let's cover what each of these do.
About Fills
Fills are colors, patterns, and images you add to the background. You can use a solid color fill, such as purple, blue, green, etc. You can also use a gradient fill, pattern fill, or a picture.
Gradient Fills
In a gradient fill, the color is gradually shaded, usually from top to bottom.
A gradient fill is shown below:
As you can see, the top of the slide is lighter than the bottom. This is a gradient.
In the Fill section of the Format Background pane, you can select your fill.
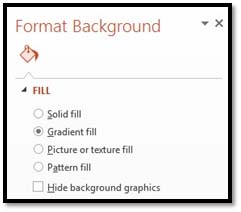
You can select:
-
Solid Fill
-
Gradient Fill
-
Picture or texture fill
-
Pattern fill
-
Or you can hide background graphics.
When you select a type of fill, you'll see the options for that fill. Below are the options for a gradient fill:
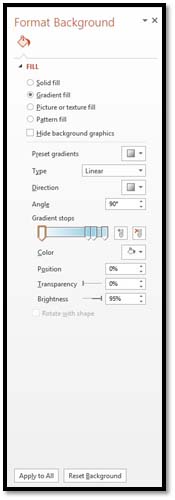
Play with the options for a gradient fill to get the look you want.
Pattern Fill
You also can assign a pattern as a fill.
To assign a pattern, select Pattern Fill from the Format Background pane.
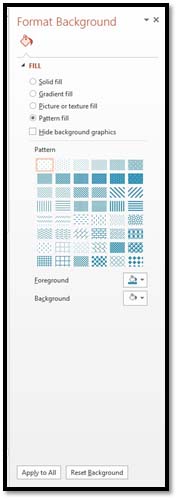
Choose the pattern you want to use, then the foreground and background colors. You can play with this just as you did with gradients.
Picture and Texture Fills
If you want to apply a picture or texture to the background, click Picture or Texture Fill.

If you want to insert a picture, choose if you want to insert it from:
-
A file on your computer
-
The Clipboard
-
From an image online.
We'll talk more about inserting images later in this course.
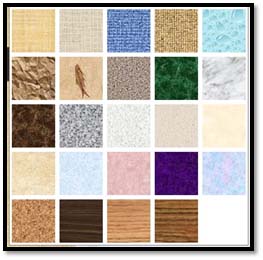
If you want to insert a texture, click the Texture drop-down box:
You'll then see different textures you can apply:
When you're finished adding your fill, click the Apply to All button at the bottom of the pane.
Slide Layout
In addition to the look and feel of a slide, the layout of your slides will also be very important to you. To learn about slide layout, let's go back to the Slides pane.
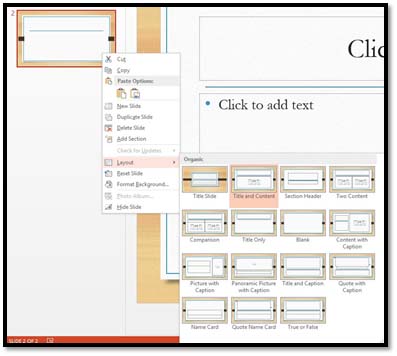
Click on a slide in the Slides pane to select it, then right click on the slide.
Choose Layout from the drop-down menu.
Working with Objects
Objects are what you will use to insert content in PowerPoint. Content might be text, but it also might be pictures, graphics, videos, etc.
The Types of Objects
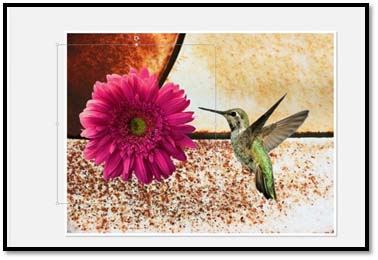
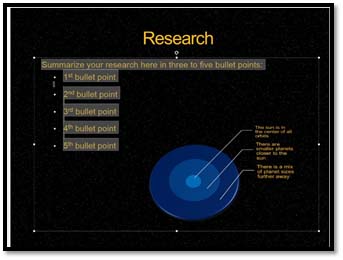
If you'll look at the layout on the slide featured below, you'll see that it will contain two types of objects: text and non-text.
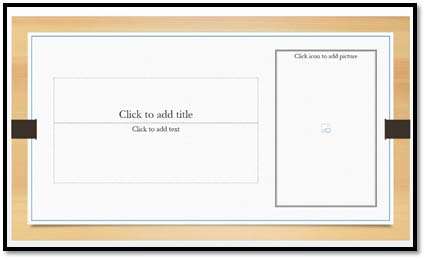
A text object in PowerPoint is any object that contains text. A non-text object may contain a picture (as above), video, graphic, etc.
Everything you add to your PowerPoint slides will be added as an object. You will then add content to the object.
Right now, the slide above doesn't contain any objects, because we haven't added any. It only contains placeholders.
Placeholders are simply areas on a slide that are reserved for text, images, video, graphs, or any other type of object.
As you can also see, each object on the slide occupies a rectangular-shaped region. The content you add to the object may not totally fill the region; however, you can adjust the area or region of the object if you want. You can also overlap objects.
Selecting an Object
In order to work with an object, whether it's to add content, move, or resize it, you must first select it.
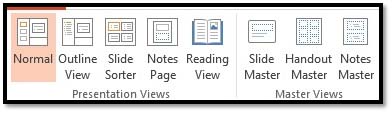
To select an object, first make sure you are in Normal view. To make sure you are in Normal view, click on the View tab on the Ribbon, then select Normal.
Once you're in Normal view, you can select objects.
To select a text object, move the mouse pointer over the place in the text that you want to edit, then click. You'll see a rectangular box appear around the object. This is the outline of your object. You'll also see the cursor, so you can begin to type.
To select non-text objects, click on the object and it's selected. You'll see the rectangular box around the object, so you know that you've selected it. After you've selected it, you can drag it around or resize it, but you can't edit the contents.
You can also select objects by doing these things:
-
Use the CTRL key to select more than one object. To do this, select the first object, then click on other objects while holding down the CTRL key.
-
Click and drag. Click on your mouse on the slide, then draw a rectangle around the objects you want to select.
-
Press the Tab key once to select the first object on a slide, then press it again to select the next object. Keeping pressing Tab until the object you want is selected. Tab only selects one object at a time.
Resizing and Moving Objects
Whenever you select an object, you'll see an outline appear around it, as shown below.
The box has handles around it. One on each corner and one in the middle of each side. You can use the handles to resize the object. You can also click on a side (between handles) to drag and drop the object elsewhere on the slide.
Here's some things to remember when resizing an object using the handles:
-
The corner handles allow you to change height and width at the same time.
-
The top and bottom handles allow you to change height.
-
The side handles allow you to change width.
If you change a text object's size, it doesn't change the size of the text.
Adding Special Effects to an Object
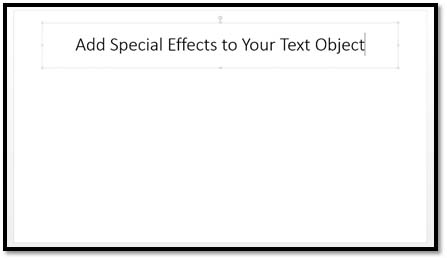
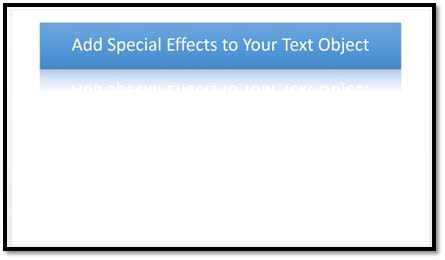
Let's say you've created a text object, as pictured below.
You can add special effects to the object to make it more attractive, or to stand out more on the slide.
To do this, select your object by clicking on it.
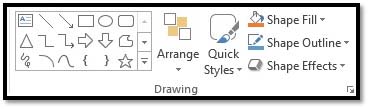
Next, go to the Drawing group under the Home tab.
Let's look at the different things you can do.
You can apply a Shape Fill. A Shape Fill is the color that will be the background inside the object.
You can apply a Shape Outline. This is the color of the border around the object. You can choose "no outline," or select a color.
You can also apply Shape Effects, as shown below.

You can also choose to apply a Quick Style. A style is a combination of different formatting. The Quick Styles you can apply are pictured below:
As you can see, some have gradient fills, some have shadows, etc. This is a quick way to apply an effect to an object.
In the snapshot below, we chose a Quick Style, then added a reflection by using the Shape Effects drop-down menu.
Editing a Text Object
Whenever you select a text object in order to edit it, PowerPoint turns into a little word processor to make editing the text easy. Please note that PowerPoint wraps text for you inside the text object. You don't have to press Enter at the end of a line unless you want to create a line break to start a new paragraph.
To edit text, first select the text object that contains the text. Next, move the mouse to the beginning of the text that you want to edit, then click and drag over the text. Release the mouse button when you have the text selected.
The text in the slide below is selected. You can tell it's selected because it is highlighted.
If we wanted to remove all the selected text, we could either push Delete on the keyboard, or simply start typing. However, you can also select text to cut or copy.
When selecting text, you can select a single word, an entire paragraph, or multiple paragraphs -- as long as they're in the same text box. Here are a few shortcuts.
To select a single word, put an insertion point (click your mouse to place the cursor) in the middle of the word and double-click the mouse.
To select an entire paragraph, click to put your mouse cursor anywhere in the paragraph, then triple-click.
Cut, Copy, and Paste
If you've used any other Office programs before, then there's no doubt you're familiar with cut, copy, and paste. Cut allows you to cut (remove) an object or text from a presentation. Copy allows you to make a copy of it, then put it in some other location. Paste allows you to paste (or place) whatever you've cut or copied from your presentation somewhere else in the presentation � or in a different one altogether. Cut, copy, and paste work with the Clipboard, which we'll discuss in just a minute.
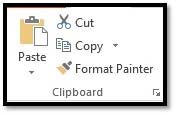
In PowerPoint, you'll find the Cut, Copy, and Paste tools in the Clipboard group under the Home tab.
Cut an Object
To cut an object from a presentation, select the object, then click Cut on the Ribbon. The object is removed. You can paste it elsewhere or just leave it on the Clipboard.
Copy and Object
If you click Copy on the Ribbon, you'll see a drop-down menu with two choices.

The first choice, Copy, lets you copy the item to the Clipboard. The second creates a duplicate.
Paste an Object
When you go to paste an object that you've cut or copied, PowerPoint allows you to preview how the object will appear once you paste it.
To see what we mean, click the drop-down arrow beside Paste on the Ribbon.
In the example below, we've copied text to the Clipboard. Here are our Paste options:
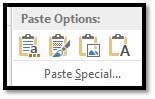
From left to right, we can:
-
Use Destination Theme. (This means the theme and formatting that's used in the area where we're pasting will be applied. If there's a different font used where we're pasting that's different from the font where we cut/copied, the font used where we're pasting will be applied to the text that we paste.)
-
Keep Source Formatting. (This means the theme and formatting used in the text that we copied or cut will be used when we paste.)
- Picture
- Text Only
You can hover your mouse over any of the paste options to preview how it will look in your presentation, then choose the one that works for you.
Duplicate an Object
In the last section, we mentioned the two options you had for Copy in PowerPoint 2013. Let's talk about the Duplicate option.
Duplicate lets you create quick copies of objects. The duplicate appears on your slide (instead of being moved to the Clipboard.) You'll then have to move it to the proper location.
In the example below, we duplicated the text object.
As you can see, the text object was duplicated. The duplicated text object overlaps the original. We would have to move it to the proper location.
The Clipboard
Whenever you cut or copy anything in PowerPoint, it is automatically sent to the Clipboard (unless you use Duplicate). The Clipboard does just as its name implies. It holds the objects you copy and paste for you to use. The Clipboard and its associated tools can be found on the Home tab at the far left end of the ribbon.The Clipboard group looks like this:
Click the arrow at the bottom left of the Clipboard group to see its contents.
The clipboard will open as a pane on the left side of your presentation. It can only hold 24 objects. When a 25th object is added, the first copied item is removed. To empty the Clipboard, click the Clear All button at the top of the Clipboard menu.
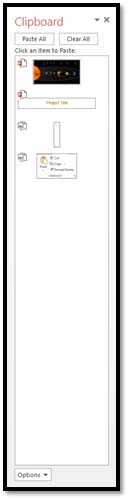
You can remove individual items from the clipboard by moving the mouse pointer over the item and clicking the arrow button that appears to the right of the object. In the drop-down menu, select Delete
Undo and Redo
Let's say you accidentally delete something or deleted it and then decided you want it back. You grit your teeth and start to grumble. It's a lost cause, right? Wrong. The makers of PowerPoint anticipated this problem and supplied an easy solution. The Undo button!
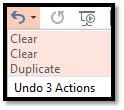
The Undo button is on the Quick Access Toolbar. It looks like this:  . You can click the downward arrow beside the Undo button to determine how many steps backward you want to take with your undo.
.
The Redo button is to the right of the Undo button. It looks like the recycle symbol you might see on trashcans at the airport:  . The redo button allows you redo an action that you just undid, or to repeat the last action. If Word cannot redo the last action, the button will be faded.
Find and Replace
Find and Replace also can be used to locate words or sections of your presentation you want to edit or format.
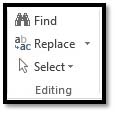
If you want to find a certain word or phrase within your presentation, instead of scrolling through it, you can go to the Home tab, then click Find on the far right in the Editing group.
Enter the word you want to find.
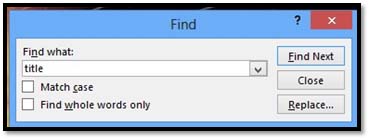
We've chosen "title."
Click Find Next to find the next occurrence.
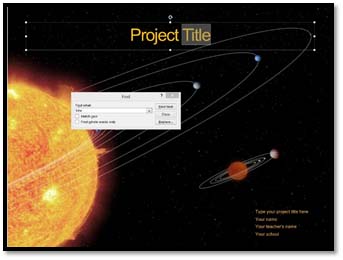
PowerPoint will then highlight the next occurrence of the word.
Click the Find Next button to find the next occurrence.
You can also replace words or parts of texts by using the Replace feature. To use this, click Replace (right under Find) under the Home tab on the Ribbon. You'll see two options: Replace and Replace Fonts.
Let's choose Replace. We'll talk about Replace Fonts in just a minute.
You'll then see this window:
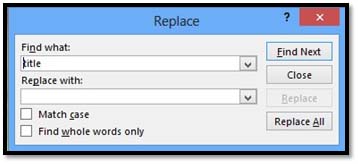
Next, type in the word or phrase you're looking for in the Find What box. This is the word or phrase you want to replace.
Now, type in the new word or phrase you want to insert into your presentation instead in the Replace With box.
When you're finished, click on Find Next to find the next instance of the words or phrase you want to replace, then click Replace.
The other option you see when you click the downward arrow beside the Replace button is Replace Fonts.
Let's select this option.
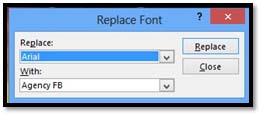
Now we can quickly and easily change a font in our presentation. Simply select the font you want to change, then choose the replacement font. Click the Replace button when you're finished.
Slide Sorter View and Rearranging Slides
You use Normal View most of the time to work with and edit your slides. However, Normal View doesn't give you the big picture of your presentation. You can only see one slide at a time � or thumbnails in the Slides Pane. If you need to see the overall view of your presentation, you use Slide Sorter View.
To go to Slide Sorter View, click the View tab on the Ribbon, then click on the Slide Sorter button in the Presentation Views group.
Slide Sorter View is shown below.
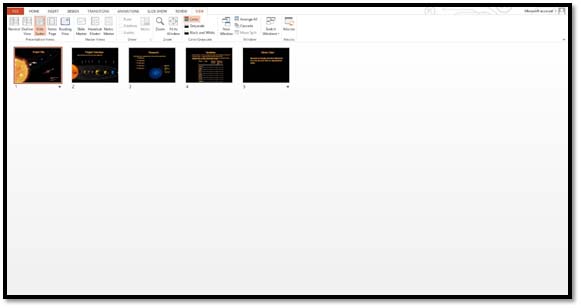
In Slide Sorter View, you can:
-
Move a slide by clicking and dragging it to a new location. Simply point to the slide, then hold the mouse button down. Drag it to its new location.
-
Delete a slide by clicking on the slide to select it, then pressing Delete on your keyboard.
-
Add a new slide by clicking on the slide that you want the new slide to come after, then clicking the New Slide button.


