Optimizing your files is the process of making sure your files are of the best quality while keeping the file size as small as possible. The larger a file is, the longer it will take to load on a computer or mobile device. It doesn't matter if the file is an image or an entire web page.
In this article, we are going to discuss optimization techniques for image files. We will discover how to:
-
Export image files and pages
-
Optimize image files
-
Using selective quality
-
Create a sprite sheet
-
Work with CSS in Fireworks
Image File Formats
Before we go any further in this article, let's take a minute to review image file formats to help you decide which you should use.
-
JPEG is the best format to use for images such as photographs because it has more colors. This is great for smaller images, such as images on a page that accompany text. However, because it is a higher quality format, it also means a larger file size.
-
GIF is the best format to use for graphics. It has 256 colors, which is more than enough for most graphics.
-
PNG is a combination of JPEG and GIF. You should use this for larger images on your site, such as headers, etc. When you export to PNG, you can choose between 32-bit, 24-bit, and 8-bit PNG output. An 8-bit PNG is a lot like a GIF, although does not support frame-based animation. However, it will provide a smaller file size.
About Saving and Exporting
Whenever you create an image file in Fireworks, you will have the choice of either saving or exporting the file. When you export a file, the bitmap image is flattened. This means there are no layers, vectors, or objects that can be edited. Plus, since you use the Optimize panel to export, you can control the quality.
On the other hand, saving (File>Save) your file means the file is saved in the original format. Since you can't reach the Optimize panel when you choose Save, you cannot change the default settings. However, if you use Save As (File>Save As), you can click the Options button in the Save As dialogue box to reach the Optimize panel settings.
The Optimize Panel
The Optimize panel is pictured below.
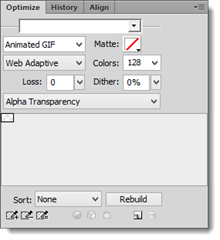
The Optimize panel lets you choose the format you want to use when you export a single image file, an image slice, or a group of slices. Since each slice in a design can have different optimization settings, you get control over the size of the web page. If an image or part of a web page doesn't have any slices, you can only use one optimization setting. When you choose the format for your image file in the Optimize panel, you will see the options for that image format.
Single-Image Files and the Optimize Panel
If you use Fireworks CS6 to design a web page, you will probably end up with several image files. For the time being, however, we are going to talk about optimizing a single image file that you have either opened or created in Fireworks CS6.
We are going to use the image below.
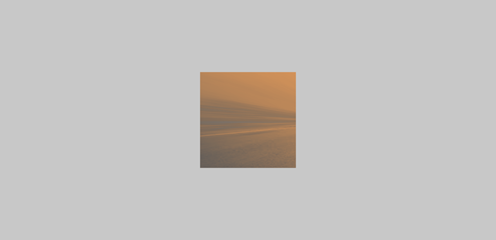
Go to the Optimize panel. Press CTRL+1 to zoom in on the image.
Now, take a look at the document window. In the upper left corner, you will see Original, Preview, 2-Up, and 4-Up. Preview, 2-Up, and 4-Up will allow you to view your image in different formats as we start to optimize it.
Let's click the Preview button.
Go to the Optimize panel and select a format. We've chosen GIF Adaptive 256, as shown below.
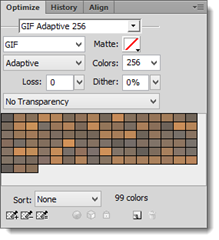
Let's take a look at the document area again. We can see our image as it appears with this format. We can even go to View>Zoom In to get a better look at the quality.
In the bottom left corner of the document area, we can see the file size, followed by the download time. Just so you know, 56kbps would represent the download speed of someone with a very slow dial-up connection.

Now, go back to the Optimize panel. Select a different file format. Notice the change in quality, as well as the change in file size and download speed.
Next, select 2-Up in the document area.
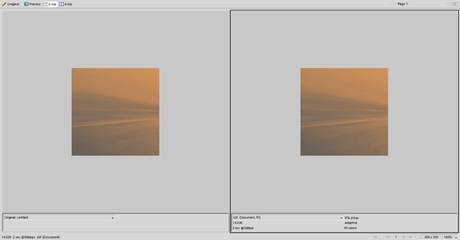
This shows you the difference in quality between the original (on the left) and your image with the selected file format (on the right).
Use the Pointer tool and click on the image on the right. The right pane will appear with a border around it, which means it's active.
NOTE : If you hold down the spacebar, your cursor will change to a hand, and you can pan the image.
Go back to the Optimize panel.
To balance quality with a favorable file size:
-
For GIF files, you can change the number of colors in the Color dropdown menu.
Interested in learning more? Why not take an online Adobe Fireworks course?
-
For JPEG files, you can increase or reduce the quality.
-
For PNG files, you can change the bit.
Take the time to experiment with and adjust the different formats and settings in the Optimize panel. If you're an experienced graphic designer, web designer, or even digital photographer, this will probably be easy for you. If you are not, take the time to experiment and learn. Remember, lower compression equals higher quality.
Below are some common terms you will see for different formats in the Optimize panel, along with their definition.
Color Palette Terms
-
Adaptive : Derived from colors in the document. Highest quality.
-
Web Adaptive : Colors converted to websafe colors. These colors come from the Web 216 palette.
-
Web 216 : The 216 colors that are common to Windows and Mac. Using these colors usually means a consistent result regardless of the browser or platform.
-
Exact : The exact colors used in the image as long as the image doesn't have more than 256 colors. If it has more, it will switch to Adaptive.
-
Windows and Mac OS : Contains the 256 colors used by Windows or Mac.
-
Greyscale : 256 or less shades of grey. The image will be greyscale.
-
Black and White : Two colors, which are black and white.
-
Custom : A modified palette or loaded from an ACT or GIF file.
Other Terms
Matte : Indicates a fill color for transparent pixels in the original image.
Dither : Alternates similarly colored pixels to approximate colors not in the color palette.
Loss : The amount of data from an image that you throw away to reduce the file size. Usually, 5% to 20% are safe values.
Smoothing : Helps with compression. If you set the smoothing to a non-zero value, it will smooth out the image a bit and reduce fuzziness from compression.
Index Transparency : Each color in the color table is given a tranparency value of either 0 or 1. Zero is transparent. One is opaque. There's nothing in between. The color is either displayed or it's not. For this reason, an indexed tranparency can't show high quality drop shadows or glow effects.
Alpha Transparency : Each color has an alpha channel value that decides how transparent it is. The value can run from zero THROUGH one. Provides better quality for gradients, drop shadows, and glow effects.
About Selective Quality
Selective quality lets you create a JPEG mask to apply higher quality settings to areas of an image where you want more color definition.
To learn about selective quality, go back to the Original view.
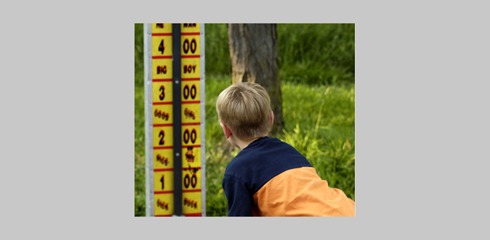
Click on the Lasso tool, then go to the Properties panel.
If you want, adjust the Edge and Feather.
Next, use the lasso to draw a selection around the area of the image that you want to be higher quality.
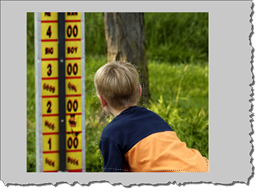
Next, go to Modify>Selective JPEG>Save Selection as JPEG Mask.
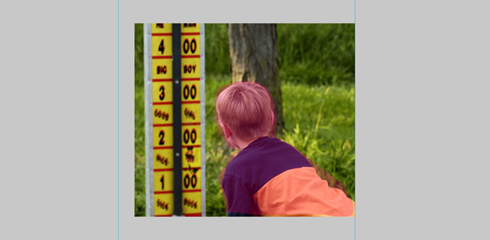
The area becomes pink. This is the JPEG mask.
Now, go to 2-Up View. Select the right pane by clicking on it.
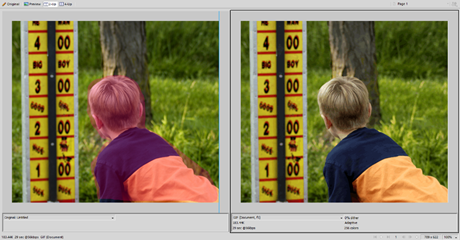
You will see the mask in Original view, but not in Preview (on the right).
Go to the Optimize panel. Choose JPEG from the Export File Format List.
Adjust Quality and Selective Quality.
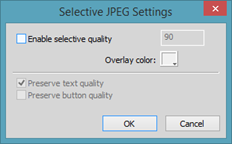
If you can't adjust Selective Quality, click the icon to the right of it to display the Selective JPEG settings dialogue box. Put a checkmark beside "Enable Selective Quality," then click OK.
Exporting an Image File
To export an image file, go to File>Export.
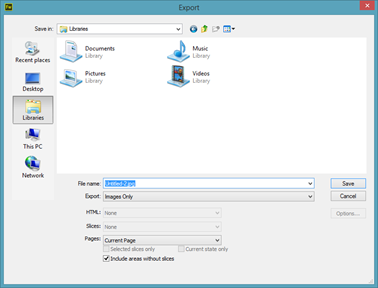
Make sure Images Only is the selection in the Export field.
Enter a name for your file in the File Name field, then click the Save button.
Exporting a Single Page as HTML
When you want to export a web page design, you can export as HTML And Images or CSS and Images.
When you choose to export as HTML and Images, you will create a table-based HTML layout. However, CSS is more commonly used today � and more flexible. You will find that it will be hard to edit your page in Dreamweaver because the table struture may break.
To export as HTML and Images, to to File>Export.
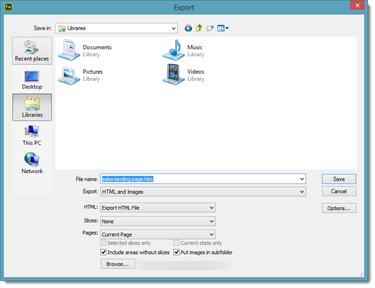
Select the following options:
-
Set the Export Field to HTML and Images.
-
Set the HTML field to Export HTML file.
-
Set the Slices field to Export Slices.
-
Put checkmarks beside Include Areas Without Slices, Current Page, and Put Images in Subfolder.
Customize any other settings you need, then click the Save button.
Creating a Sprite Sheet
A sprite sheet is simply a bitmap file that can store small graphics, including buttons, bullet graphics, and logos. With Fireworks CS6, you can also export sliced graphics as a sprite sheet.
To create a sprite sheet, you can go to File>Export, and choose CSS Sprites option in the Export field. You can also right click on a slice and choose Export CSS Sprites.
In the example below, we are choosing to export our CSS sprites.
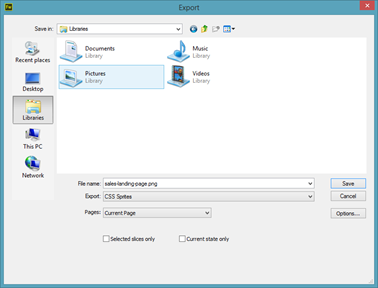
Click the Save button.
About CSS in Fireworks CS6
We are not going to spend too much time on CSS in this article, because CSS is a huge topic all on its own. However, we do want to give you a few basic tips if you want to export to CSS and Images.
-
Keep everything as simple as you can in terms of design and slices. If you want to export to CSS and Images, try to avoid overlapping slices. If you overlap slices, Fireworks will export an absolute positioned layout.
-
Also, keep in mind that only rectangles, text, and image slices are exported. Any images you want exported must be sliced. If you want text to remain as HTML, it should not be sliced.
-
Use rectangles to create CSS containers.
The CSS Properties Panel
Fireworks used to export every visual element as a bitmap. However, exporting so many bitmaps into a file can create large file sizes and swallow up a lot of bandwidth. That's not the case anymore though. By using the CSS Properties panel, you can extract the CSS properties of objects, properties such as drop shadows, transform, and etc.
The CSS Properties panel is shown below.
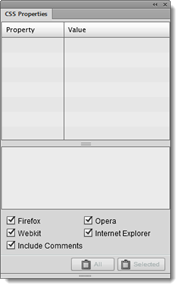
The top part of the panel will list the attributes of a shape or text that can be turned into CSS. The bot part shows the declarations as they will be written.
Below is the CSS Properties panel when we click on our Footer Area layer.
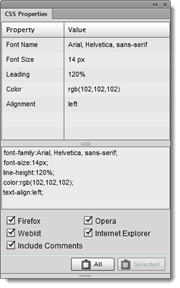
Click the All button. Fireworks will copy everything to the clipboard.
To create a CSS rule, you will need Dreamweaver where you can paste the rules from the clipboard as a new CSS Rule Definition.
It's important to remember that Fireworks is a prototype and design tool; whereas, Dreamweaver is a web editing tool. The CSS Properties panel is meant for those who want to use Fireworks in conjunction with Dreamweaver.


